So I thought I had posted pictures of Valkyr’s hard dodger long ago but it seems that I didn’t. These are not the best formated pictures but should help to give an idea of what I did.
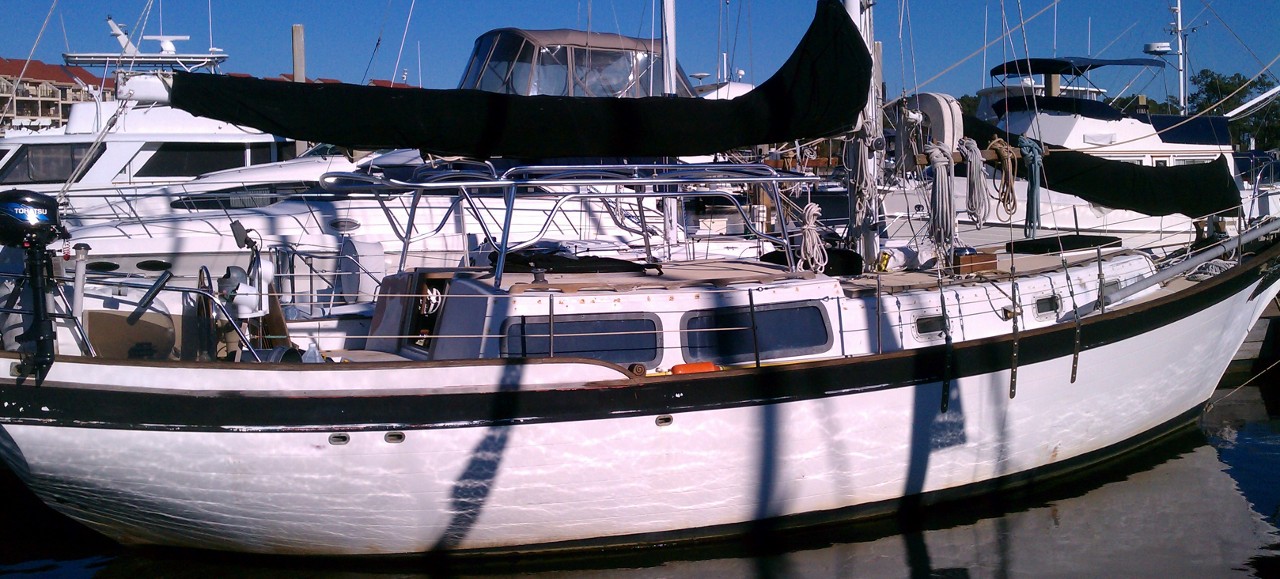
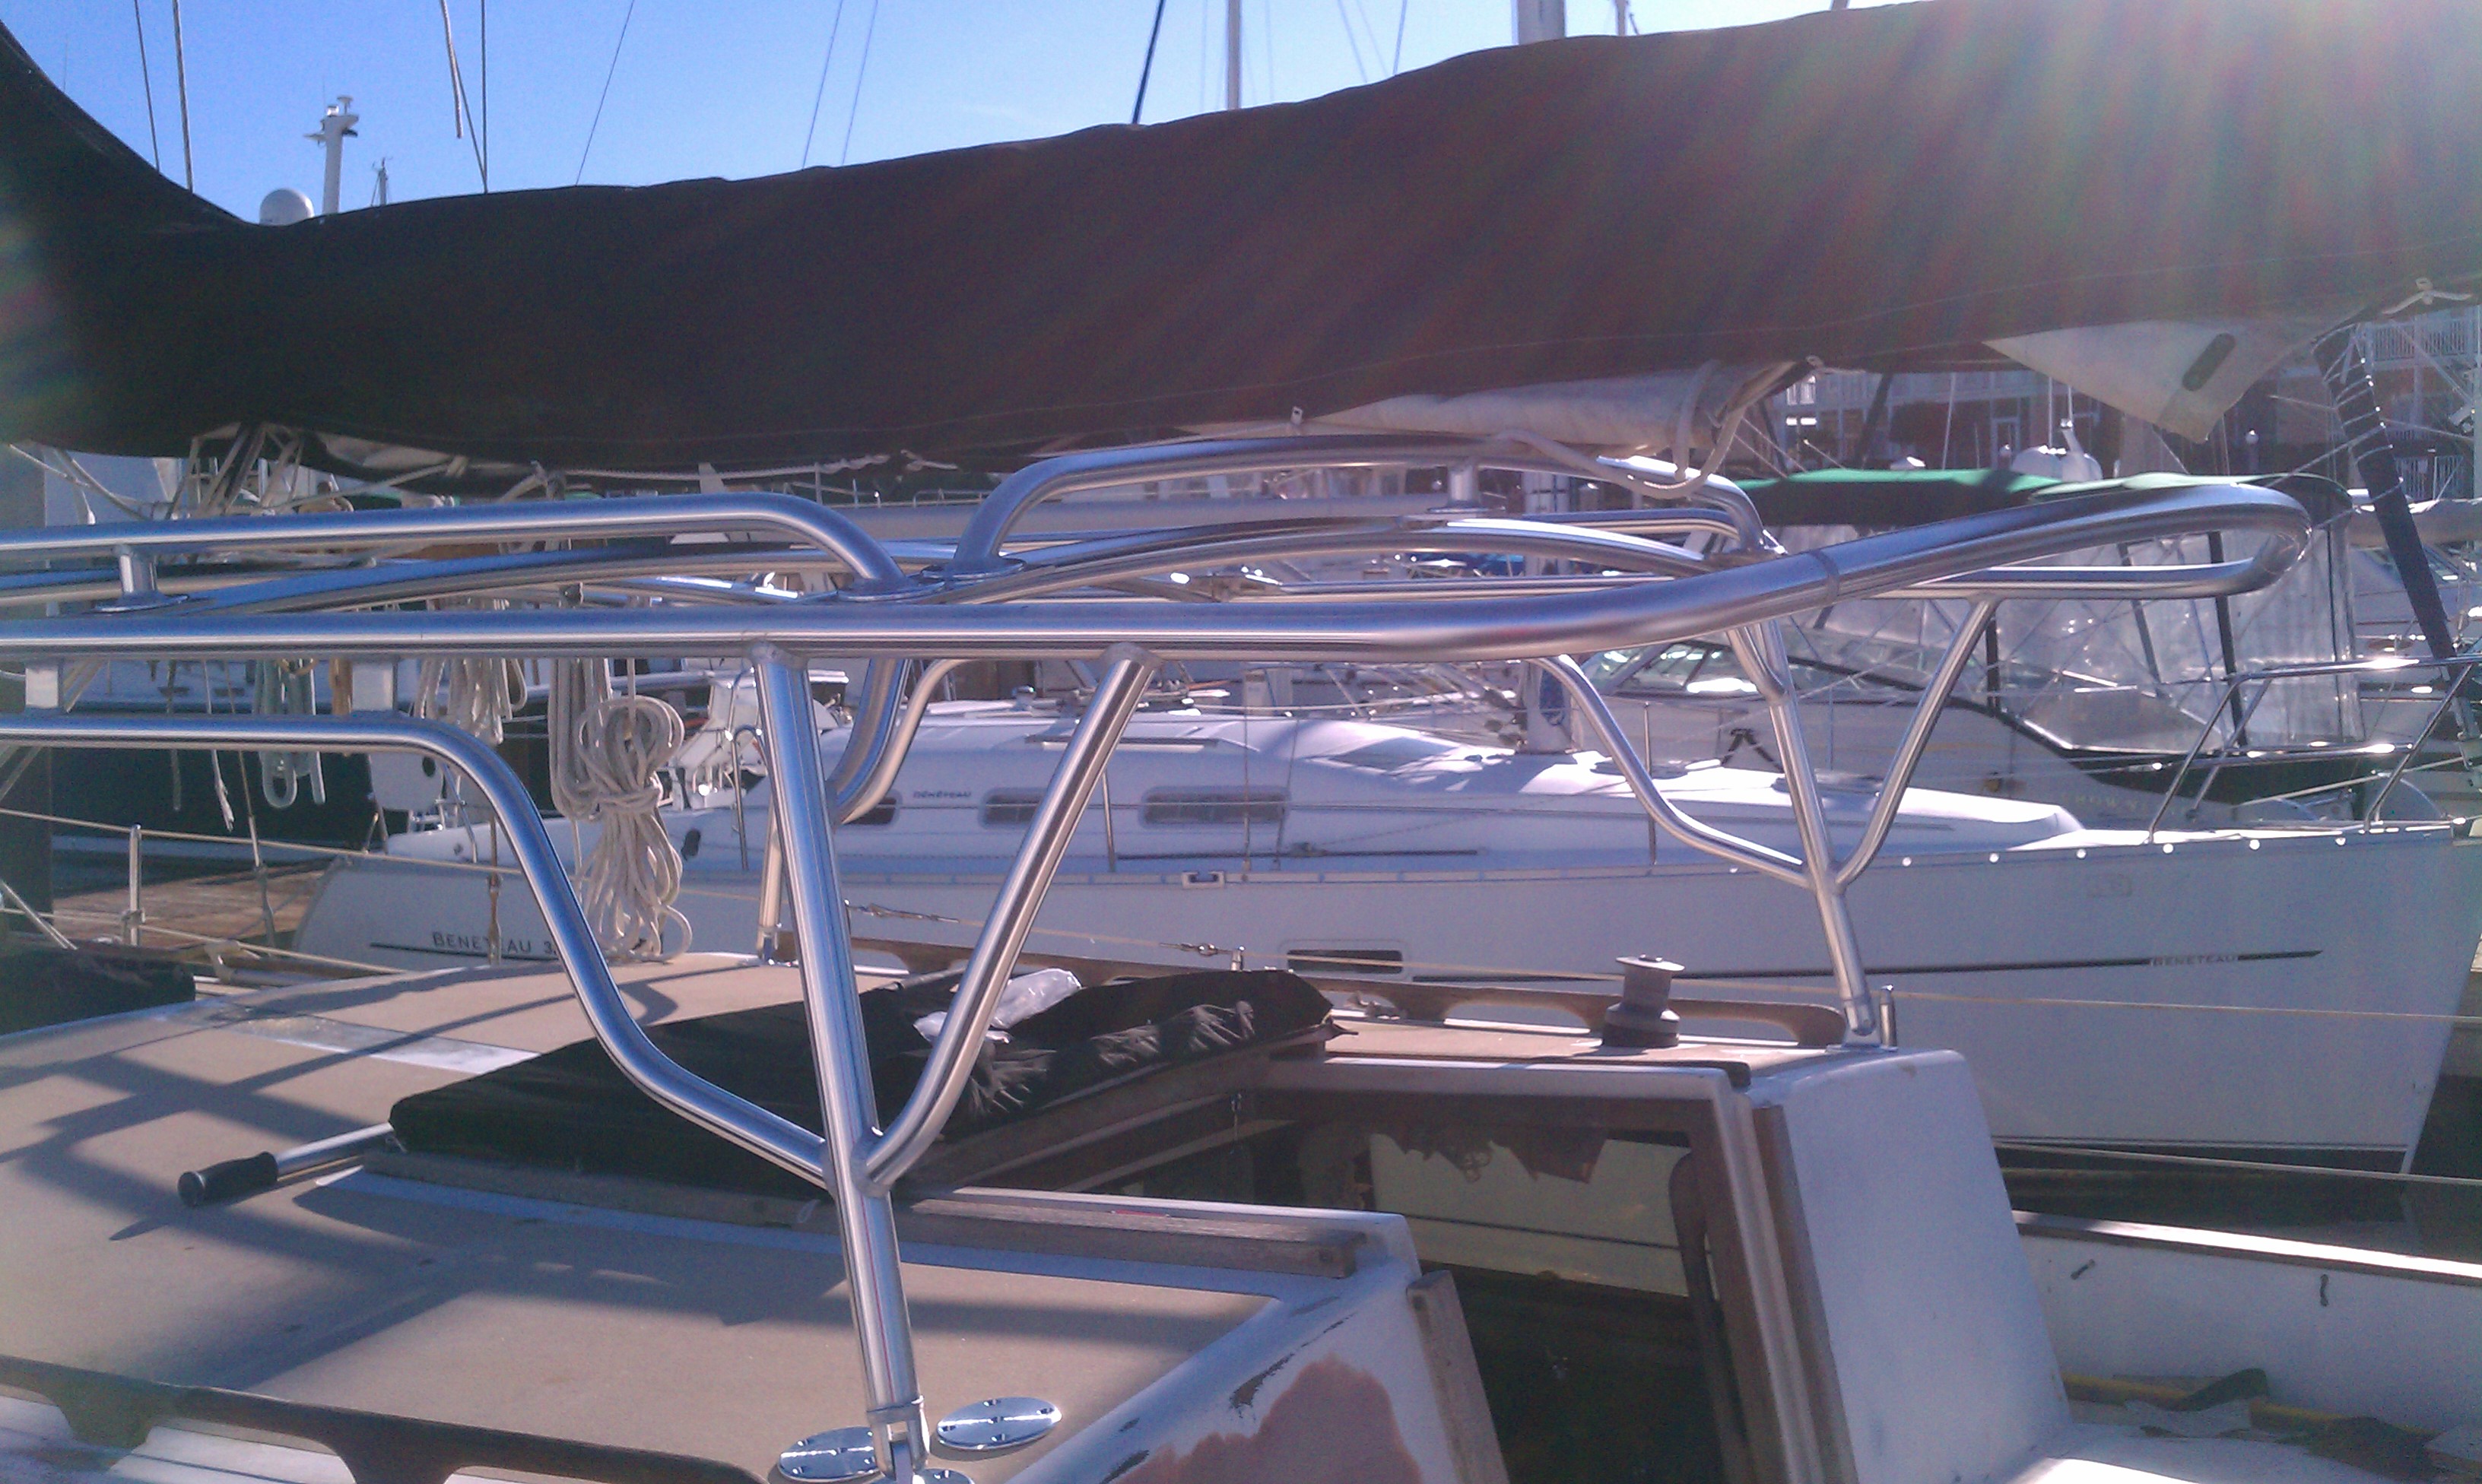
Starboard view of whole dodger frame

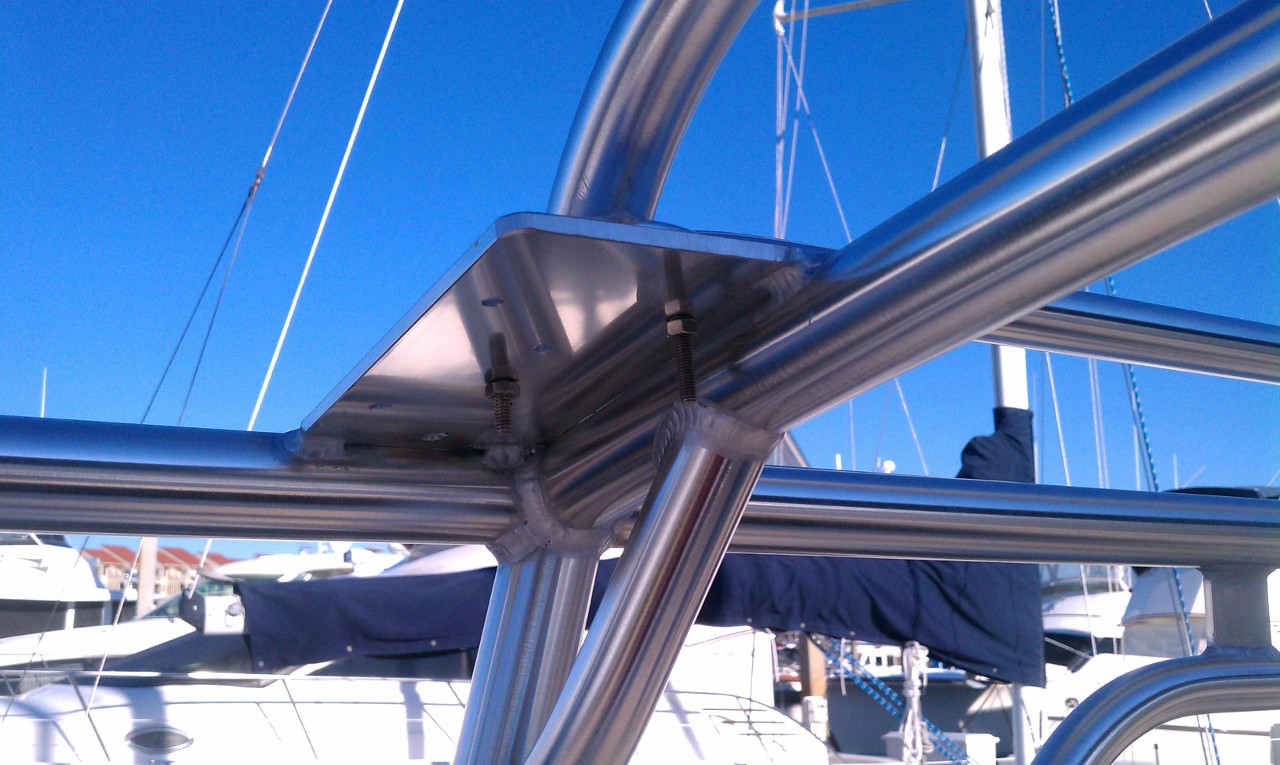
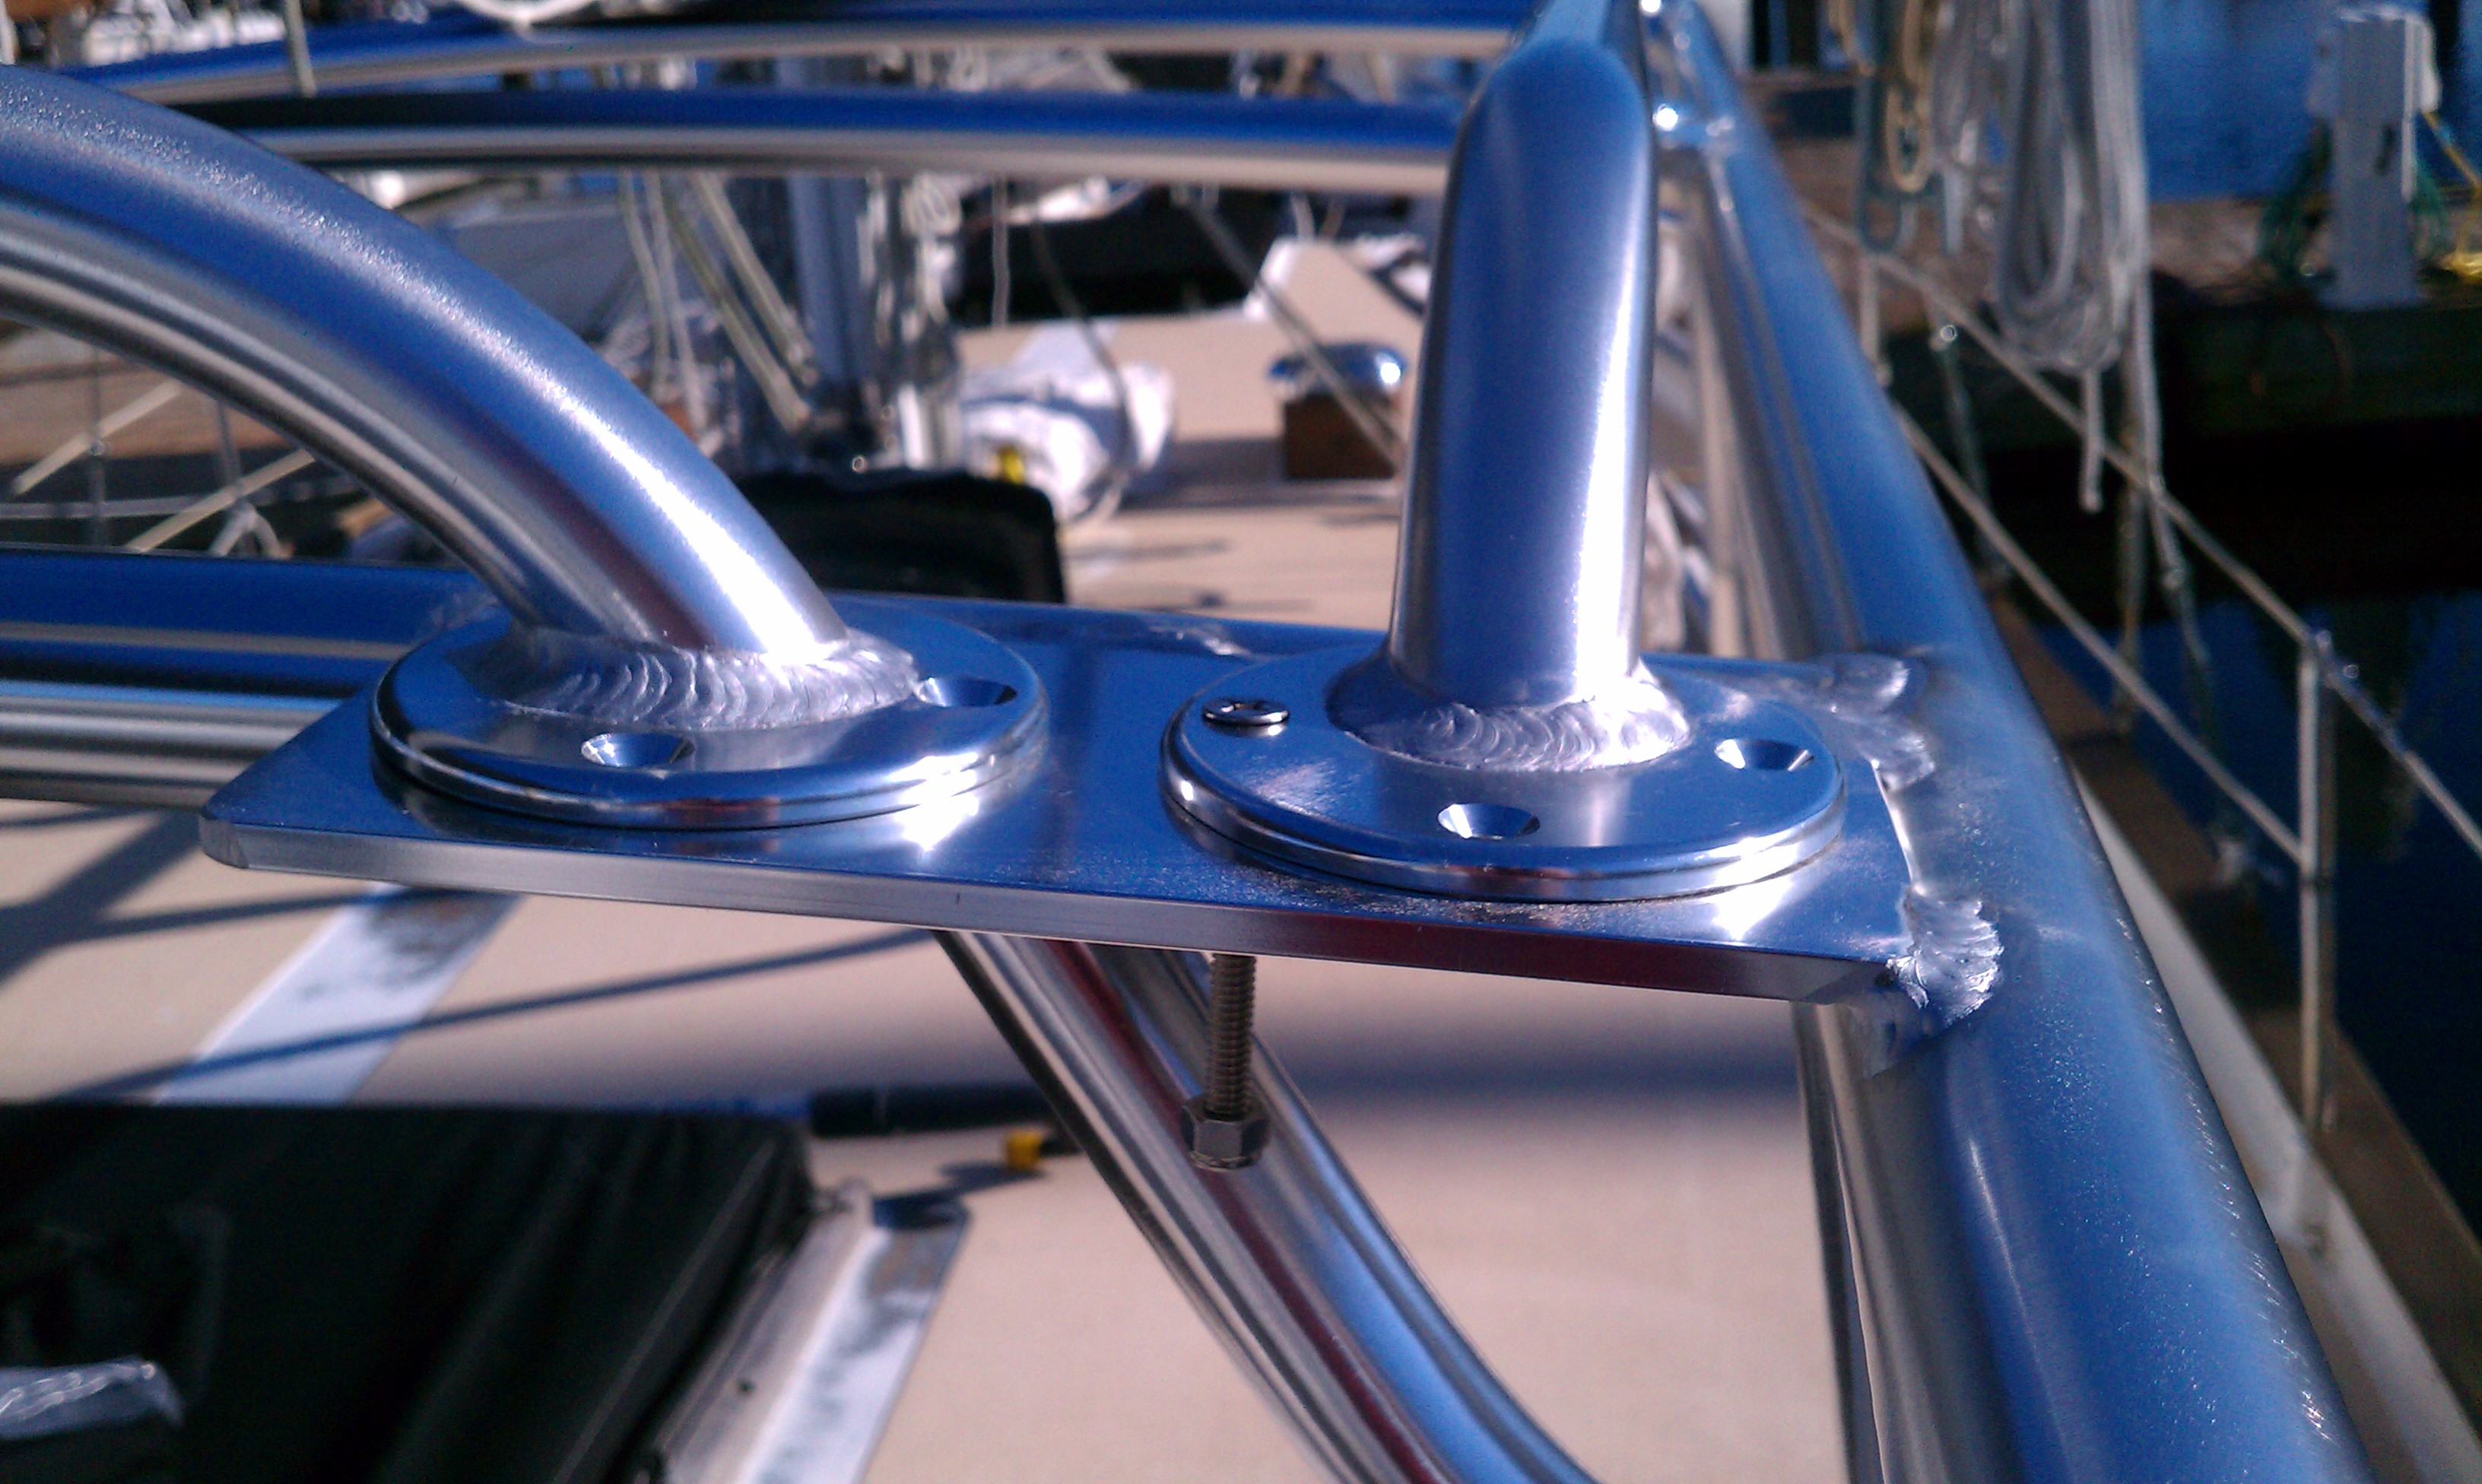
We had 1/4 inch aluminum plates welded into frame to bolt the top rails onto. In finished dodger this is what actually holds it to dodger. There are 6 of them.
Aft partial view of dodger frame
We drilled the holes to mount frame to boat and then filled with epoxy and drilled again to make sure we would never have an issue with water penetration into the core.
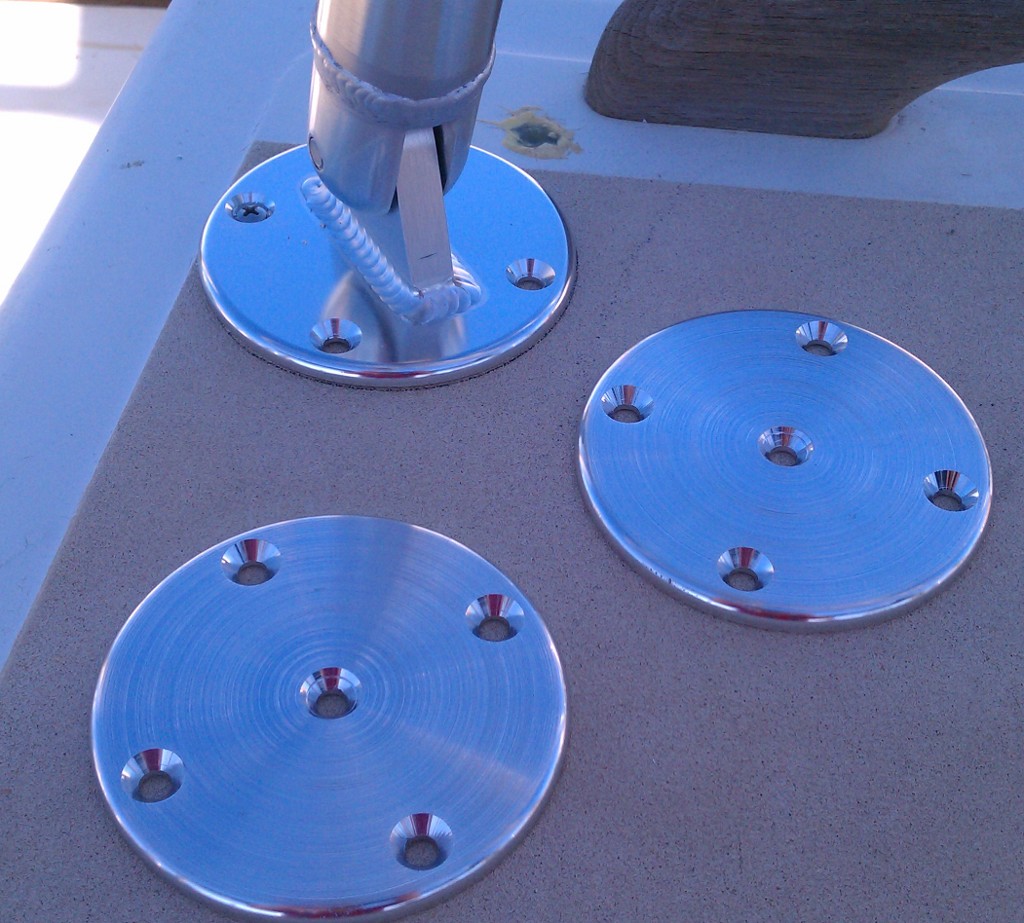
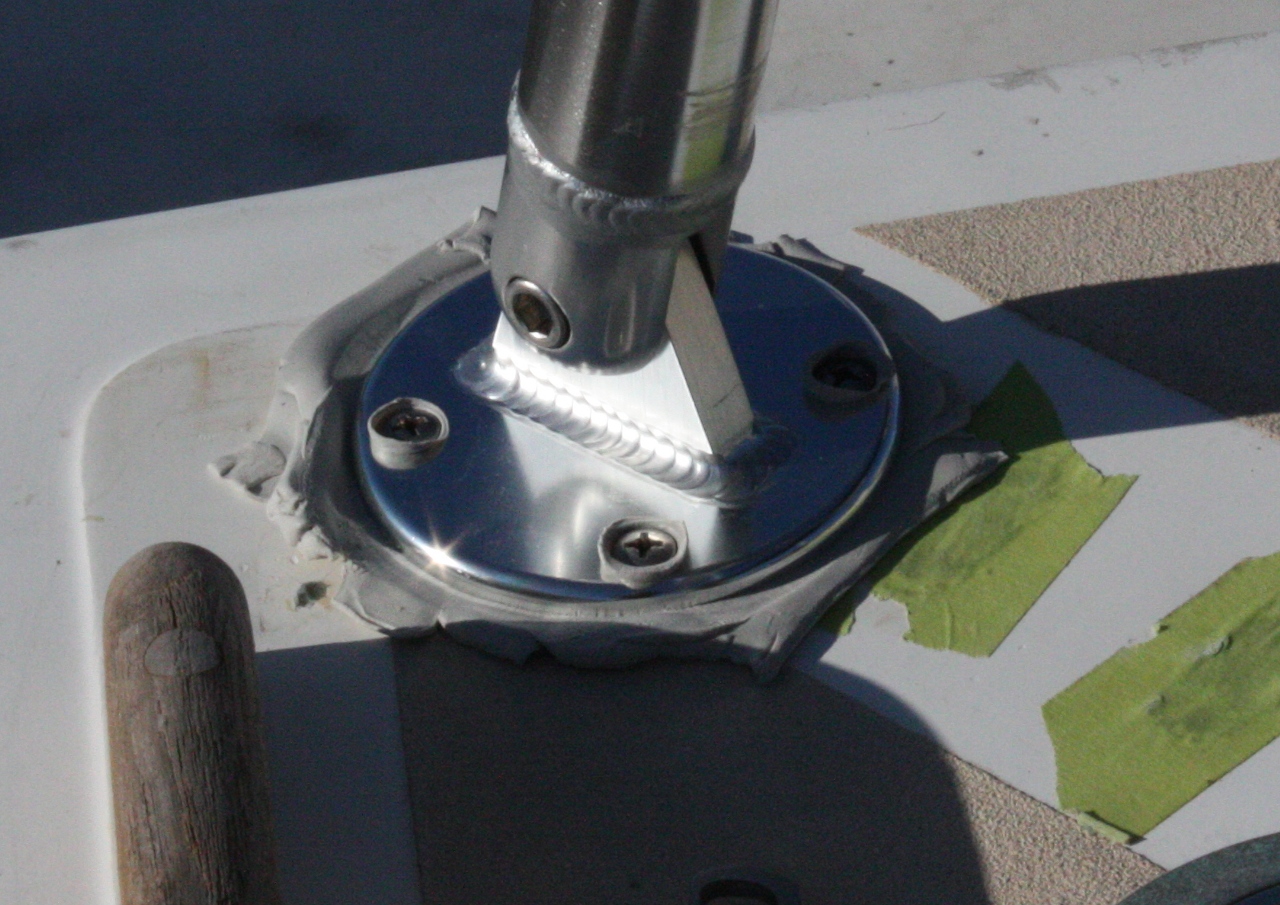
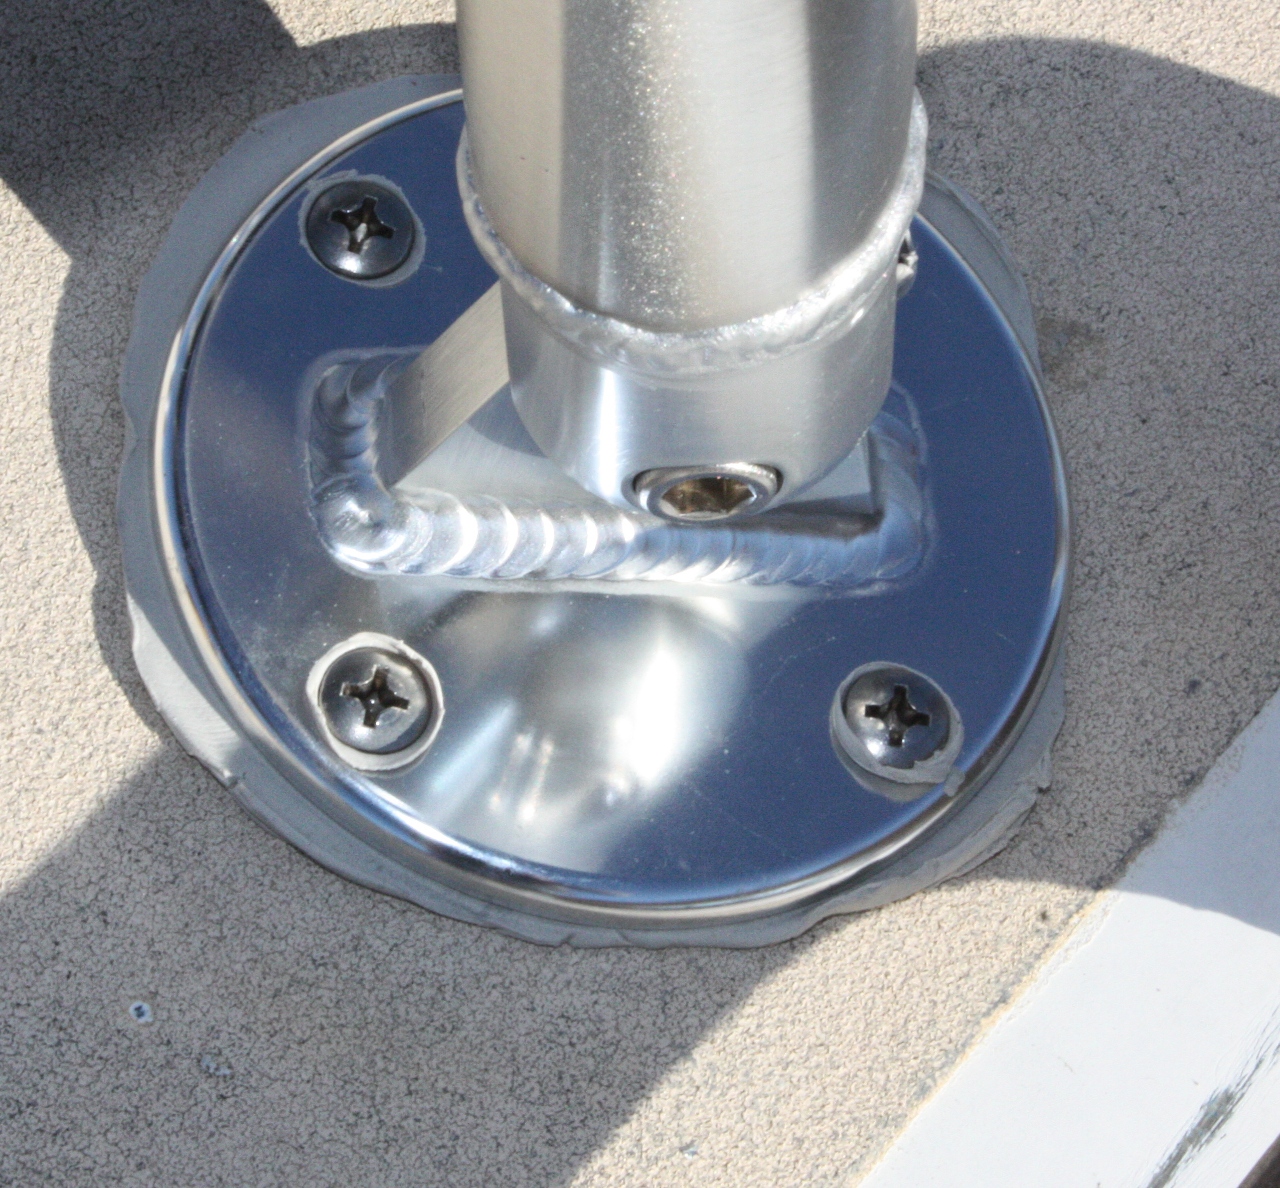
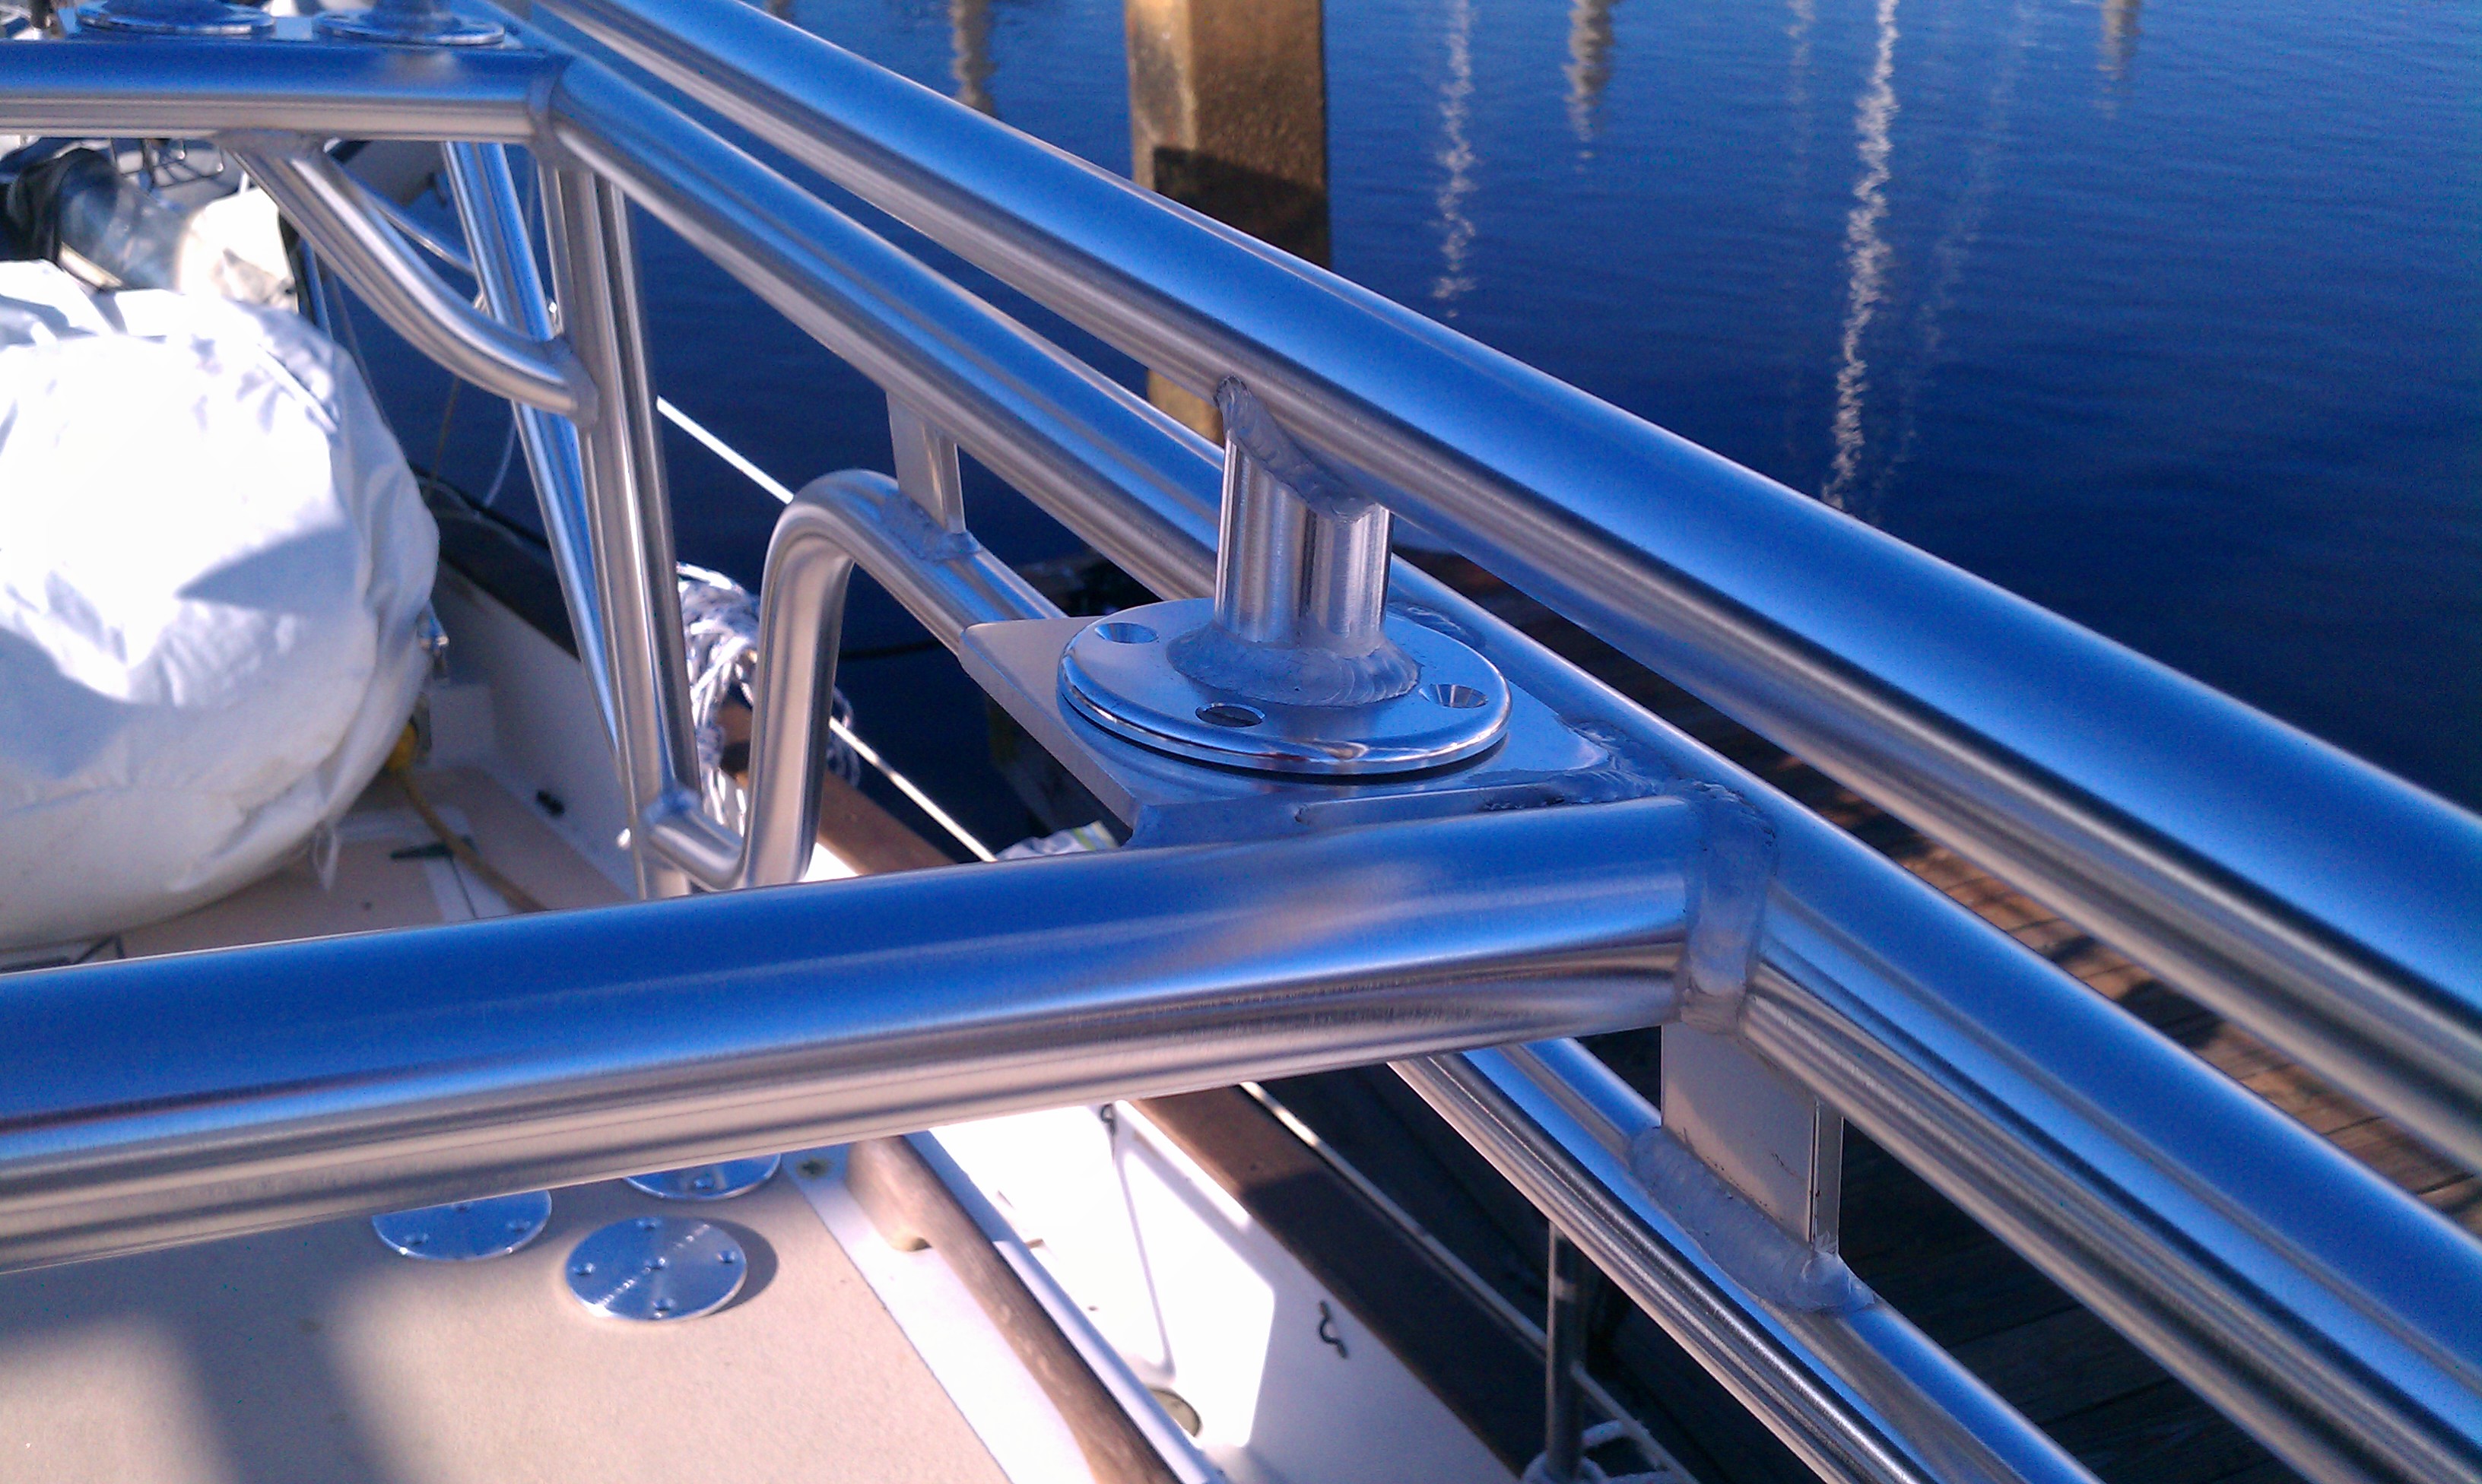
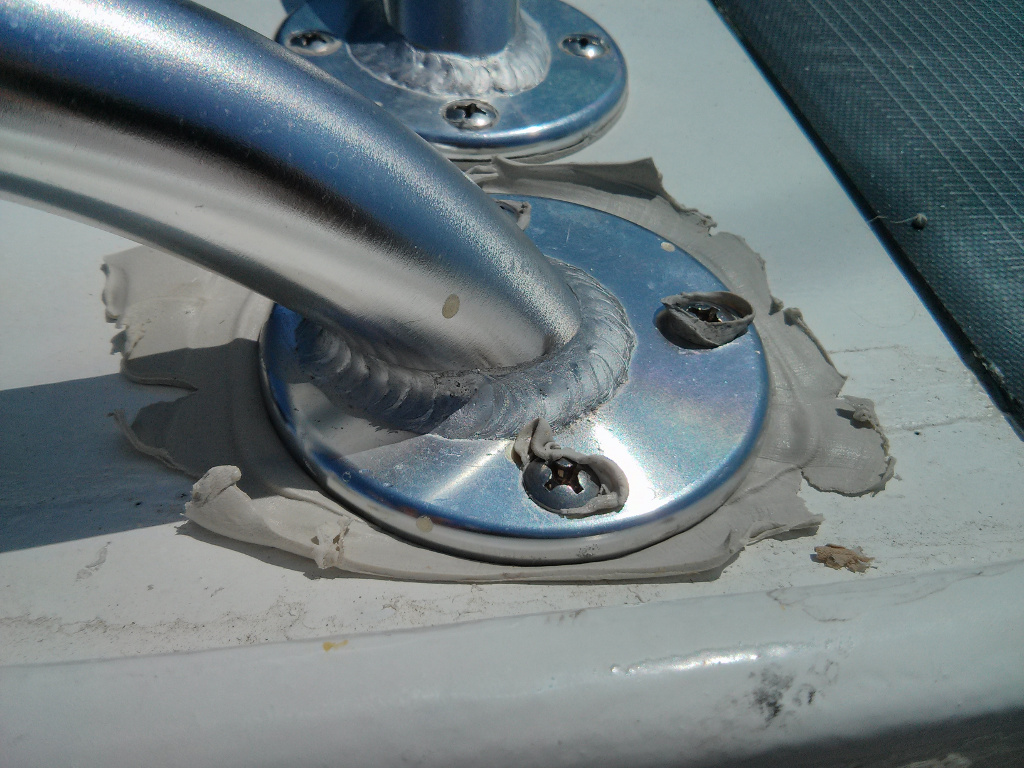
This is picture of the above deck mount and two of the backing plates for under the deck. As you can see the deck mount has a pivoting base. The reason we went with this is that once mounted we could unbolt the entire dodger with four bolts, and have no risk of water ingress while it is off the boat. also 4 bolts vs 16 bolts is a lot quicker and easier.
Underside of one of backing plates for top rails.
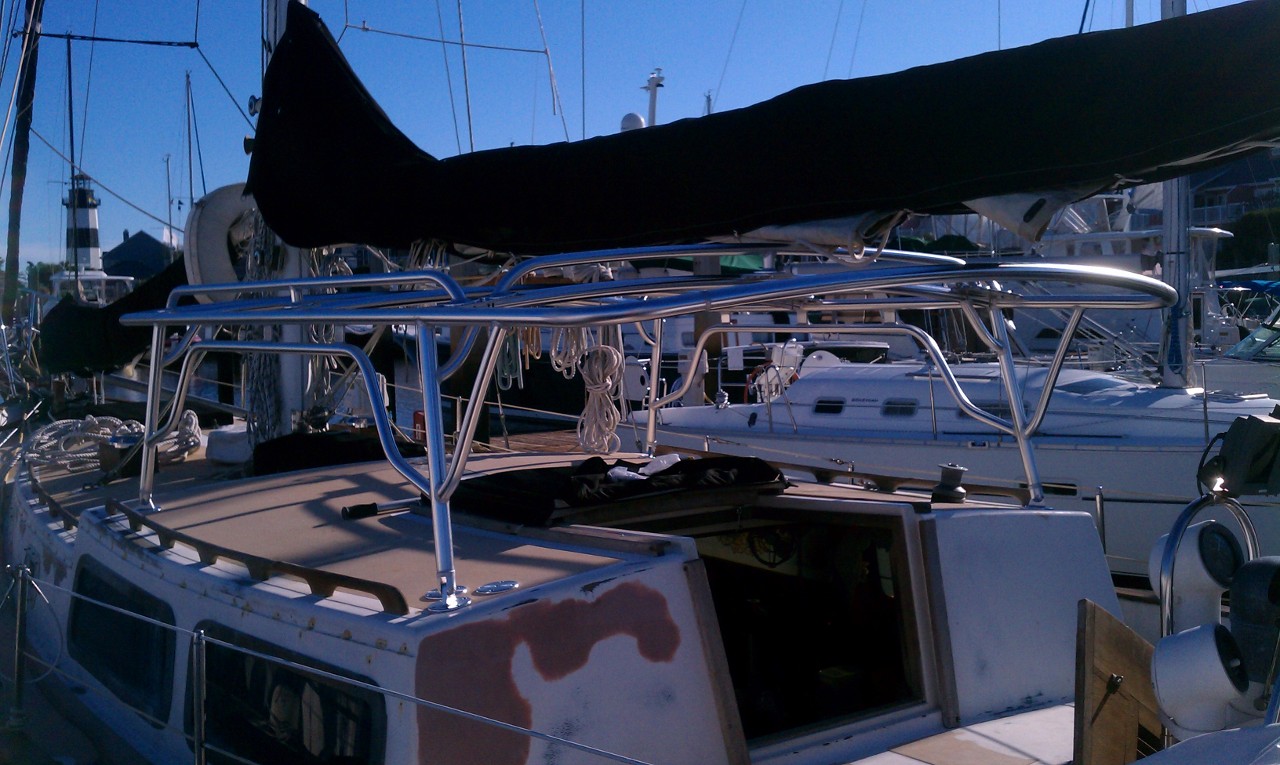
aft portside view of entire dodger frame
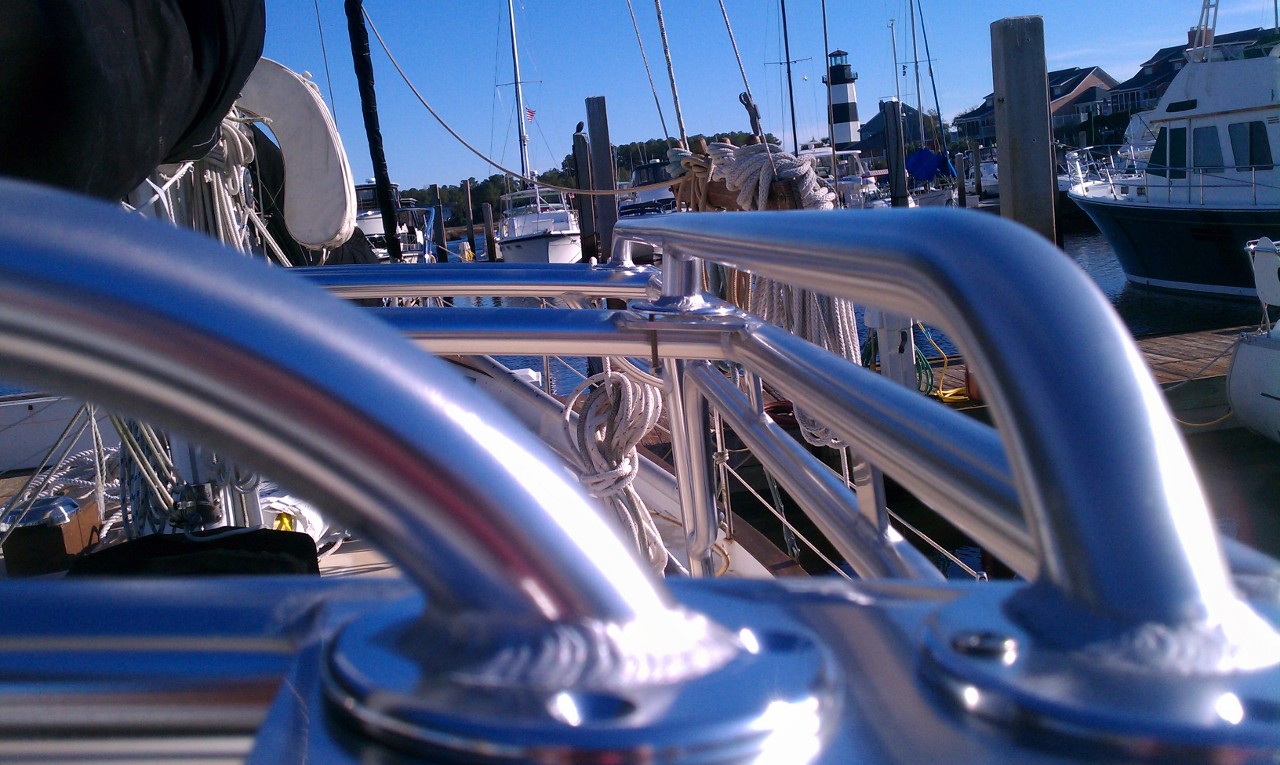
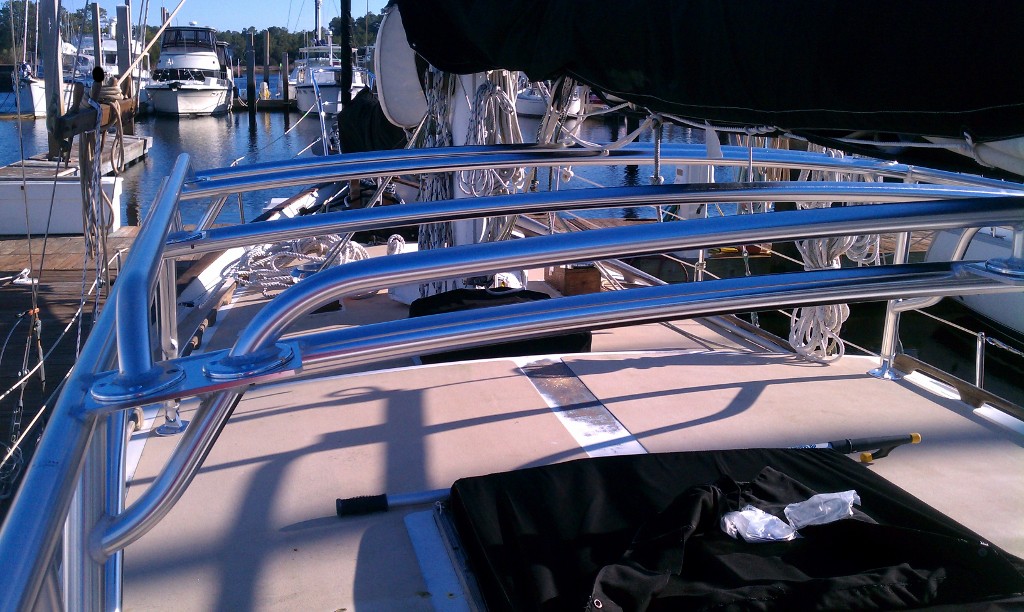
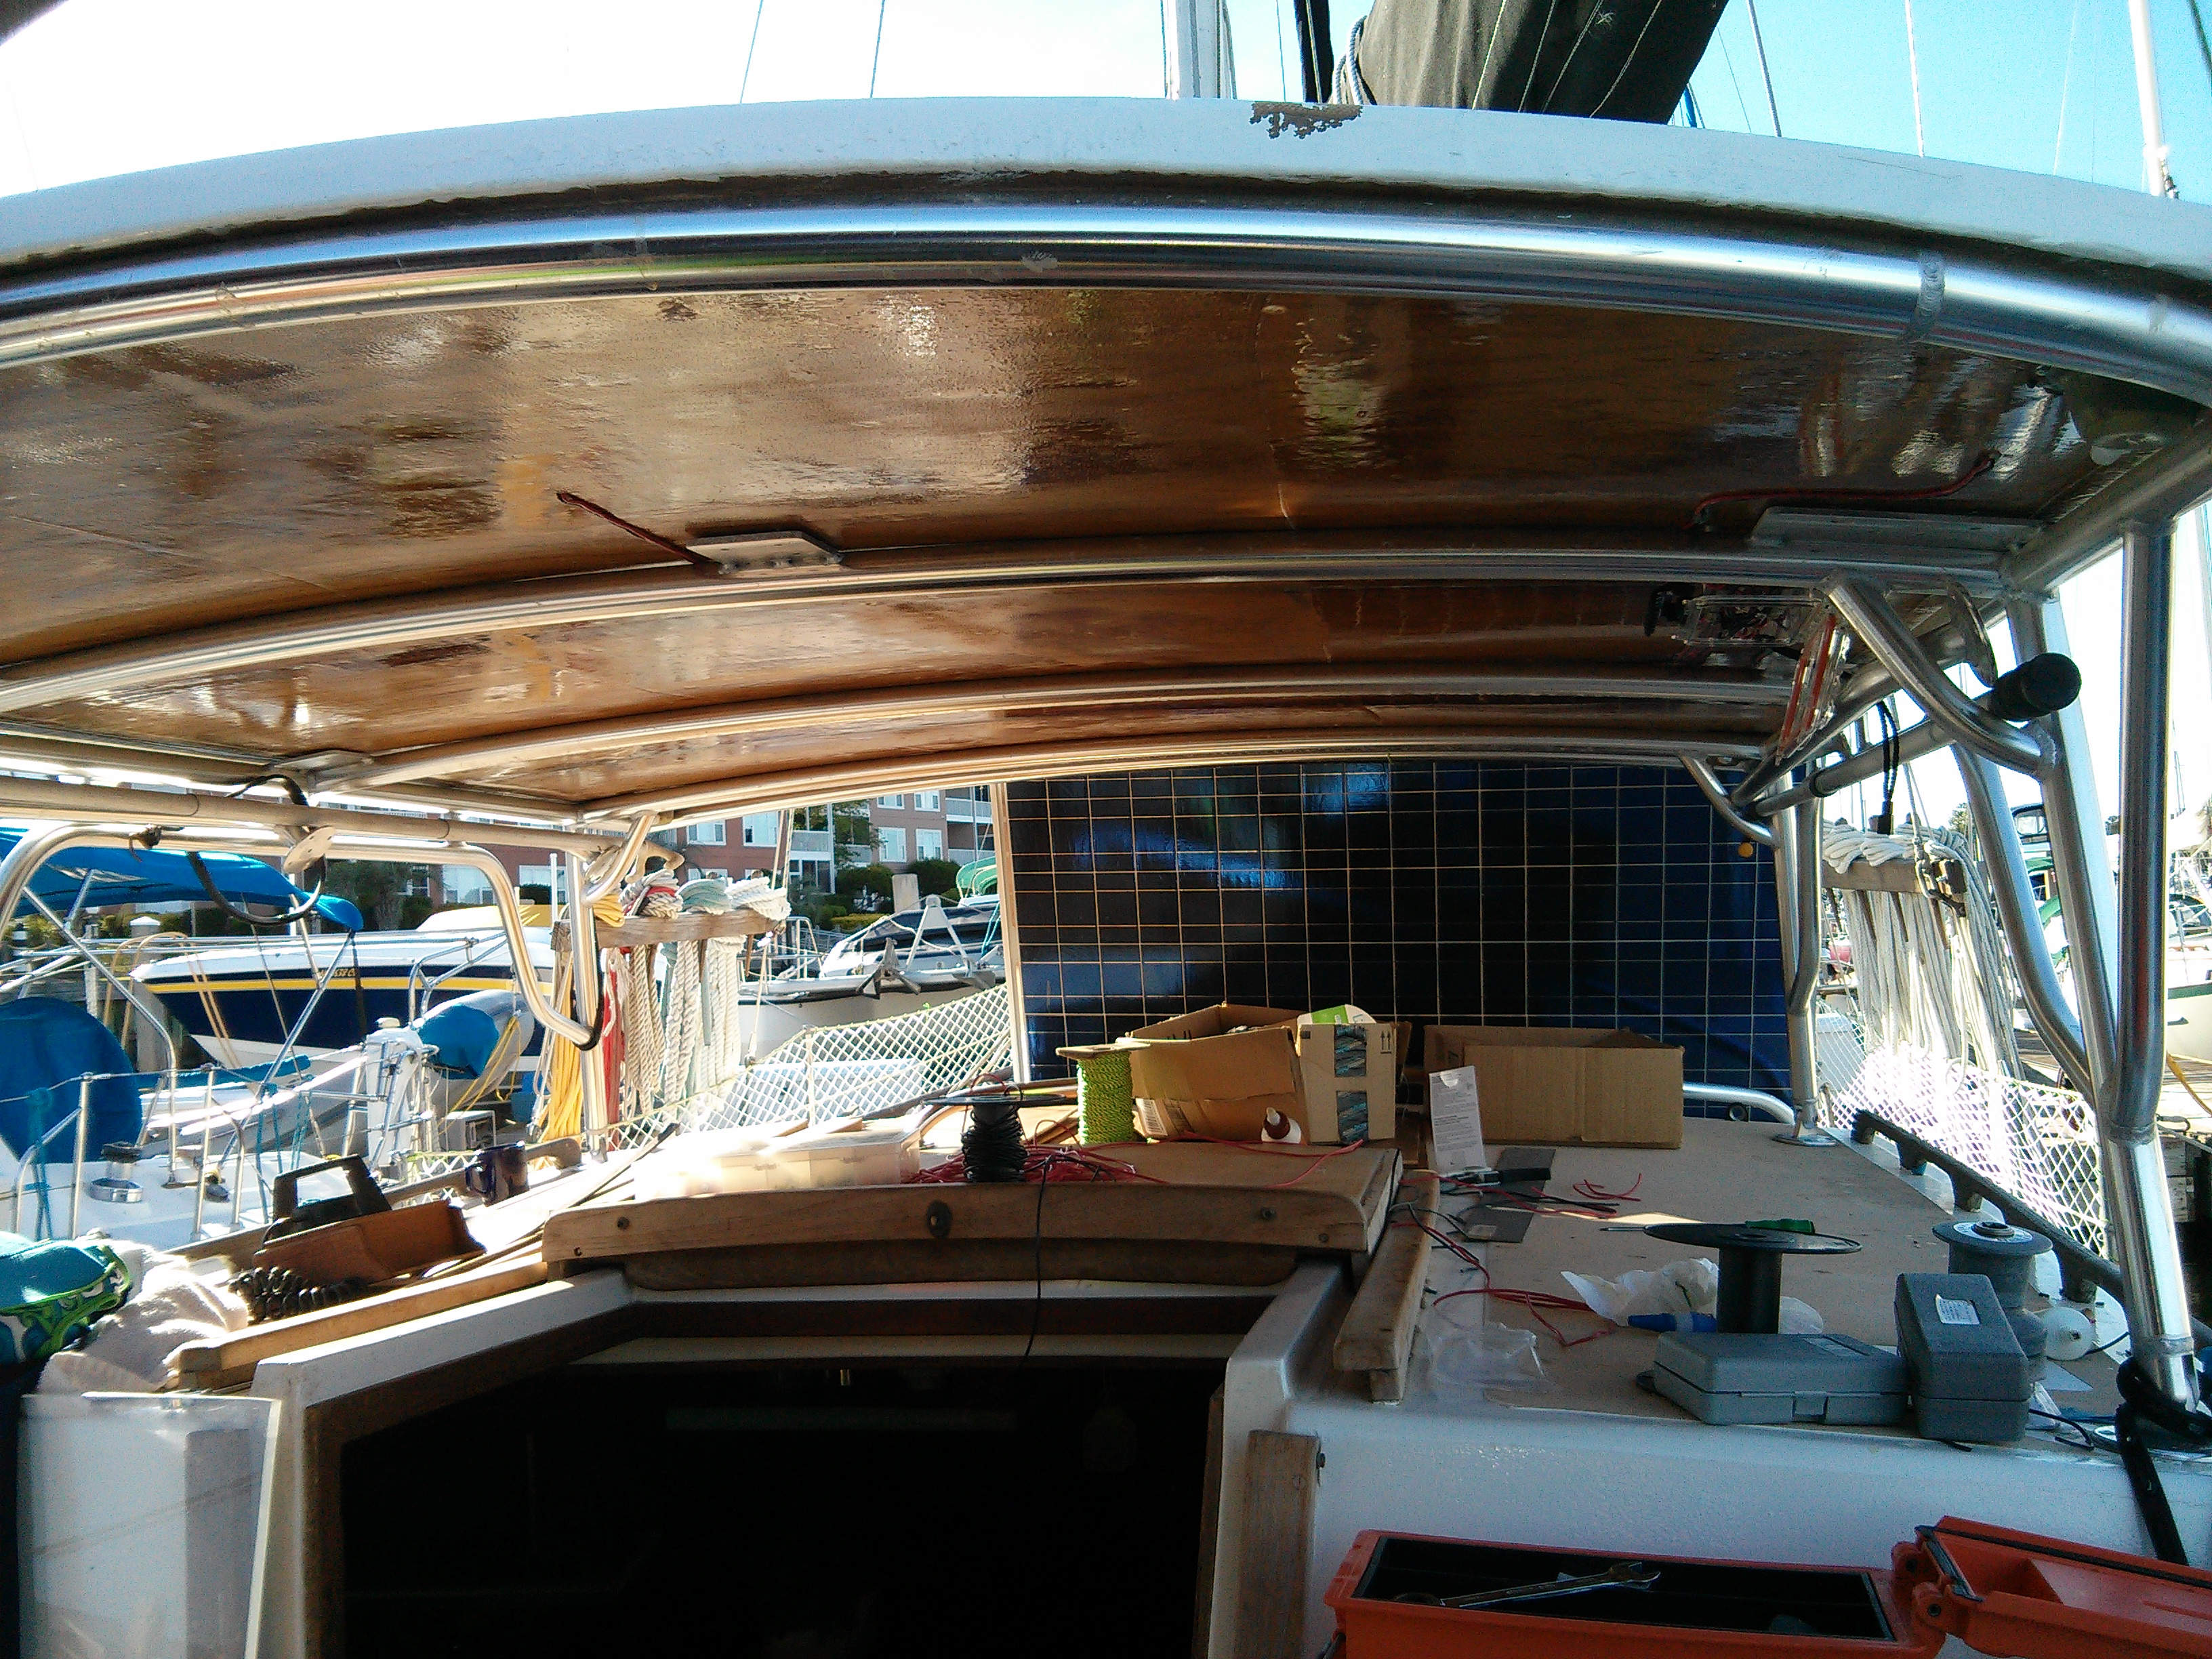
starboard view down top of frame. You can see the next attachment point at the center of the handrail and then forward attachment point. Dodger has 3 rails, hand rails on either side that are full length of dodger and atached with 12 1/4 inch stainless bolts. I’m almost 200 lbs and can yank on a rail as hard as I can and it barely shivers the dodger. More rocks the boat the the dodger. The third rail is what you can see in the left foreground of the picture and is simply to keep the boom from hitting the dodger if it falls and for tieing it down if you need to.

We spent a lot of time making drawings and sitting on the boat taking measurements to get the height of the dodger correct. This is the view sitting at the helm. You have clear unobstructed view under and if you stand up you can see over it. We also did a lot of different version of the side supports to finally end up with the graceful design we got. The curves added strength and elegance yet still left us with a lot of unobstructed view forward under the dodger. The top of the dodger has the same camber as the deck under it.
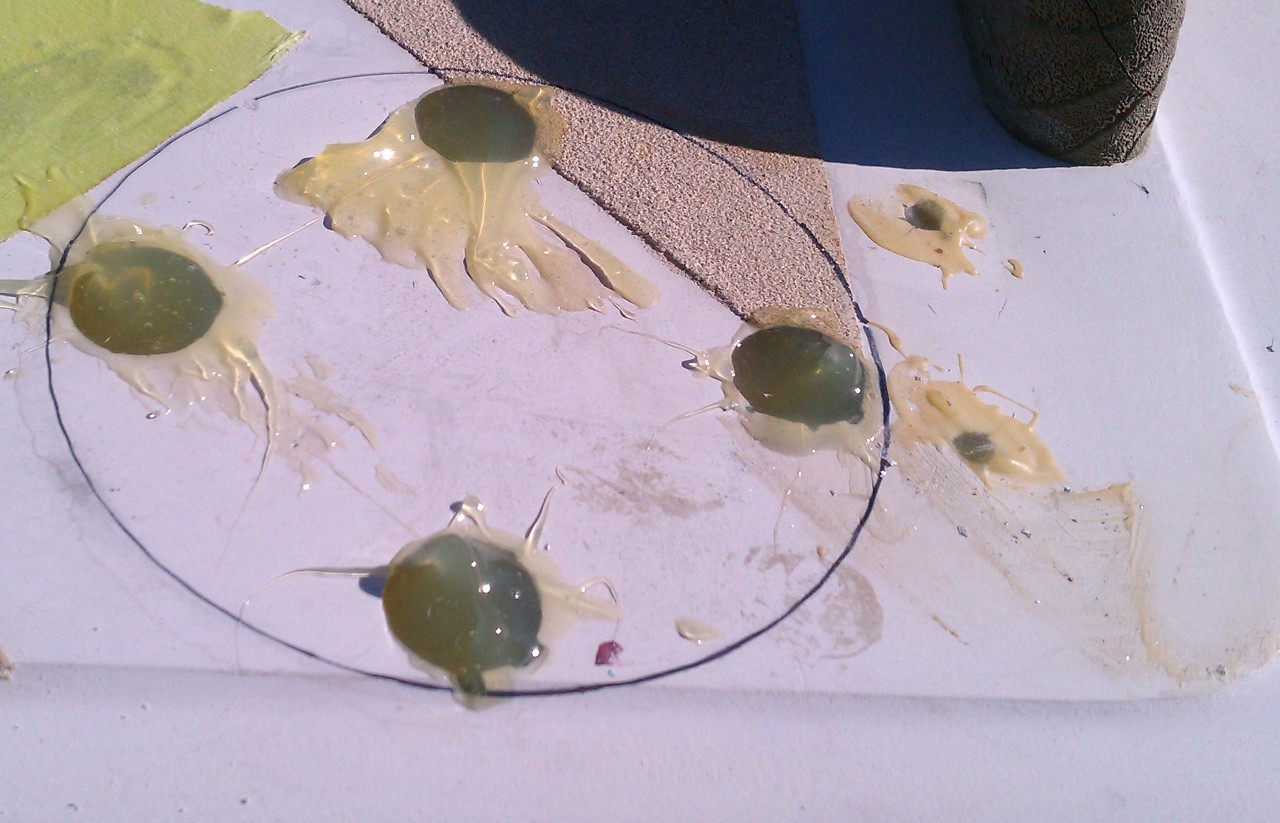
dodger bolted down with sealant.
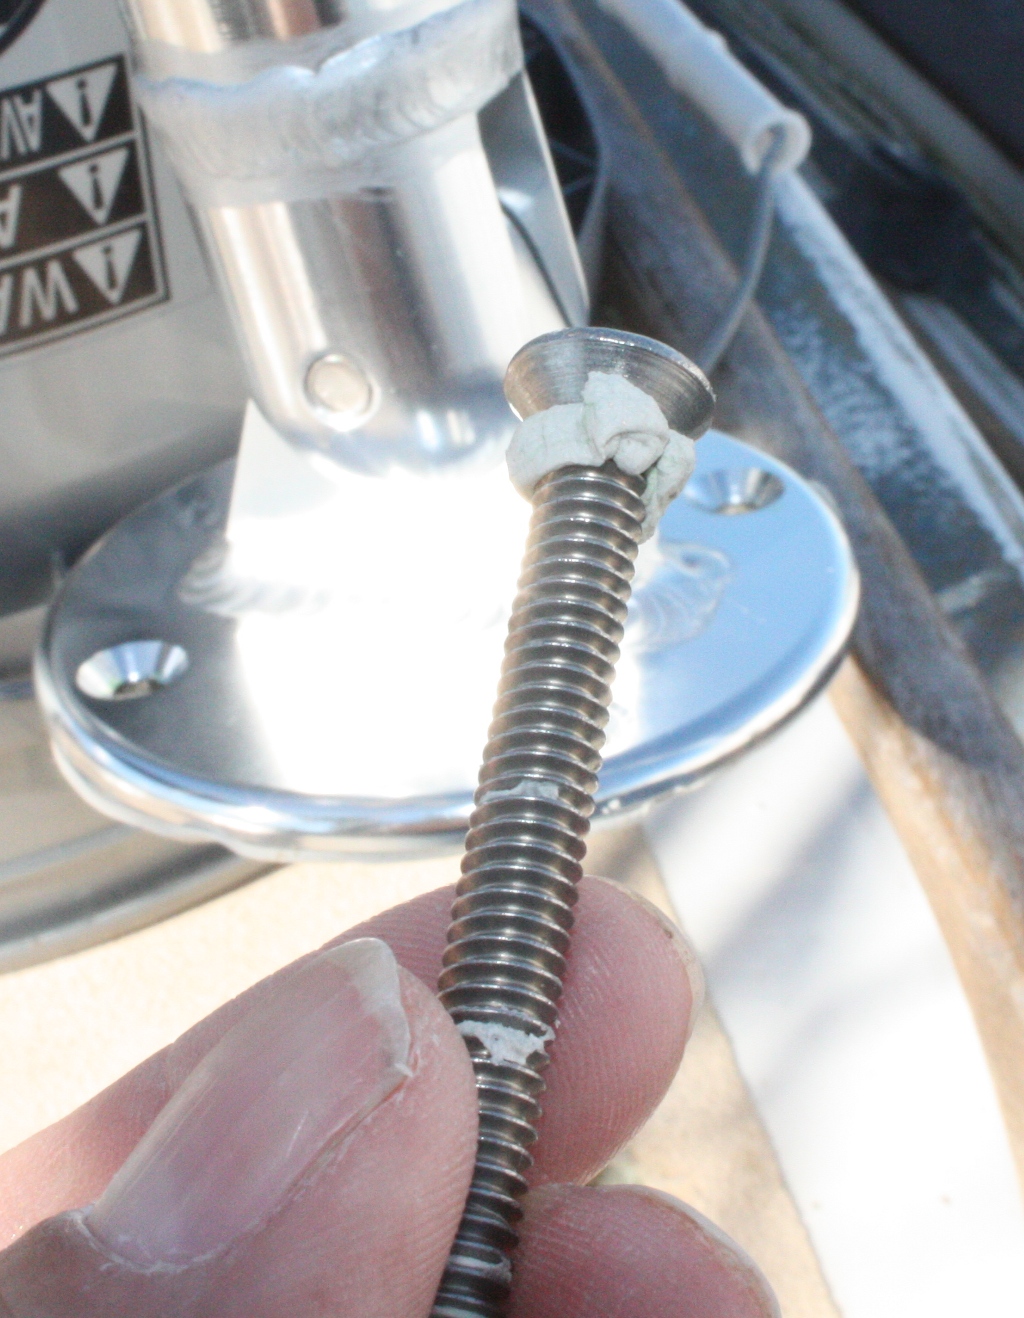
sealant to keep water from running down the bolt.

again sealant to keep water from running down bolt. All epoxy filled holes through deck were counter sunk to allow the built up sealant around bolt here to fill and compress in the holes.
It took several go around over a few days to fully tighten down. The sealant we used was pretty thick and it would gradually ooze out as it sat after being tightened. After a couple go arounds it was all good and hasn’t leaked in the 4 years since it was installed.
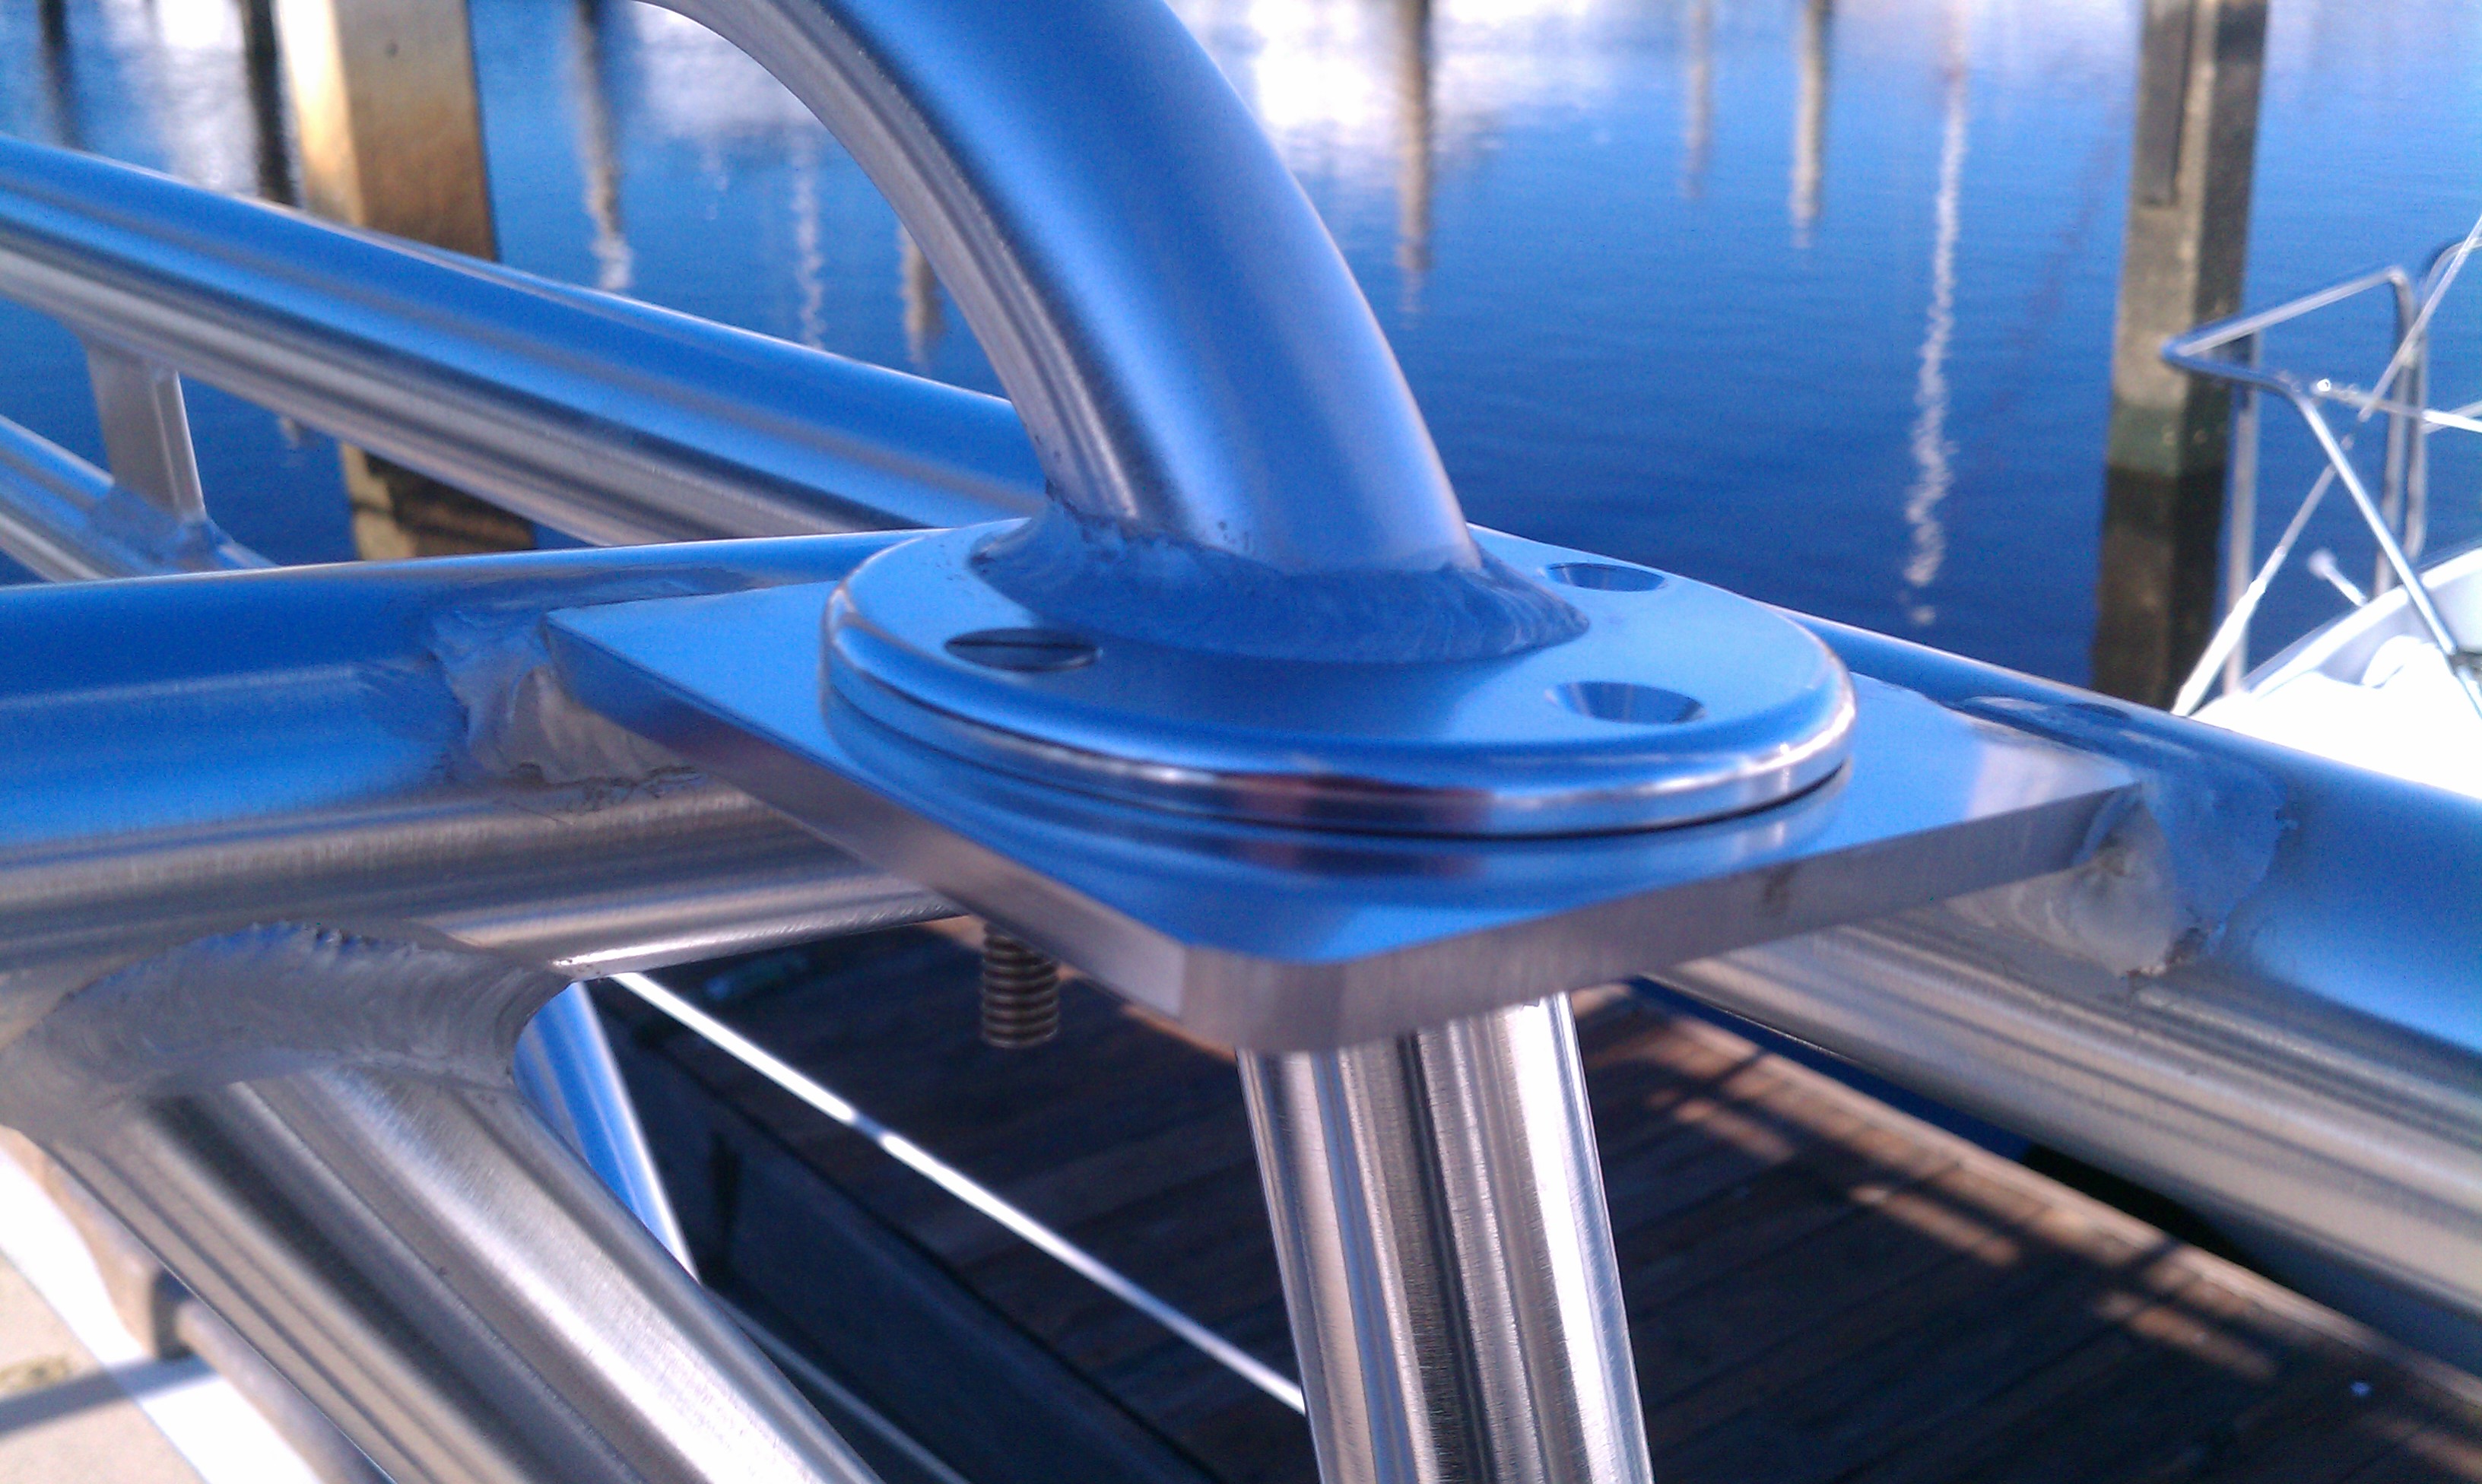
Temp attachment of forward port side handrail on dodger.
temp attachment on starboard
port side view of dodger frame
Middle starboard side attachment for handrail.
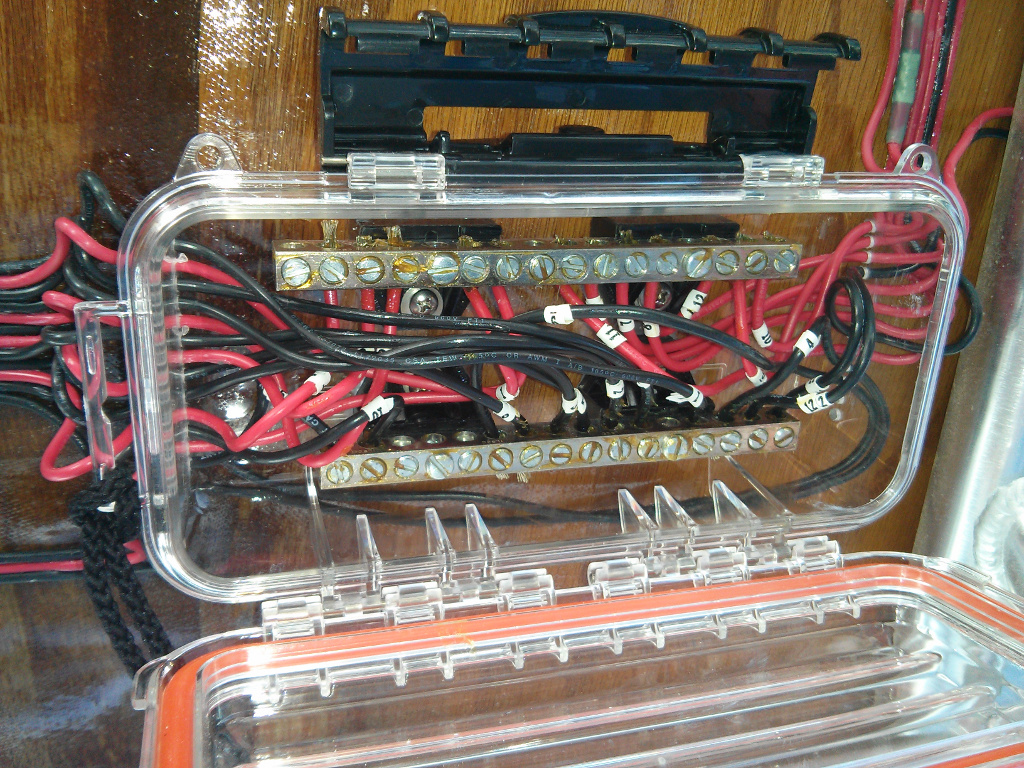
This is a bit out of order but has to do with dodger. This is the central junction for all the solar panels on the dodger near the startboard aft leg of the dodger that the main wires from it run below to the charge controller. We used a water proof document case that we modified into a junction box. notice all wires into have a drip loop. All exposed wire and buss bars are coated in di-electric grease. 4 years later it still looks like new. No corrosion.
You can see the deck penetrations where the wires from the solar panels penetrate the dodger. It was a lot of work drilling and then filling all the holes with epoxy and then drilling again. We actually glued the wires to the underside of the dodger in neat runs to lead to the junction box. It has also worked well.
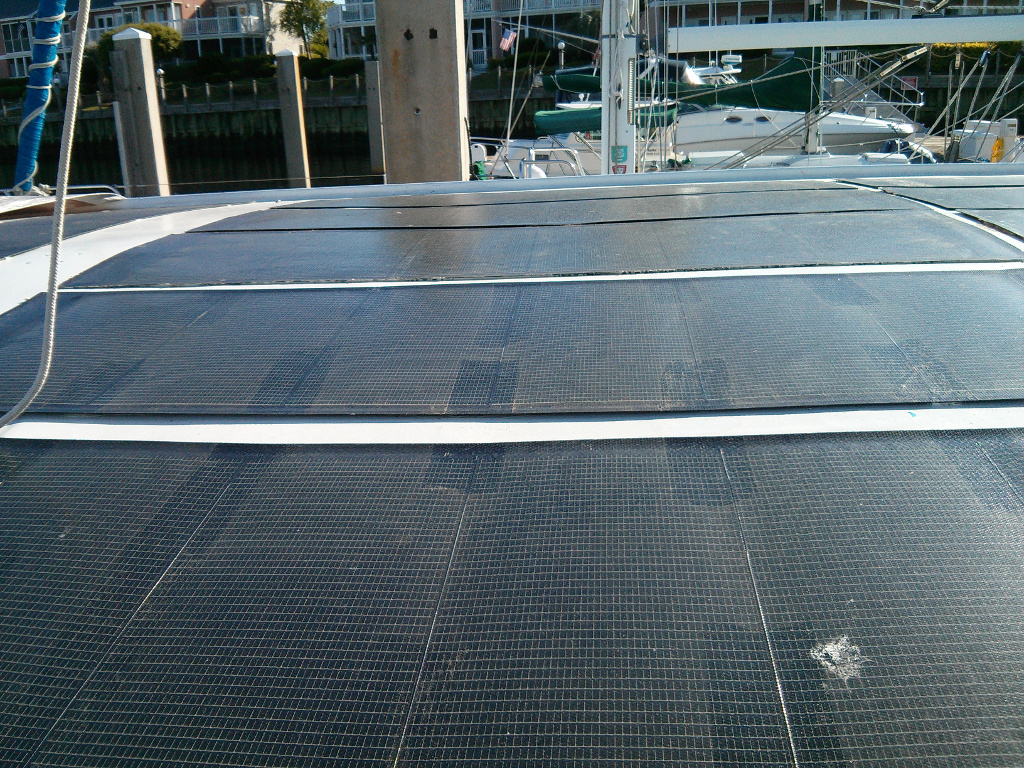
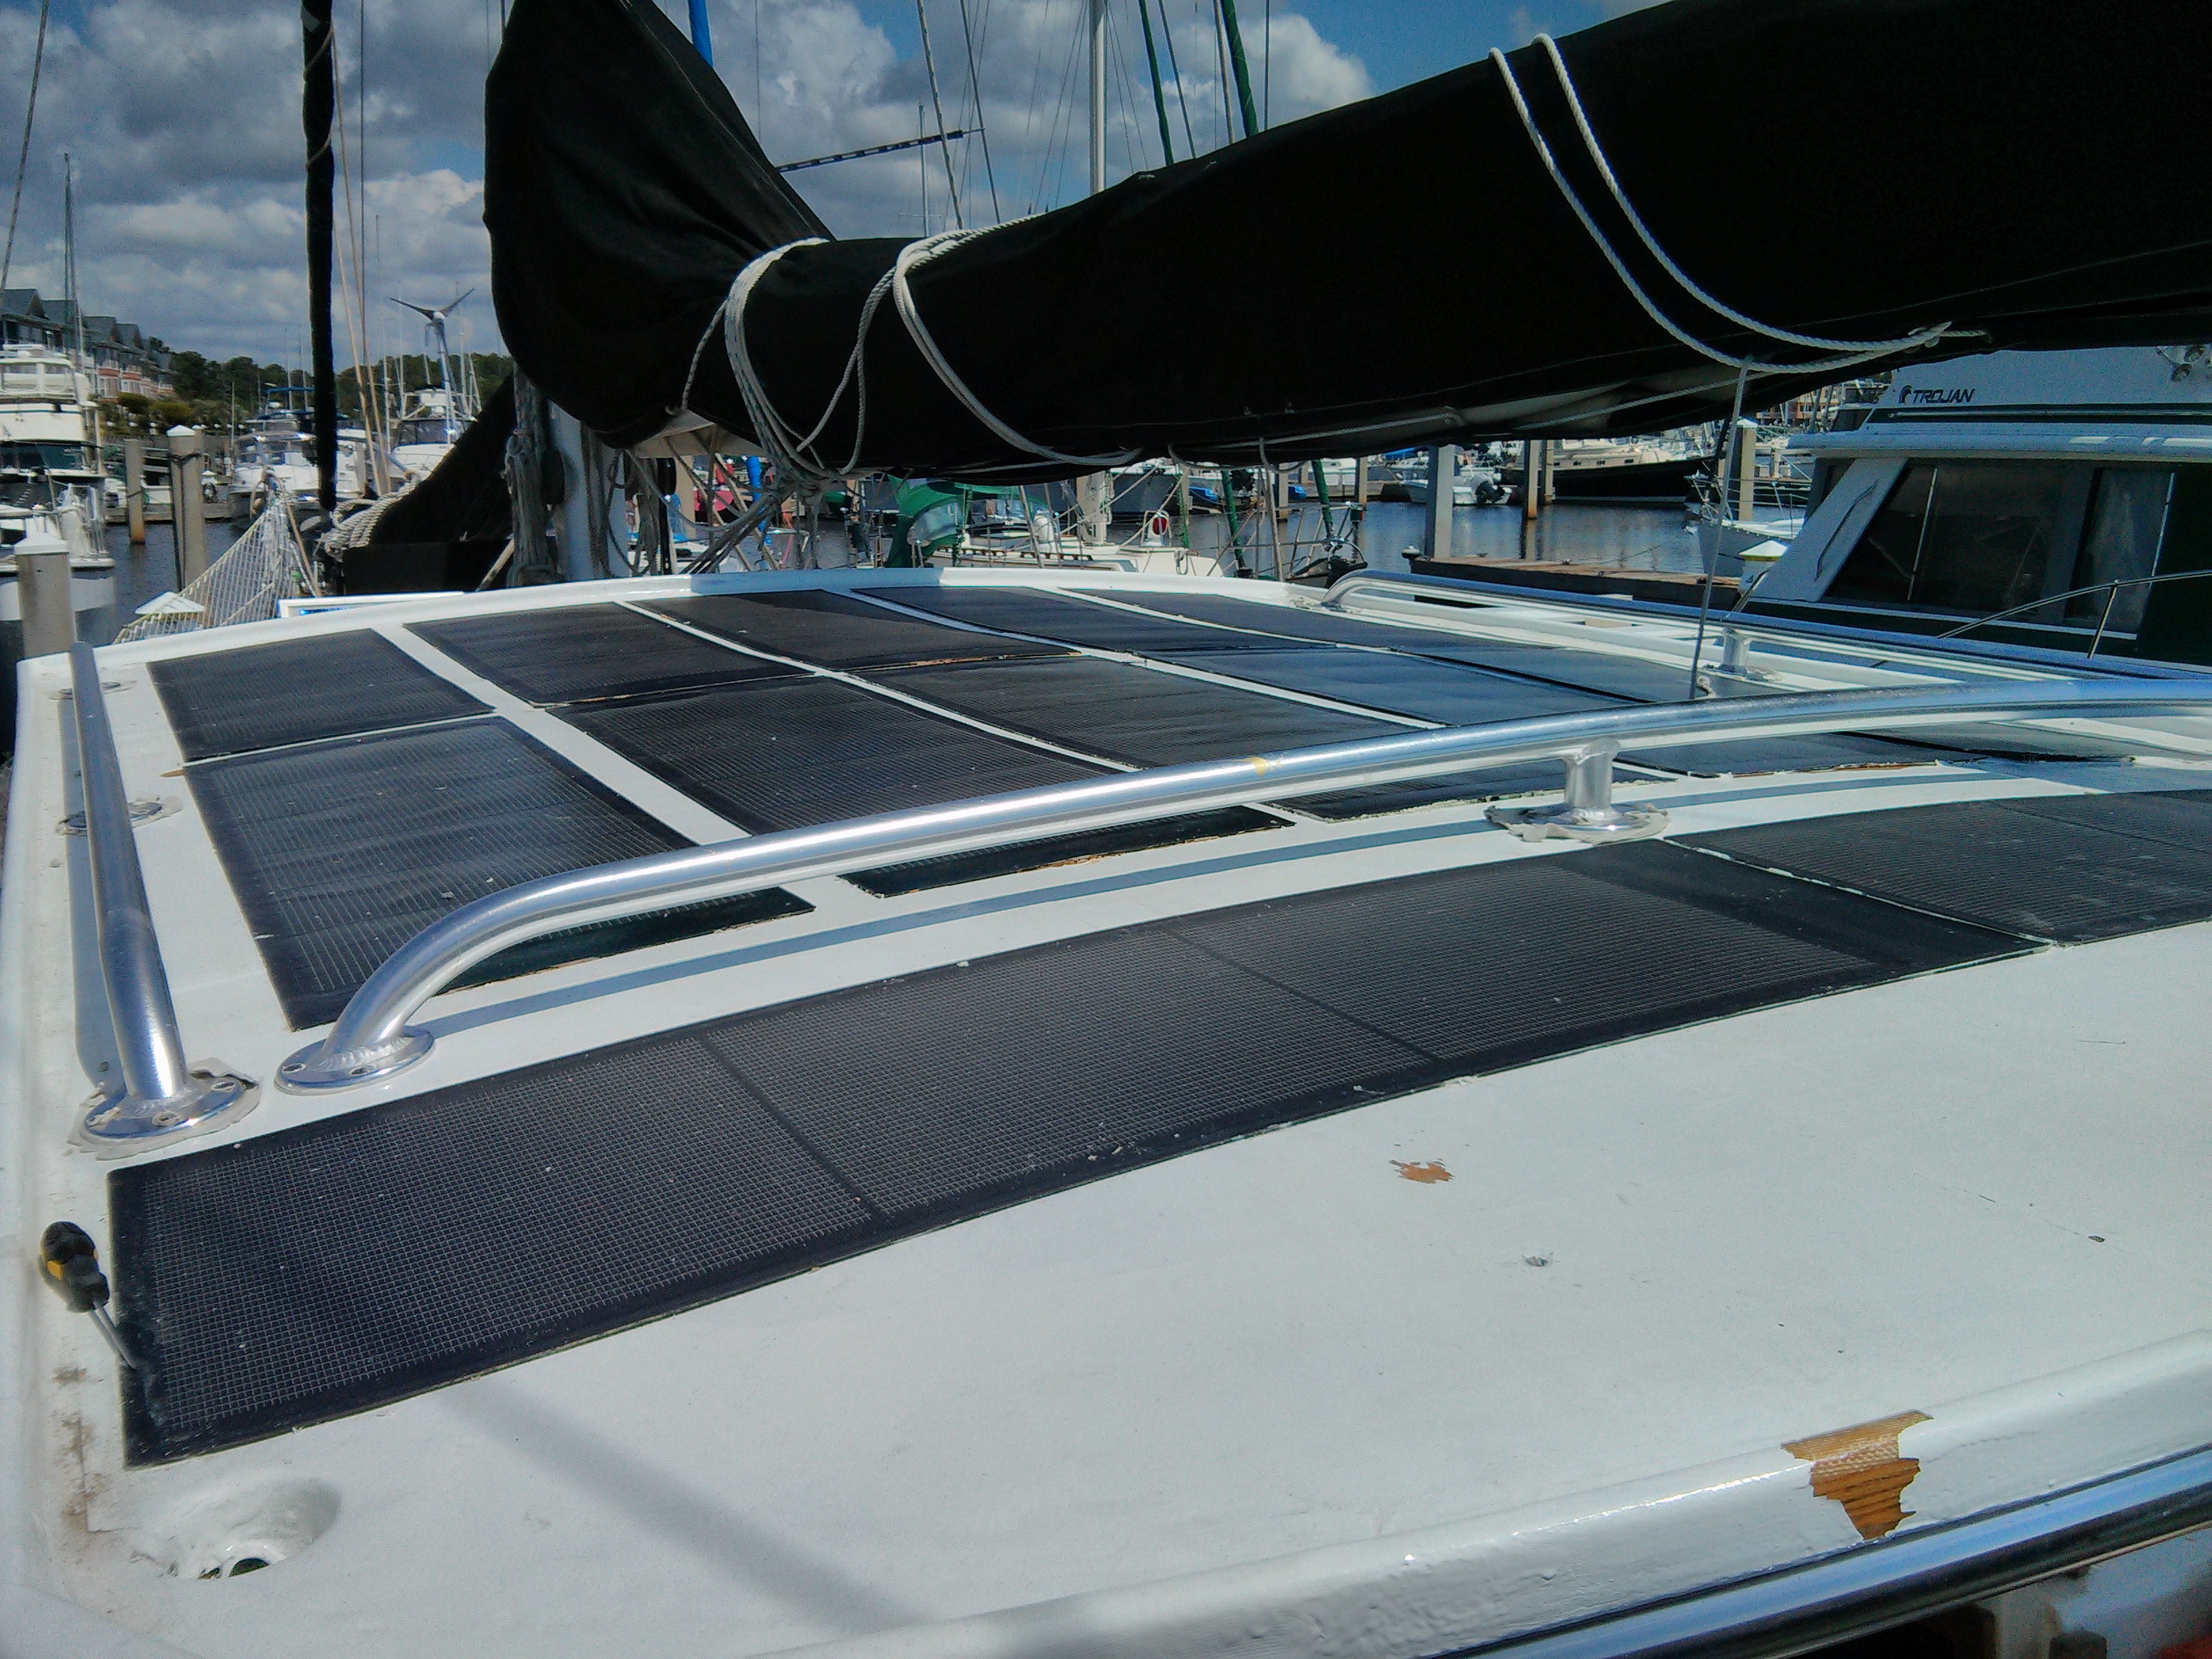
Solar panels on dodger roof. We used a adhesive sealant to attach them to roof. It has held really good. Forget what it is called, something kevlar 400? from PPG.
another view of solar panels. Each one of the panels is 25 watts. They are a thin flexible panel that it is safe to walk on. There are
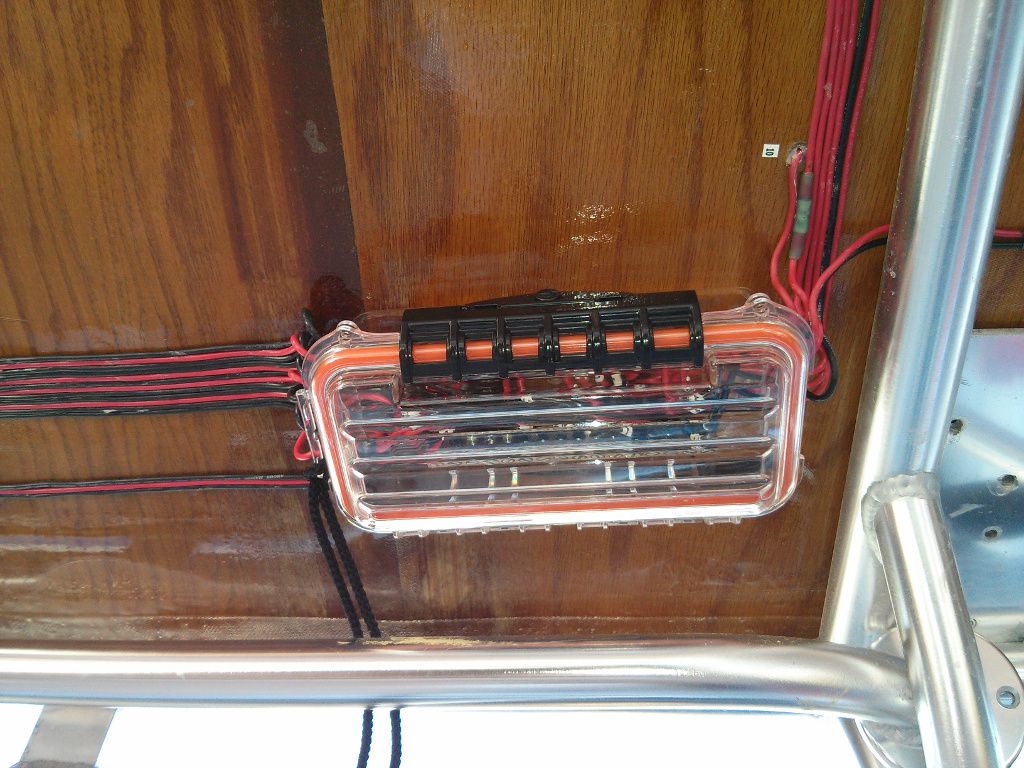
junction box closed
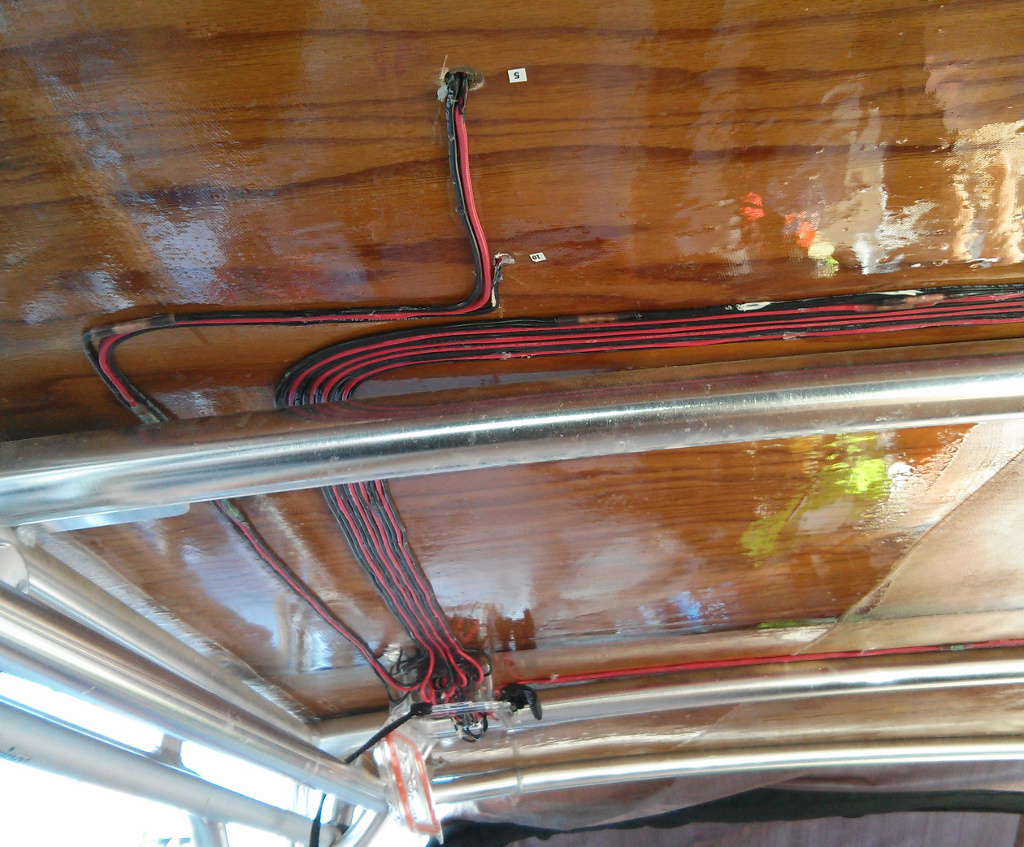
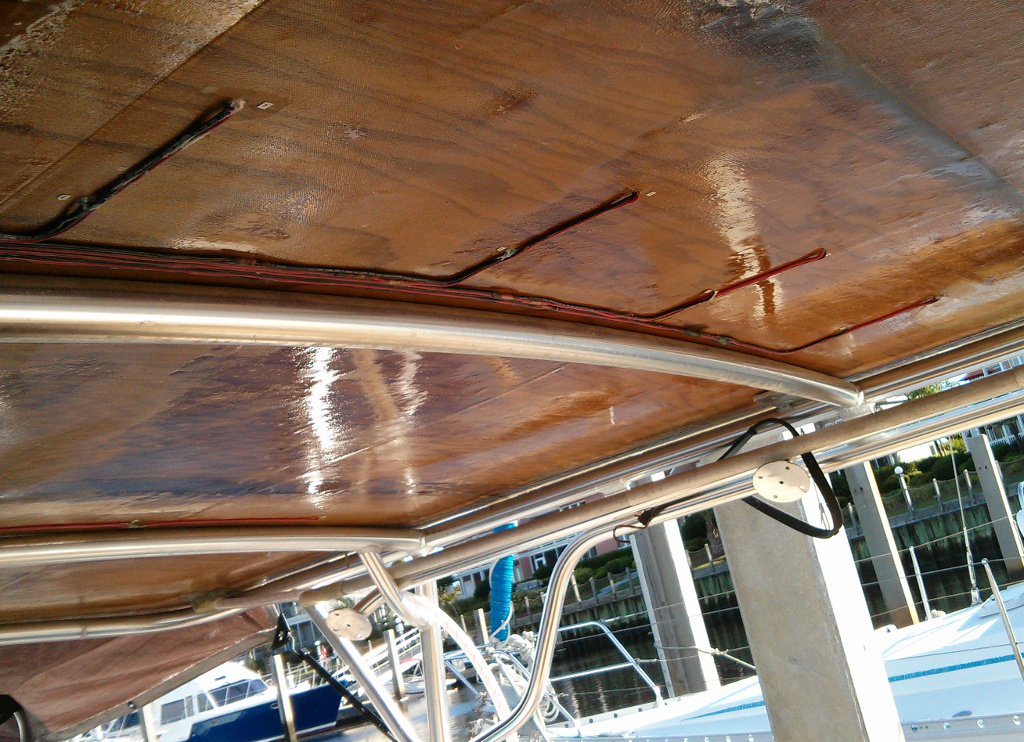
roof penetration for solar panel wiring and runs glued to roof as they go to junction box. I used quick set gel super glue to do the gluing. Run a line of glue and press wire into it for a few inches and hold for 15 or 20 seconds and then repeat. It took a while to do it all but in the end it was very neat and held good. when I painted it is hardly noticeable under there. Sadly I should have sanded before glueing the wiring in. Not that it was an issue with the wiring but some of the paint flaked off on the under side.
another view under dodger. If you notice the chips in the white paint on the aft upper edge of the dodger, That edge takes a beating sometimes an has to be touched up on a regular ( annual basis )
Hand rails being attached to the top of dodger once roof is installed.
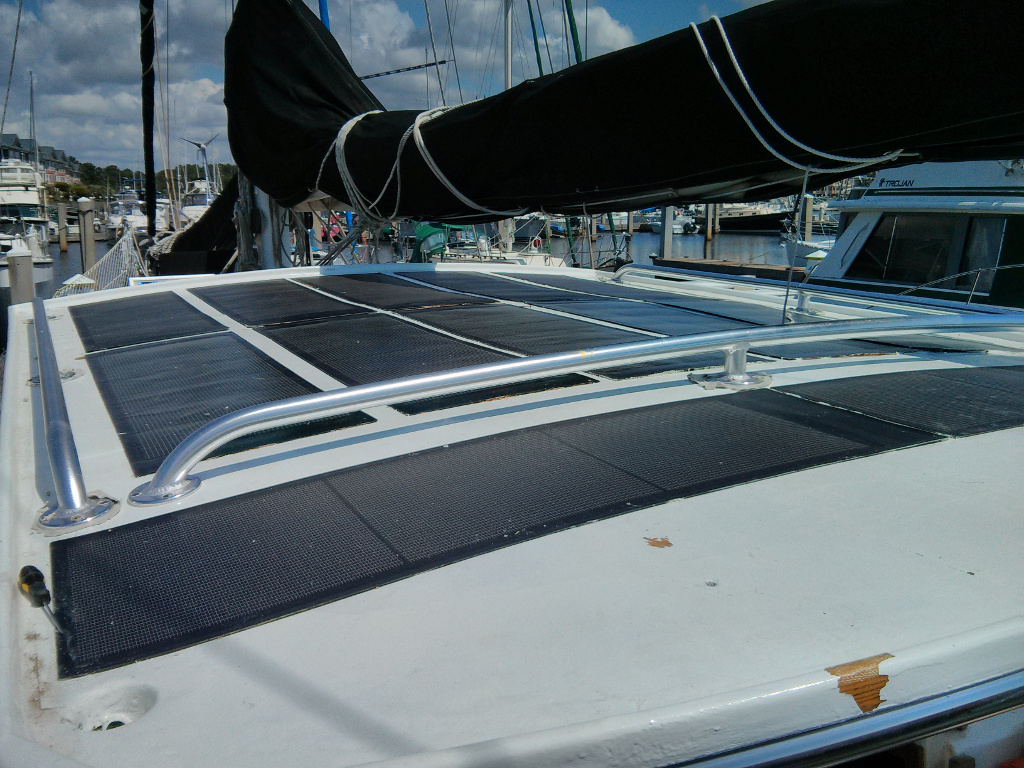
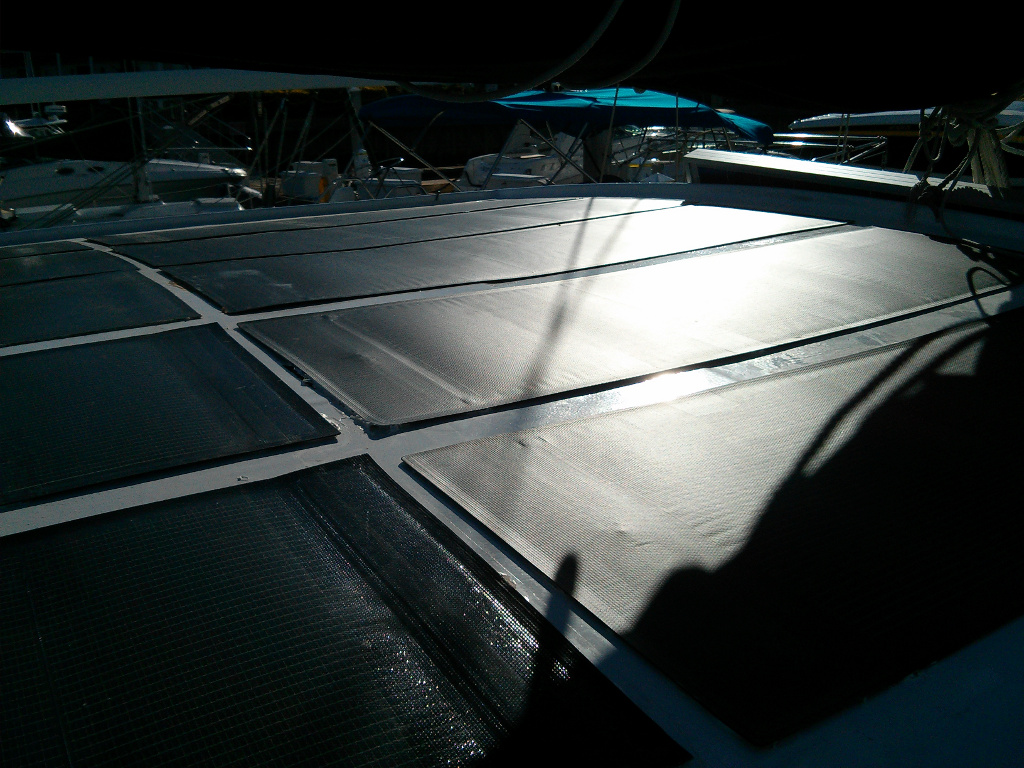
Picture with 12 panels attached. For some reason I think I added a 12th panel behind the aft most two panels for a total of 275 watts on the dodger. There is another 190 watts in one big panel on the dingy davits also for a total of 465 watts on the boat. We had power hooked up at the dock when we lived on the boat to run the AC. Since then though the boat has been powered by the installed solar. We turned off the dock power to save money and never noticed the difference.
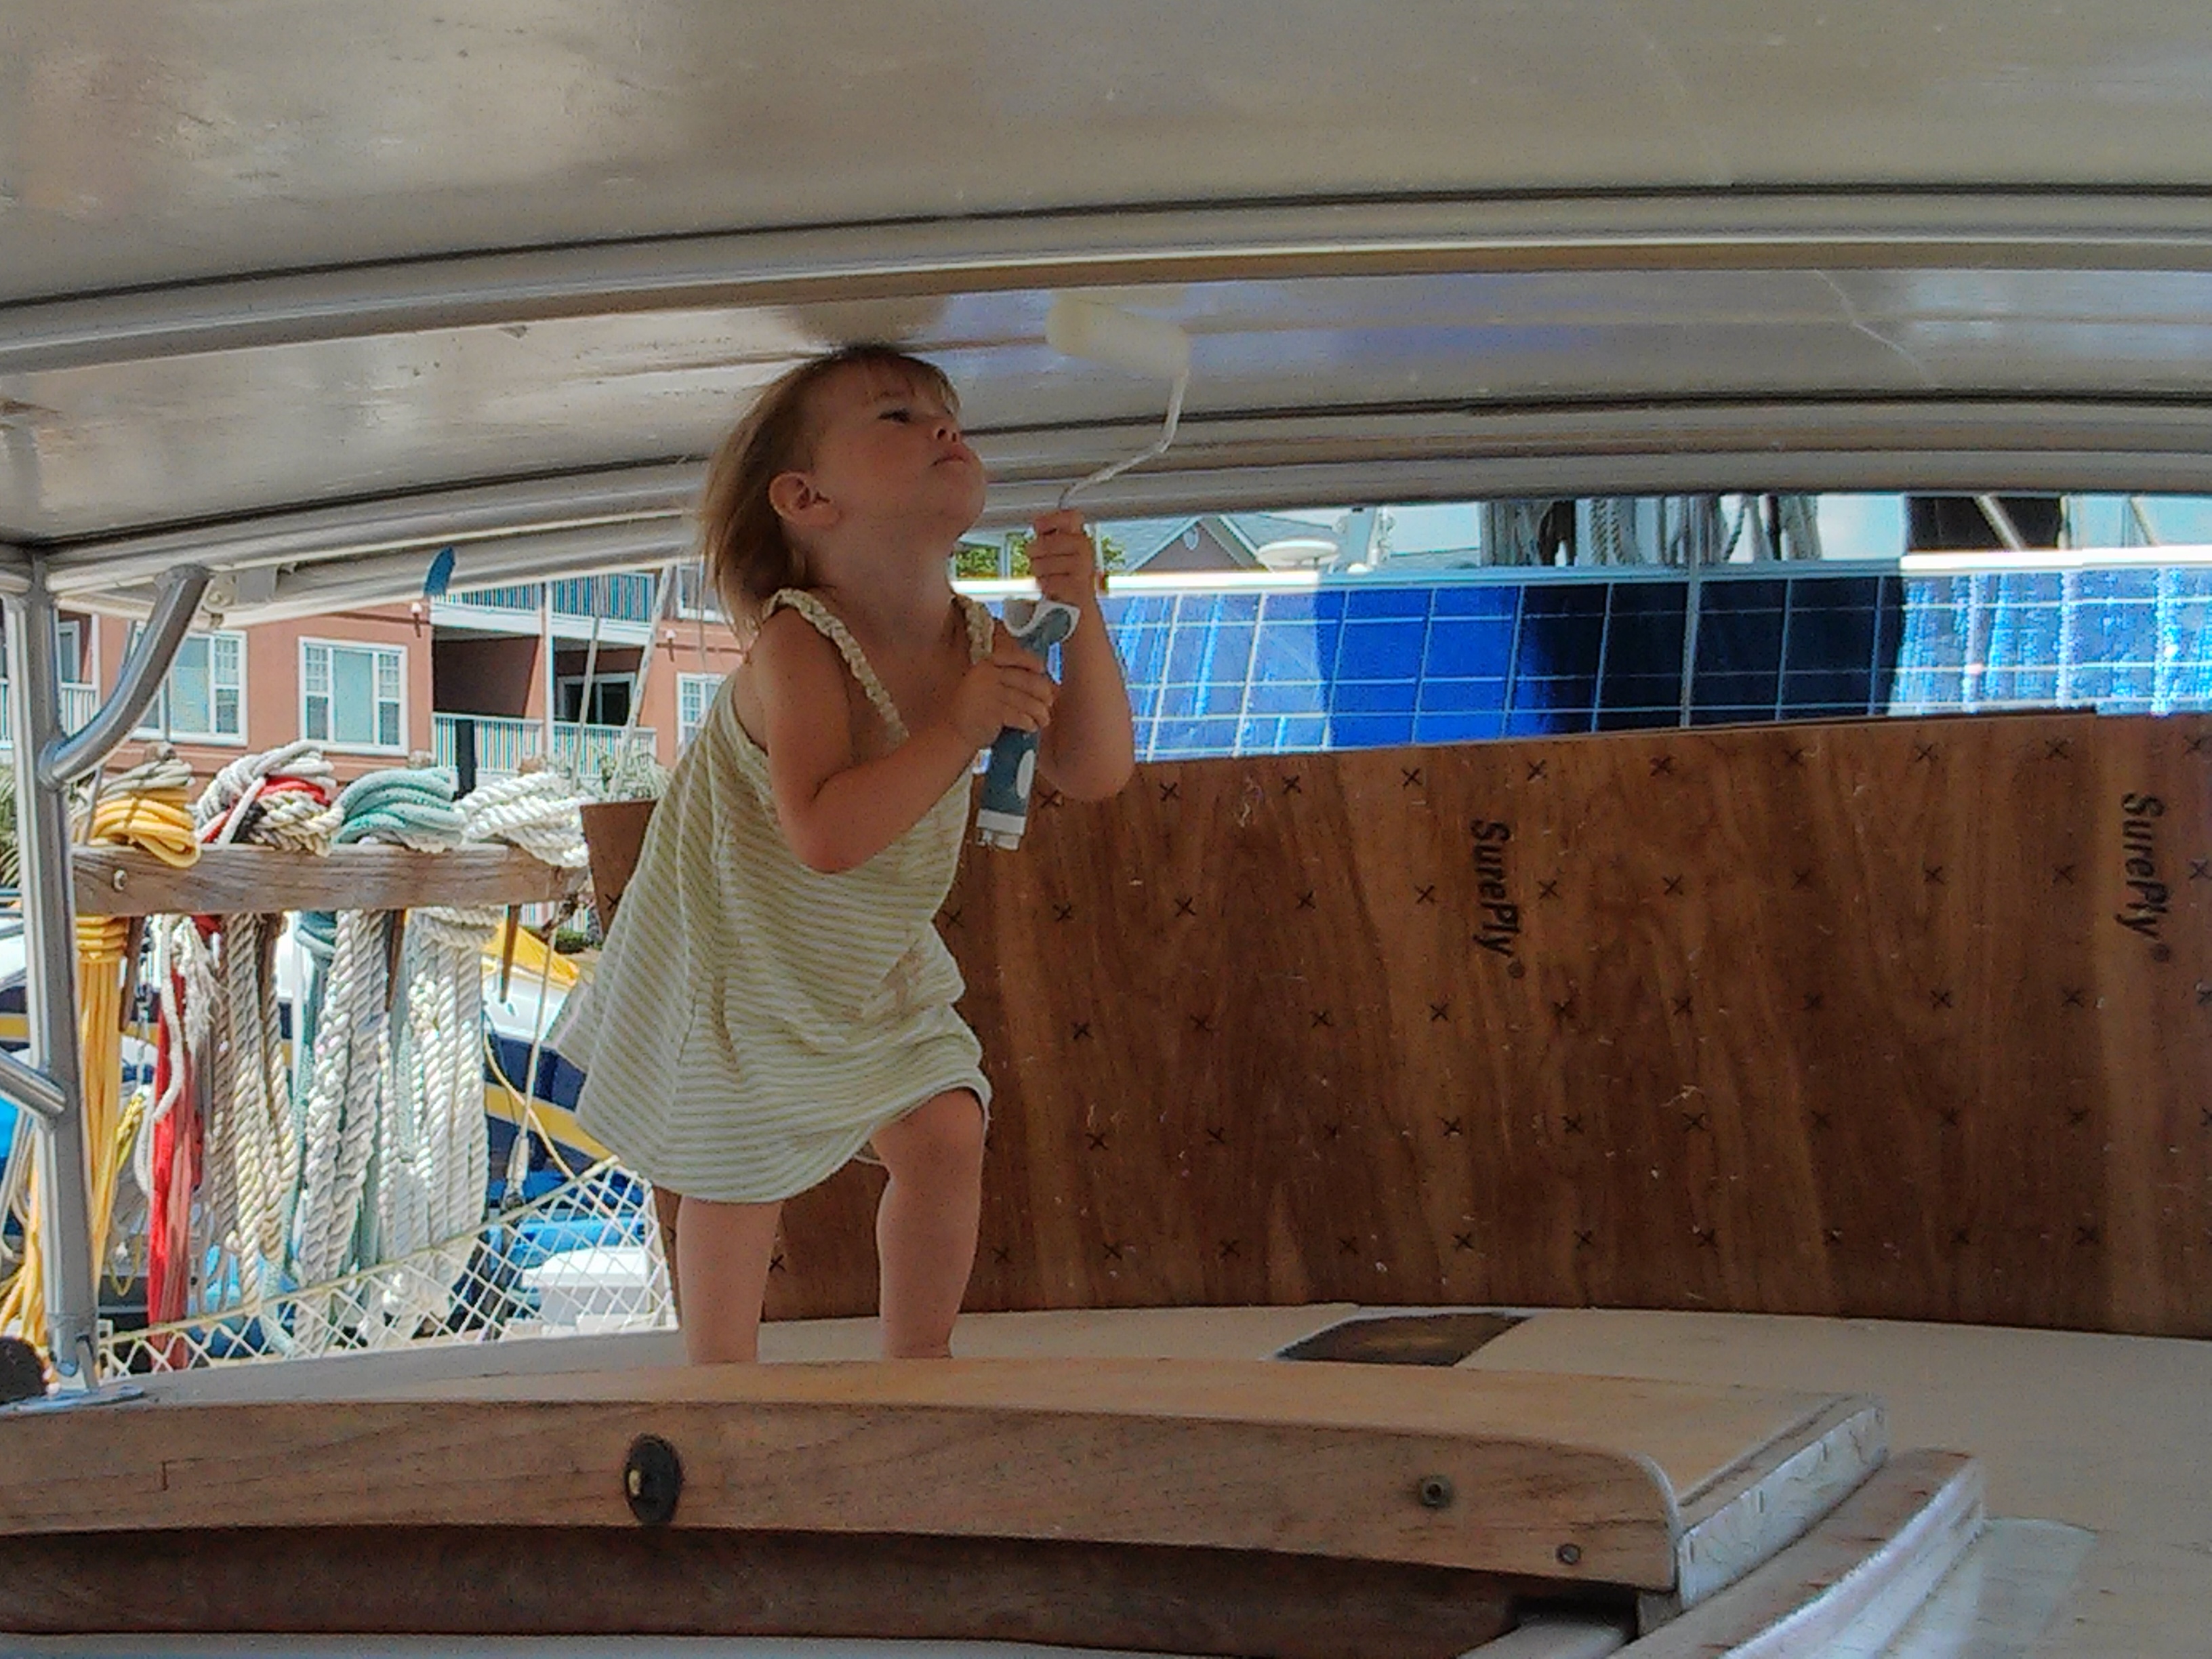
Kaylin helping paint!!
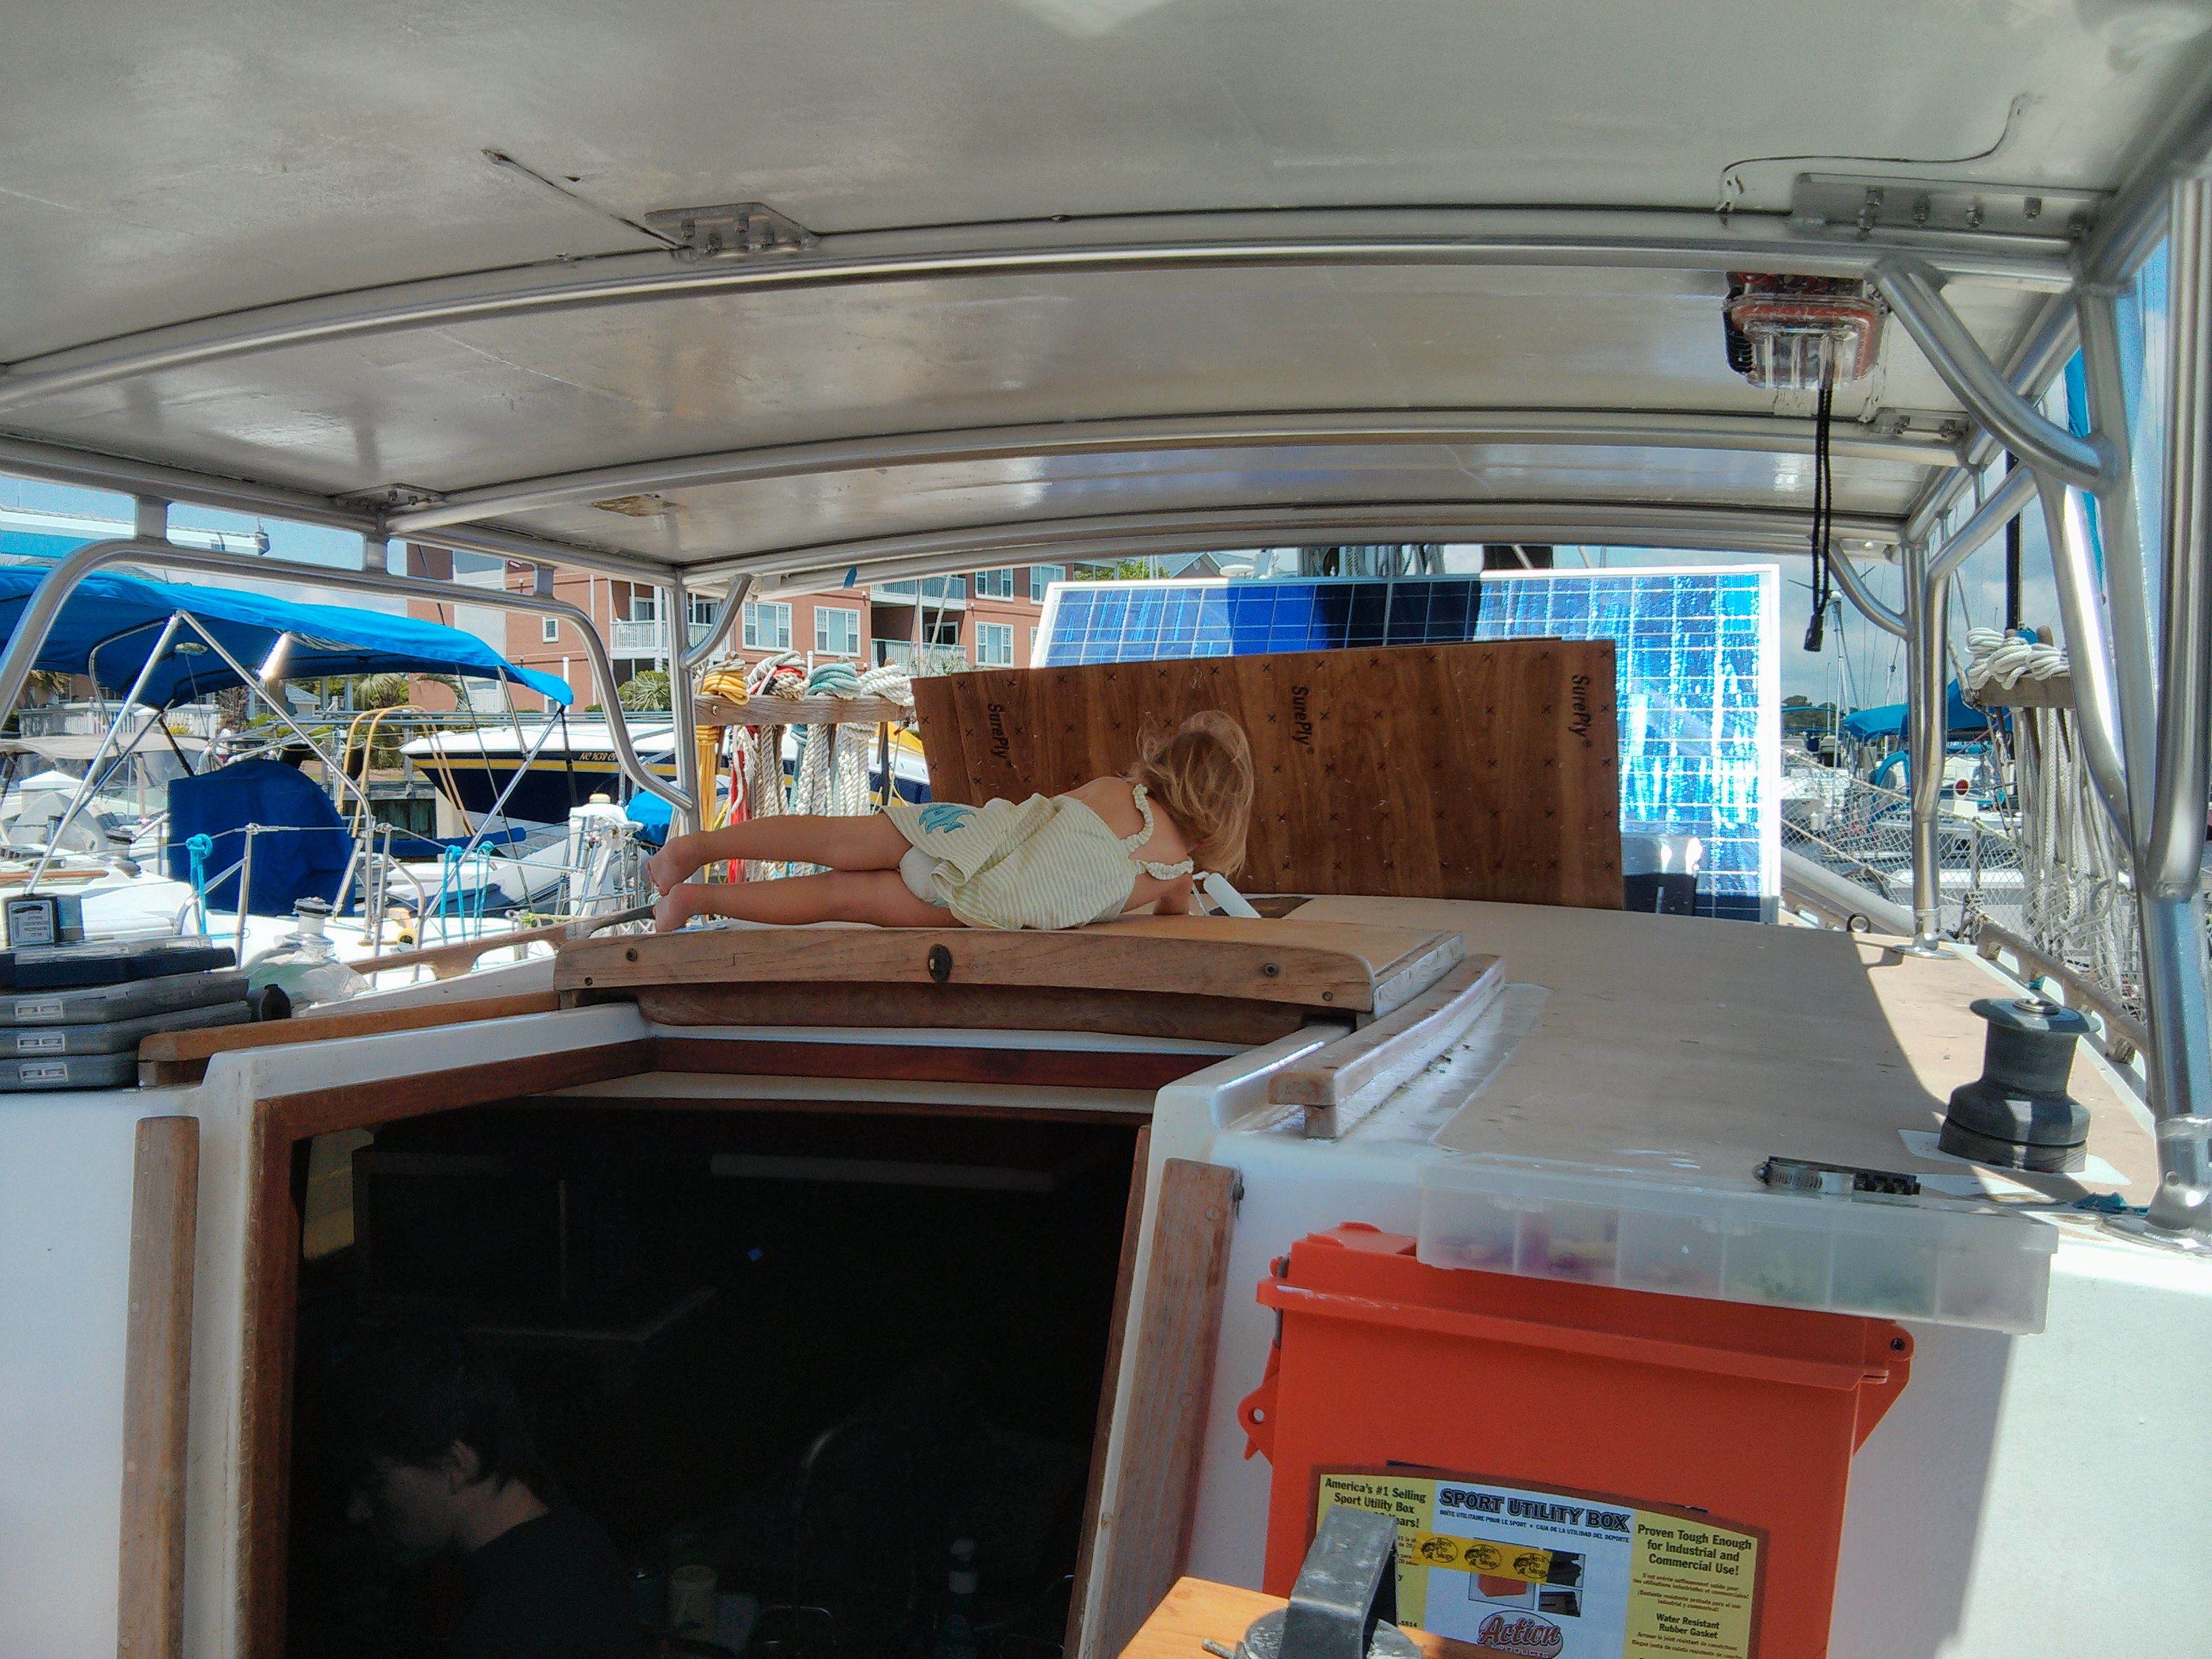
Zsanic in the galley and kaylin hanging out under dodger.
forgot to mention. If you look in the lower left corner of the dodger you will notice a drain. We custom made drains in all 4 corners of the dodger with 1/2 inch hose leading down on deck from it. No matter what angle of heal rain will drain off and if we wanted we could lead it to the tanks.
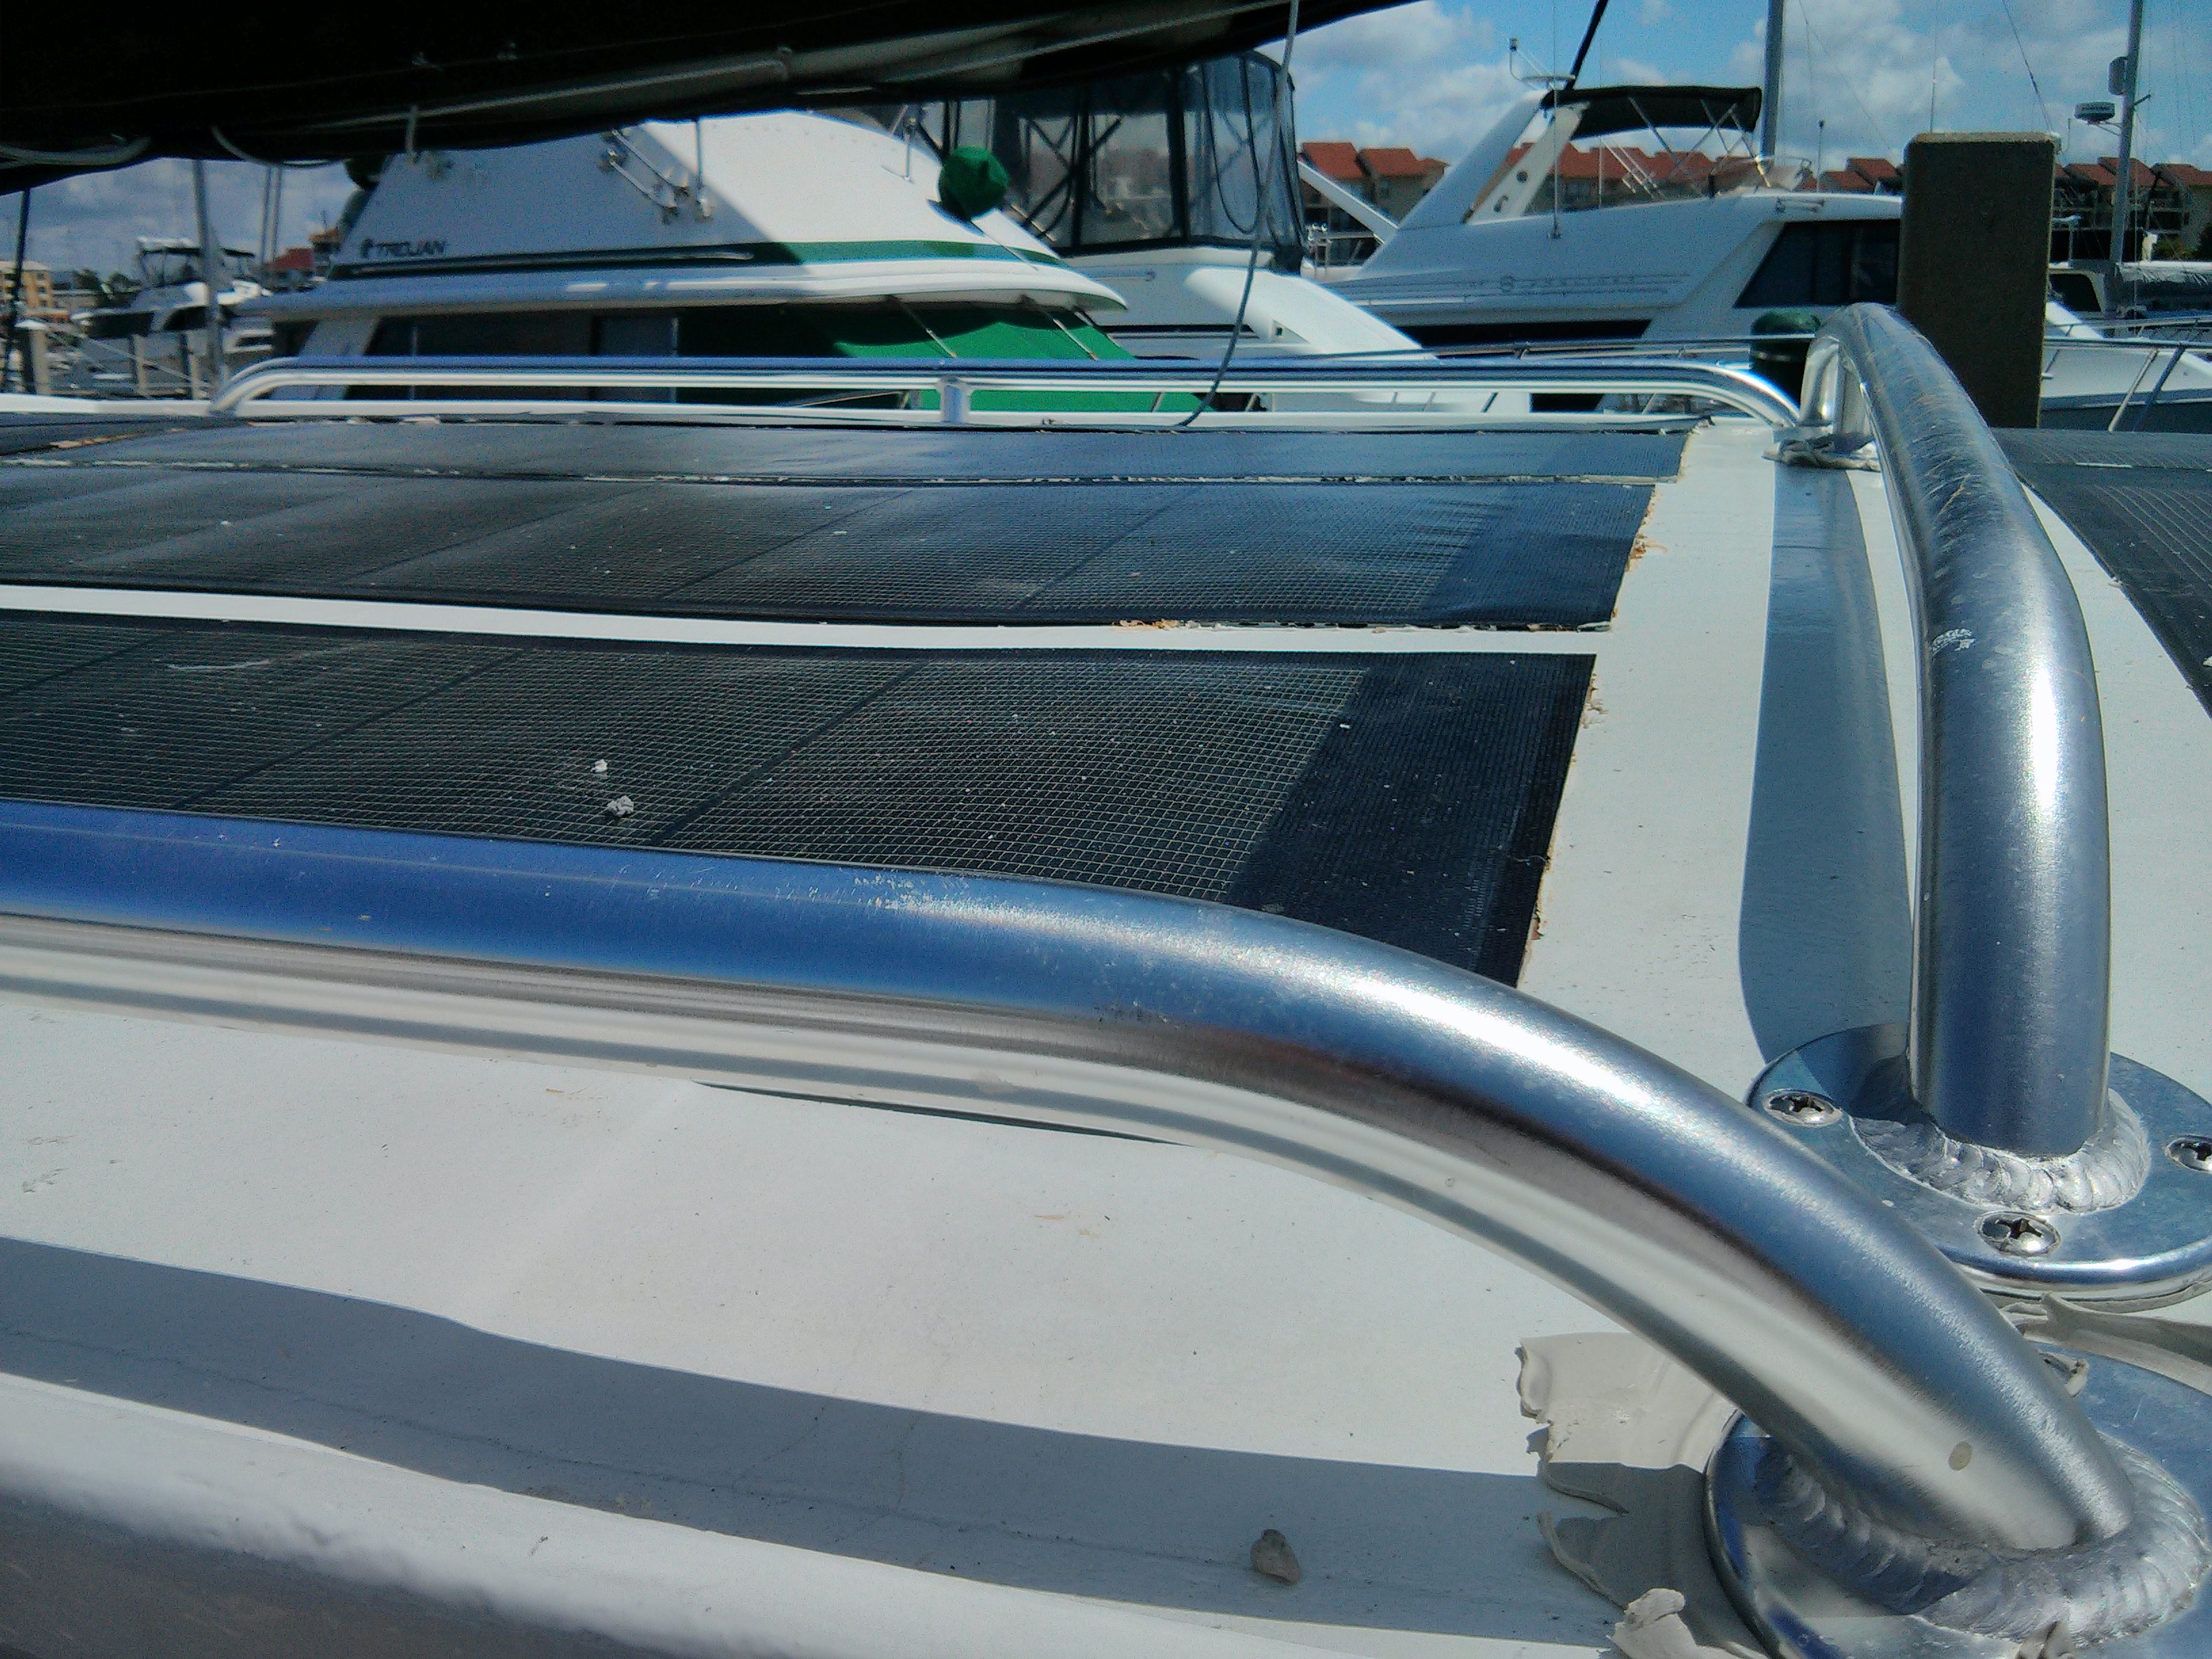
Good view of the aft rail that protects solar panels and dodger top from boom if it falls.
I will link to here from the forum where I was asked about this. Probably best to comment in the forum rather than on the post if you want to talk or ask questions on this post.


James,
I have a 1978 Downeaster 38 sailboat Deja vu.
I am having some problems with the coupling in between my transmission and my prop.
I am wondering if you have any familiarity with this.
If you wouldn’t mind emailing me back I will send you some pictures of the part. I can’t attach photos here.
Thank you,
Philip Hoag
406-223-1699
philip.hoag@gmail.com
Hi. My name is Philip Hoag. I have a 1978 Downeaster 38 presently located in Hood River OR. The dodger canvas was missing when I purchased my Downeaster and am definitely interested in a hard dodger replacement. Who built your stainless steel frame? Do you have any drawings for it? Where are you located? Another two questions:
1. When I bought my boat a little more than a year ago the manual bilge pump was missing. What brand and model bilge pump do you have? I am trying to find a through hull bilge pump that will work with my existing hoses behind the bulkhead and potentially the existing holes in the bulkhead.
2. Have you ever heard of anyone raising the boom attachment to the mast in order to create more headroom in the cockpit? The clearance is so poor that I can’t figure a way to get a Bimini rigged over the helm.
Thanks,
Philip philip.hoag@gmail.com 406-223-1699
not sure why but I never noticed that this comment had been left. sorry for the late reply.
My hard dodger was a custom aluminum fabrication. The guy that made it was a wizard. Retired from designing and making aluminum towers on fishing boats. Last I heard he moved to south korea with his korean wife within a year of making mine. So 6 or 7 years ago? Cost me about 2400 dollars which for what he did was a steal. I ended up paying more than what we had agreed on but he did more than we planned as the project evolved. Straight up materials and time it should have been closer to 3500 than the 1800 we started at.
as to number 2, yes several people have raised their booms. you lose a little light air performance with the loss of sail area and push the cg up a few inches. Have to have your sails recut or new sails to fit new shorter distance between boom and top of mast. So it is a significant but very doable project. We used the pieces of the old soft dodger stainless frame and reconfigured into a small bimini over the helm. you could see under it sitting and over it standing. I had it so I could pivot it forward or backward over the helm. It was nice shade during the middle of the day but did nothing early or late when the angle of the sun was greater. Also it wasn’t really great at rain prevention as it was small enough that the most it did is keep direct rain off your face but still got a lot of splash on you 🙂 and direct rain still mostly got you at any angle from the waist area down.
the manual bilge pump = whale gusher 10
the main boom should be adjustable and yes i have moved mine up to clear the cockpit and solar panel above it.
Hi guys, my name is Paul Metzen and I have a DE38 on a mooring on the east coast of Australia in a place called Lemon Tree Passage, Nelson Bay. Great to see activity on this site …
My plan is to haul her out later this year/early next year for a few months to do the following: change the engine to electric propulsion, raise the boom, add a diving platform, and build a dodger a la Scott Carle. Great photos Scott. I hope you don’t mind me downloading them … even though I will not build an exact copy but your dodger has already given me some good ideas. I would be interest on the performance of you solar panels. I’m looking at 1200 – 1400 Ah lithium batteries. Need a lot of solar and wind power generation.
The above will keep me busy in retirement.
Cheers Paul