I had always thought heat pumps were the perfect answer for heating/cooling on a boat, but never considered one due to their cost. When I saw a two-year old one on craigslist for less than 1/4 the retail cost, I jumped without hesitation.
(An aside to those who do not know how a heat pump works: A heat pump is almost exactly like an air conditioner, but with the addition of solenoid valves which allow reversal of the freon flow. Did you ever notice that a running window air conditioner blows hot air outside? That is the heat which was removed from the cooler inside. If you were to physically turn the unit around in the window, it would become a heater. The solenoid valves allow this reversal of function without having to physically move the unit. And yes, the heat pump is also an air conditioner. One more thing: on a marine heat pump, the heat source/sink is not the outside air, but is instead the water. In Puget Sound, the water temperature ranges from about 55 degrees in the summer to about 48 degrees in the winter, so it is perfect for this.)
Here on the boat, we live on 30 amps. That is, the total amount of power available to us is a little less than what you can get from 2 household circuits. This requires us to be conscious of our electrical usage. With the current price of diesel, it is cheaper to heat the boat with electricity than using diesel in our diesel heater. To do this, we have used 3 space heaters (forward cabin, main saloon, aft head), each set on a 500 watt setting. Thus we were heating with 15 amps, leaving another 15 amps to run the water heater, refrigerator, espresso
machine, microwave, lighting, etc. Tho this sounds like not very much heat, it was sufficient until outside air temps dipped into the low 40’s, at which time we had to fire up the diesel heater too to make up the difference.
Those 3 500 watt heaters were pulling about 15 amps, and delivering about 5100 BTU/hr. The heat pump, when in heating mode, draws 12 amps, and delivers 18,000 BTU/hr. That is, the heat pump delivers more than 3 times as much heat, and uses less power to do so. That is because not only do we get the energy from the 12 amps drawn from the electrical circuit, but this energy is used to MOVE heat, so we also get the heat captured from the sea water. We also get air conditioning, but that is seldom needed in this climate.
The heat pump is about the size of a window air conditioner, but without the external housing. Unfortunately I didn’t take any pictures before I got it into the fwd settee compartment. Because of its size, it was necessary to remove both the door and the bezel from the large opening. It just fit. Next, the unit requires a supply of sea water for its pump. For now, given that we are in the heating season, I stole the connection for the generator, and I made use of an abandoned above-the-waterline thru hull for the discharge.
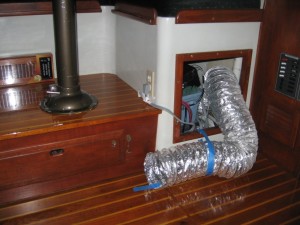
The initial installation just had the giant 6″ hot air discharge hose led back out the door. And although this kept the main saloon toasty warm, it left the ends of the boat cool.
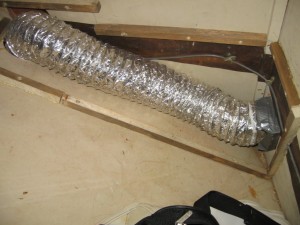
So to string 4″ flexible aluminum ductwork (think dryer hose) from the compartment to carefully chosen locations for heat registers… I rented a big (BIG) electric drill and a 4.5″ hole saw. This is a monster. It takes two hands and all my strength to keep this thing going in the right direction and not jumping out of the hole and chewing up everything in sight. And given that all the duct locations are run thru the backs of the small compartments along the port side of the boat, running the hole saw to make the holes can best be compared to wrestling with a pit bull while under your kitchen sink, with the door closed.
There were a lot of holes to be cut; each took between 30 and 60 minutes to make.
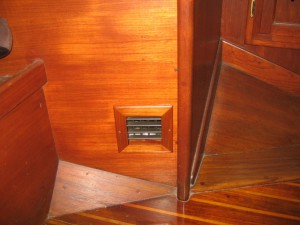
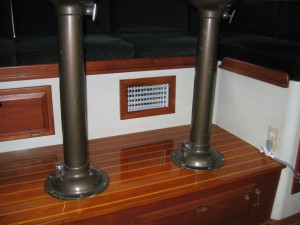
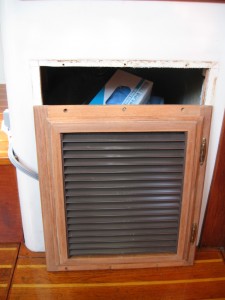
I found the 4 – 4″ grills for the cabins and heads on the internet, but the 6×10″ grill for the main saloon is made of a conventional grill, with a teak overlay bezel (that I made) in place.
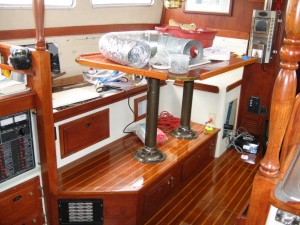
Thankfully, the giant silver snake is gone from the saloon.
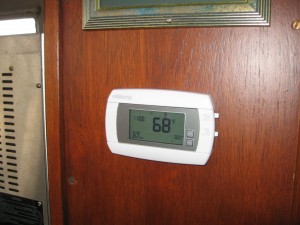
We are warm and cozy, and when you hang up a towel in the head, it is dry the next time you use it, instead of just cold. The boat has never been this warm, and yet the heat pump runs just a fraction of the time, and is far quieter than the fans in the 3 space heaters. We also now have a smart programmable thermostat which allows us to have the boat cool when we are absent or asleep and warm when we are here, automatically.
OK, you people in houses have had these for a long time. For us it is a new luxury.
We pick up the story of Eolian’s heat pump from last week with two more articles about the installation. One is some finishing touches a week later and the second is the next spring.
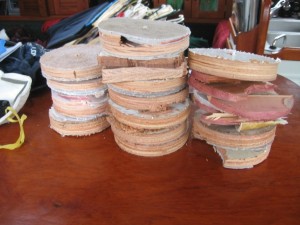
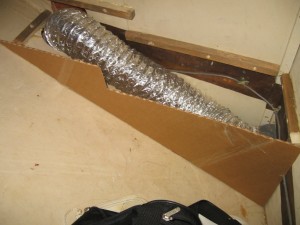
As I mentioned last week, we are still putting the finishing touches on the heat pump installation. One of those finishing touches is to protect the flexible ductwork in the storage compartment under Jane’s berth from the heavy things that are normally stored there.
The first step was to cut some cleat stock out of some scrap lumber, and glue/screw it to the surfaces surrounding the ductwork, to provide a foundation.
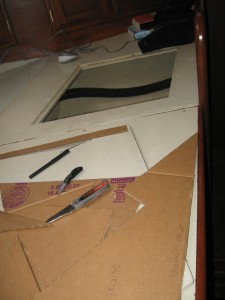
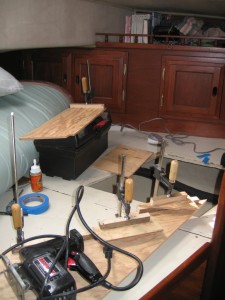
Next, making templates out of cardboard saves lumber, and allows you to change your mind about the design at zero material cost.
Once I settled on a design, I used the templates to mark up the plywood, cut it out with a saber saw. Because everything is made to fit, it fits perfectly (OK, I was surprised too).
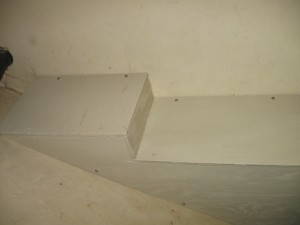
After all the pieces were cut, I glued on more cleat stock in the appropriate places, and then assembled the whole thing.
A little sanding, a couple of coats of paint, and it looks like a factory install (almost).
The heat pump which has been keeping us warm all winter was not really installed. Last fall when I got it, I kind of jury-rigged the install in order to get it up and running. Today I tackled one part of that jury-rigging: I positioned the heat pump in its final location and bolted it down – a prerequisite for us to be able to go sailing (wouldn’t do to have it flopping around down there).
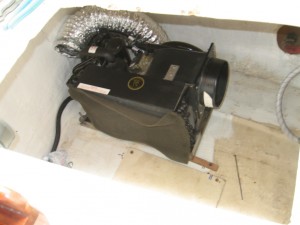
Last week, Jane picked up the collection of stainless nuts, bolts and washers that I figured would cover any installation eventuality, so I was prepared to do the bolt down. I drilled the holes and test-fitted the bolts. They didn’t work – the threaded length was not sufficient. So, since I needed more water hose anyway, we left the mess and made a trip to West Marine. With the proper bolts and 14′ of hose, I once again wedged my tender body into the small space under the dinette seating. The first two bolts went in without a hitch, and required maybe 10 minutes to make up. The last bolt, however, had bad threads part way down its length. After I essentially welded the nut on (stainless galls up easily) by trying to turn it past the bad place, I gave up and hacksawed it off. I invested a good hour in this last bolt. Jane made a quick trip back to West Marine to exchange the defective bolt, while I caught my breath. The replacement bolt went in easily, and all I had left to do was to cut off the excess ductwork (left long in the initial “install” on purpose), and hook up the new hose.
Done. Remaining: permanently mount the water circulating pump, and provide permanent 110V wiring.
Project: Heat Pump Permanent Wiring Yoga
There… over there on the right hand side of the picture, near the bottom… See that grey power cord snaking out of the compartment under the dinette seating? That has been our “permanent power wiring” for the heat pump since we installed it last winter.
Now, it is a proven Law Of Nature that the incentive for completing a project is proportional to the amount of the project remaining. Thus, you can approach project completion, but it is difficult to actually get there. This is one of those items. I have been “temporarily” supplying power to the heat pump by plugging it in to a convenient outlet, for a year.
In order to properly wire the heat pump, it needed to have its own breaker in the power panel. And a decision had to be made as to whether to supply the heat pump thru the inverter, or direct from the mains. And since the wiring for the water heater had a PO splice in it and was conveniently nearby, it needed to be replaced too.
But first: power thru the inverter or not? Although the inverter can power the heat pump (I tried it), we would never do that – the battery load is unsustainable. So then, why would I choose to power it thru the inverter, as that was the final decision? The reasoning went like this:
- We have significant 12V loads on Eolian, even when plugged into shore power. Most notably refrigeration
- Significant 12V loads mean that the battery charger will be needed frequently, and will need to deliver significant power – not just a trickle charge.
- In turn, this means the battery charger will require significant amounts of power.
- The battery charger is actually part of the inverter, a perfect convergence of function
- Our Heart inverter has a “power sharing” function. That is, you can program the inverter/charger to use a maximum amount of 110V power to supply its loads (including the integrated battery charger). If the need increases beyond the power sharing setting, the amount of power available to the battery charger is reduced.
- Loads which are not supplied thru the inverter are unknown to it. Our water heater is wired direct to the mains, and draws about 10 amps. Therefore the inverter has been programmed to take no more than 20 amps for its needs, to avoid exceeding our 30 amp total load maximum.
- If I were to have powered the heat pump direct, I would have had to reduce the load sharing setting to 5 amps, since the heat pump draws 12 amps ( the load sharing is in 5 amp increments – there is no 8 amp setting)
- 5 amps is not a reasonable amount of power to share amongst the battery charger and all the power outlets on board.
- By powering the heat pump thru the inverter, I can leave the power sharing setting at 20 amps. If the heat pump is running, there will be a maximum of 8 amps available to the battery charger – not enough to run refrigeration, so at least part of the refrigeration load will come out of the batteries. But as soon as the heat pump shuts off, the battery charger wants the full 20 amps to replenish the batteries.
This was a good decision – it works well. In fact, by running for a year with our “temporary” setup, we were already running thru the inverter, since the outlets are powered that way. We have had a successful one-year trial.
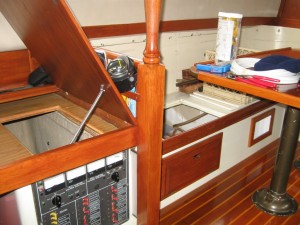
Now for implementation. The under-seating compartments all had to be completely emptied. The heat pump is in the compartment behind the teak-surrounded white grill (far right), the water heater is in the next compartment to the left (with the solid teak door), and the power panel is below the nav station desktop (accessible only thru the small opening, awkwardly oriented the wrong way).
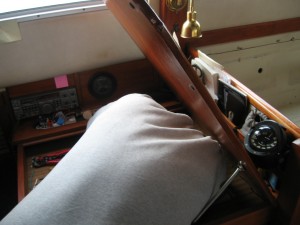
Stringing the wire was not difficult, nor was terminating it at the water heater and the heat pump (other than the joy of wedging my body into those small spaces to do the work). Most of the effort was spent with my head and shoulders down in that small opening in the nav station, reconfiguring the breakers and wiring behind the panel. Jane got a particularly unflattering picture of me, immersed in the work..
So, we have accomplished the impossible: we have reached the asymptote – the project is complete!
Yoga? Who needs it?
To see more stories about Eolian please visit http://windborneinpugetsound.blogspot.com


Recent Comments