We have been living aboard for a year now. It has highlighted some of the drastic downfalls of boats and storage. The Downeaster 38 has a huge amount of storage space, however it isn’t particularly of a shape or size to make efficient use of. We are gradually rebuilding all the storage compartments etc into better shapes to hold particular goods both efficiently and securely. One such project that I just finished day before yesterday was tea and spice racks.
I like to drink hot teas and being me go a bit overboard on the acquisition and storage of lots of different loose leaf teas. I have about 40 plastic containers with O ring seals with tea’s in them. At the house it was no big deal, I had a cupboard that they all neatly stacked in. On the boat there is no cupboard the right size and being that it moves they would fall over anyways and end up in a big jumble. In real life I found that a big jumble just due to the shape and size of the storage areas available was how things stayed.
I also like to cook and tend to have about a dozen spices, oils and other condiments that I use on a daily to weekly basis, with another 20 or so that I use weekly to monthly. Again, can we say jumble. I could never find what I wanted.
This state of affairs both in the teas and the spices tended to leave me a bit grumpy and irritated at having daily usability issues. If something is bad enough that it is affecting my outlook on life then it needs to be fixed. What to do though? I really didn’t like the cabinets as a solution as small stuff gets hidden behind other stuff, it all falls down and slides around and; well lets just say jumble. We had a little spice rack shelf over the stove/under the window. It just wasn’t the right size and the capacity was about 10 small spice bottles. I finally took it out and moved it because it just cluttered the area up to little return and made it harder to get into and see into the cabinets behind the stove. Setting stuff on the counter tops is obviously not a solution. We had some big plastic O ring sealing containers that we could put the spices in and store under the settee’s, but, again not an efficient solution. I hate having to dig under the settee for stuff.
Finally I noticed these two big empty areas on the rear cabin bulkheads just over the fridge and behind the chart table. They were covered in vinyl headliner which we had already made plans to pull down and replace with a wood panel. What if we installed the wood panel and screwed some shelves designed for the tea containers and spices there. But there is a problem. the spaces are not square and the cabin side there leans forward at about a 10 degree angle. If you put shelves there then anything on them would want to slide right off the front of them without a fiddle board or some other positive method of retaining them. At an angle like that even a little bounce would probably bounce stuff over the fiddle board as well. Then all those spices bottles would clink clink clink as the boat rolls and moves on the ocean. Not to be stopped in my desire to make that space work, I came up with a design with no fiddle board, but with individual bungee loops for each container that holds it against the back of the shelf. The boat could turn upside down and nothing would fall out and with each container and bottle individually held securely, there would never be any noise from bottles or containers clinking against each other.
We ended spice rack on portside in the galley that could hold 36 spice containers and various bottles. On starboard a more vertically oriented set of shelves could hold approx 50 of the plastic containers holding tea or spices.
Here are some pictures of the build process. It took a few days to finish due to the multistage process involved.
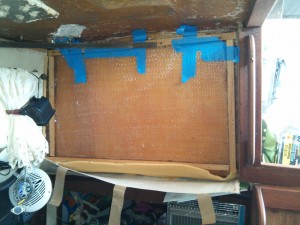
Starboard aft cabin face with wood lathing being glued into place. Panel and shelves will be screwed to this.
As you can see above I epoxied 1/4 inch thick oak lathes to the perimeter of the space the wood panel and shelves are going to be mounted on. I had some oak scrap sitting around and ripped it on a table saw into quarter inch thick lengths. I then treated all the lath with penetrating epoxy to permanently protect it from water damage, mold, mildew etc.. After that cured I cut four lengths per side for port and starboard and epoxied them in place as show above. I used a Raka two part Fast cure epoxy for all the epoxy usage in this project other than the penetrating epoxy which was cpes or rot doctor epoxy. To make a bog of the epoxy to glue the wood lathe strips down I just mix in some sawdust to get it to a peanut butter consistency.
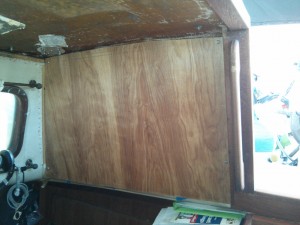
Here is the starboard panel screwed into place to test the fit and to mark all the mounting holes that will need to be drilled. I held the shelve units against the panel and traced both sides of all the perimeter boards and shelves onto the panel. Then went back in and drilled my holes in the panel from the front side while it was temporarily mounted. Once all holes had been drilled both for attaching the panel to the lath strips and for the shelves to the panel, I took the panel down and ran a couple screws into the shelves from behind the panel to get the shelve alligned with the marks I had made. I then used the holes in the back of the panel to guide a countersink drill to pre-drill all holes into the shelving. .
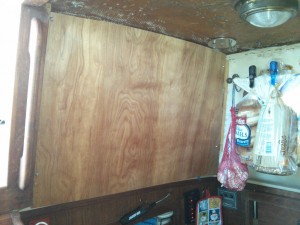
The panel is made out of a high quality luan/underlayment from Lowes at about 20 dollars a sheet. I have used this in other projects and it is very resistant to warpage or de-lamination due to sun, water etc.. The template to cut out the panels was made with paper that I taped up and cut out to the shape of the bulkhead. I cut the panels out with one of the harbour freight multifunction tools that cut by vibration. Both panels were treated front and back with Penetrating epoxy to give permanent protection against water damage, mold, rot etc.. Once the penetrating epoxy cured (about two days) I then painted the exposed surface with a clear two part epoxy to give it a clear gloss. I had not painted it at this point shown here.
The same procedure was used on the Starboard panel
Here you get to see the starboard panel and shelf unit just before it is mounted to the bulkhead. The Shelves were made of some 5/8 inch thick teak boards I purchased from a friend for 35 dollars. I Cut them the depth I needed and then ripped the 5/8 inch board down to just over 1/4 inch thick boards. I used #6 stainless wood screws countersunk into the shelves to screw them together. The port side shelves had some exposed screws and I used #8 bronze 3/4 inch screws there. I just thought the bronze would look better than the stainless. The shelf units are attached to the back panel with #6 3/4 inch long stainless screws run from the backside into the edge on shelf frame and shelves. I used a lot of screws and it is very securely attached.
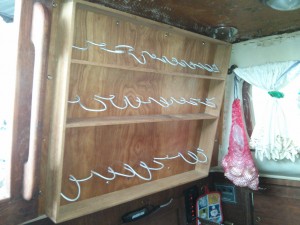
At this point I figured out the spacing of the holes I would need to drill to weave the bungee in and out of the back of the unit so that I had loops to hold the tea containers and the spice bottles and other containers. There are 48 holes drill just in the left hand side of these shelves. I tried something different at my wife’s suggestion on the right hand side where you just see four vertical runs of bungee. It is working so far but we will have to see how it does under way bouncing around. The left hand side there will be no problem with, but it was much much more labour intensive to do. Between the port and starboard shelves I used in excess of 60 ft of bungee cord. I routed and or sanded the outer facing edges of all the shelves and gave a good sanding to the shelves and frame. I have not treated the teak with anything yet but will probably use some tung oil on them before long.
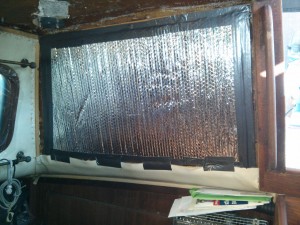
Starboard side with reflectix taped into place and headliner held up at bottom ready to be screwed down under the wood panel.
One of the goals of this project was to upgrade the insulation. The old headliner was vinyl with an air gap between it in the overhead and on the sides of the hull some 1/4 inch thick foam.. It actually worked quite well for what it was. We decided to use 1/4 inch thick Reflectix insulation. I cut it to the exact inside dimensions of the lath strips and then taped it down inside that area all around the perimeter so that it is sealed air tight. I just used a high grade duct tape to do this with. I then pulled up the headliner that we didn’t cut out and taped it up so that when we screw the panel down, it will secure the headliner between the panel and the bottom piece of lath.
Here is the finished unit mounted in place.
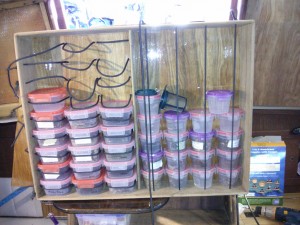
Tea containers in place. You can see the gloss of the epoxy coat on the panel behind the tea containers.
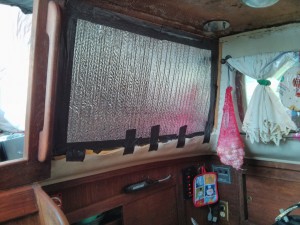
Portside with reflectix insulation taped into place and vinyl headliner pulled up so that when the shelf unit and panel are screwed down it will go through the vinyl headliner and hold it in place at the bottom.
Portside reflectix in place.
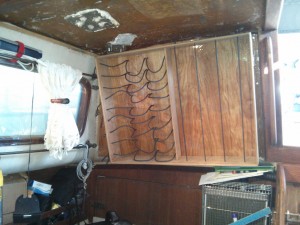
Portside spice rack and panel mounted. Again you can see how the bungees are woven through the back panel. I did it differently on each panel. Starboard on the tea shelf the bungee holes are side by side. Because of the design of the containers I had room to do that and it holds them more securely. However on portside for the spice rack the bungee holes are one above the other. Most of the spice bottles are straight up and down in design and it took up less space between them to run the bungee back and forth through the back panel this way..
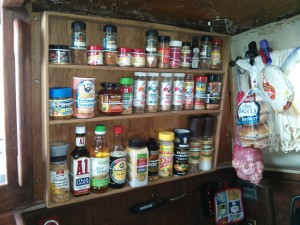
Here you can see the spice rack with bottles, jars and containers of spices in place. This shelf has a depth of 2.5 inches. I sized it according to the largest diameter container that I commonly would have on it. The starboard side tea rack is 4 1/4 inches in depth to match the containers I use for storing tea. If you click on the image and look at the full size image, you will see the screws and washers I used to attach the panel to the wood lath strips behind it. I again used #6 3/4 inch stainless screws and matching stainless finishing washers to give a nice appearance to the exposed screws.
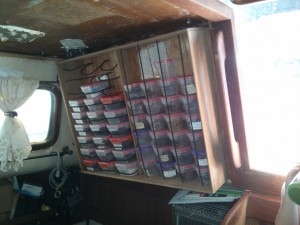
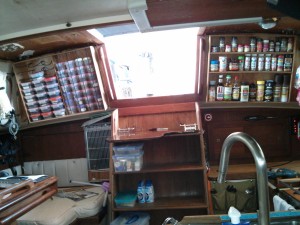
Just to give you an idea of how the finished shelves with stuff on them looks. As you can tell we haven’t finished replacing the headliner in the overhead just in front of the shelves so please pardon that part of it. Soon there will be drop down bins built into those areas both port and starboard for more spice storage and misc other things.
We were worried how theses shelves would look and function, but I was determined to try it out as we really didn’t have a better solution we could think of. I wasn’t sure how they would look with shelves leaning forward and angle down at the outsides as they follow the incline of the back cabin face and deck camber. However once they were up the give a nice symmetrical appearance, that I at least like. They are a bit busy with all the containers of tea and spices exposed. However I already have in mind another project to put some doors made out of dry erase white board material over them. This would lighten the area back up and also give us a place to create shopping lists, or note down navigation details until they can be transferred to the log book. All in all I am very please with this project. My total cost was somewhere in the neighbourhood of about 100 dollars for both sides for the materials and I have about 15 hours of labour in it spanning a few weeks between ripping out the old headliner, templating, cutting and treating all the materials used and then installing it all.

Recent Comments