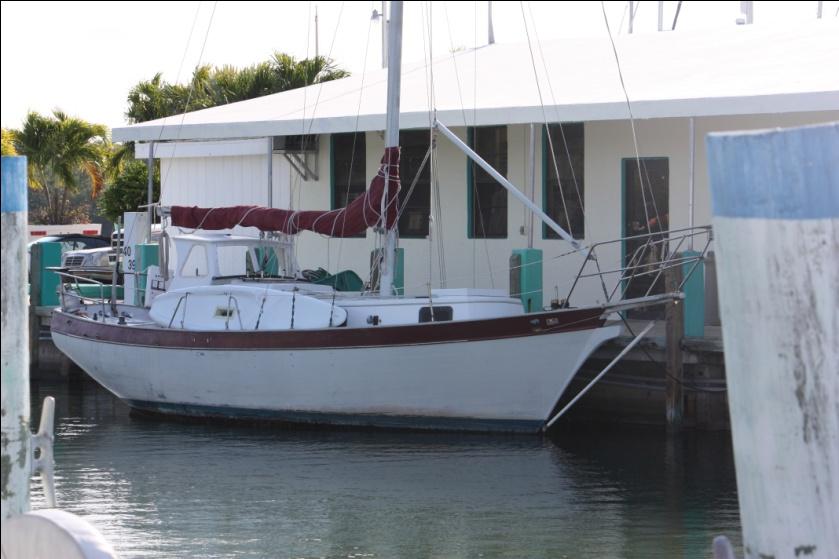
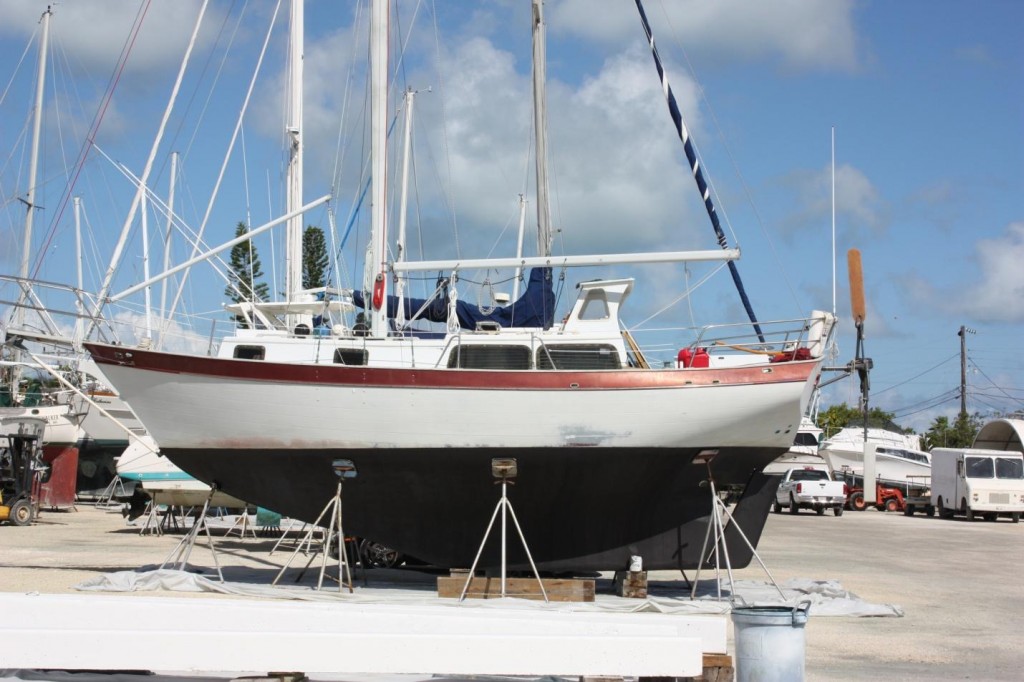
We purchased Saffanah with two purposes in mind. We needed a blue water sailboat small enough to be single handed while sailing the Atlantic circle, and secondly we wanted a beamy live-aboard, shallow draft boat that could motor the 1800 miles of European canals and rivers we wanted to explore. Further, we needed to stick to a tight budget that limited options, avoided purchasing stuff from a catalogue, and required us to do most of the work “for free”. A new Island Packet was out of the question.
So with the right price and a solid hull, a well worn and needy Saffanah became the hole in the water in which we have invested a bunch of money and few months of spare time. Some of the more substantial projects have included:
- Reconstruction of the hull underbody including replacing the cutlass bearing, reworking the rudder post and brass bearing plates, replacing all through hulls, and completing a handful of hull bottom painting related projects.
- Overhaul of the 30 HP Perkins Parama diesel engine including injectors, water pump, exhaust
- Installation of pressure water, hot water and reverse cycle heating and a/c system
- Replacement of every hose on the boat – fuel, engine cooling and exhaust, fresh water, cockpit scupper drains, pressure water systems.
- Reconfiguration of the fuel tanks and installation of a continuous fuel filtration system.
- Replacement of all standing and running rigging including re-wiring the mast head navigational lights.
- Replacement of all sails and the addition of a cruising spinnaker, lazy jacks and Mackpak, and storm sails and the installation of new spreaders.
- Reconstruction of anchor platform, Sampson posts, bow sprit, windlass and the addition of various cleats and attachments to accommodate mooring anchors, sea anchors and drogues. (Also included the construction fender boards to protect Saffanah from lock walls and Med moorings).
- Installation of a redundant marine electronics marine network incorporating new chart plotter, AIS, DSC VHF, SSB/weather fax, redundant sounders, and a few other cockpit night sailing accommodations
- Replacement of all AC electrical wiring to accommodate both American 120V and European 220 V service and the installation of a 400 AH battery bank to support a 2000 watt, 120V inverter
- Completely rewired all 12V DC service and installed solar panels to yield full energy independence in tropical climates.
- A substantial structural and cosmetic work over, including new hatches, replacement of the coach roof windows, new paint jobs on the deck and hull, and a new teak interior.
Most of the projects would only be noted by a marine surveyor but perhaps the most visible, and likely controversial project, encompassed the modifications made to the aft cockpit.
The Starting Point
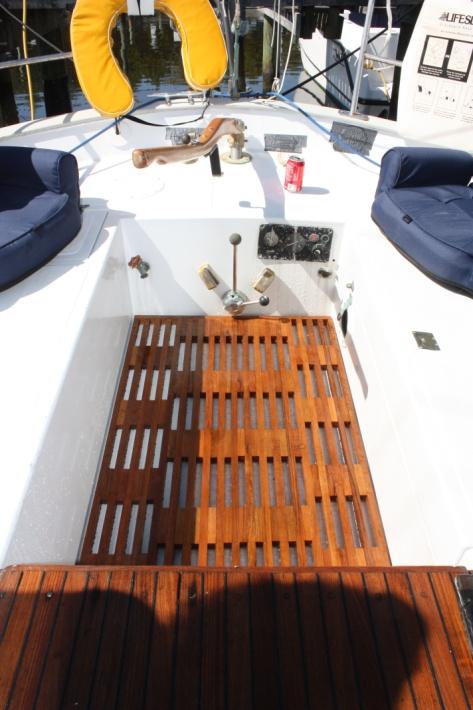
When we first found Saffanah her cockpit included a tiller, a Morse throttle and shifter, an old and worn Perkins engine control panel, a residential water spigot and a set of control cables that were so badly corroded the transmission would not engage. Once the cables were reworked to the point that Saffanah could be maneuvered, we fabricated a teak cockpit grate to keep our feet dry during Florida thunder storms, varnished the tiller and bought a couple of West Marine folding stadium seats to make the 500 mile trip from Marathon Florida to Jacksonville a little more comfortable. The overstuffed stadium chairs were a welcome addition, but they are cumbersome to stow when not in use.
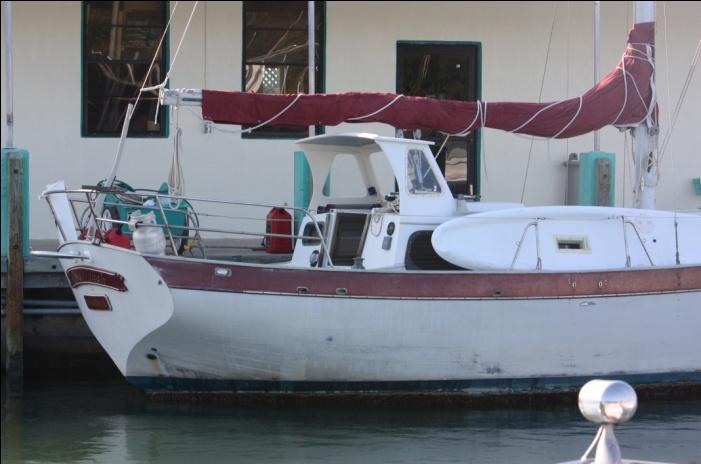
Saffanah’s a previous owner had installed a “hard dodger” that offered a few merits but which obstructed the view forward and yielded a concussion every time I came out of the companionway. After a couple hundred miles of Intracoastal Waterway motoring, the hard dodger’s merits were mitigated from a visibility perspective and quite frankly I deemed it to be “just downright non-nautical looking” following the fiftieth blow to my head. With its fate determined, the hard dodger headed to the boat-parts bone-yard just as soon as I docked in Jacksonville.
The concept of a tiller was acceptable to me since I had sailed many miles on a West Sail 32, and “Betty,” my old Aries wind vane, favored a tiller. But the combination of the uncomfortable cockpit, the view-obstructing, head banging hard dodger, and more than “just a little inconvenient” location of the Morse engine controls relative to the tiller when attempting to back into a Mediterranean mooring set my mind in the direction of a pedestal and wheel with throttle and transmission controls at eye level.
To add to the cockpit issues, there were a couple of other fundamentals which would likely be considered out of order to the mindset of a more traditional off-shore sailor.
- Keeping the Aries wind vane fixed permanently on the transom but also having permanent set of dinghy davits that would accommodate an inflatable dinghy was important.
- We wanted a radar arch to accommodate the various antennae (radar, GPS, AIS) and to offer easy access (without having to go up the mast) if a connection comes loose or to replace an antenna.
- Having everything mounted on an arch also was important since we would be motoring the better part of 1800 miles without our mast stepped on deck and the radar would not be effective on a mast laying on the deck
- A simple canvas dodger would protect us from spray but not interfere with the ability to see how the main is trimmed. We wanted to be able lean back and see the stars (the best time to sail is on a clear breezy, moonless night 500 miles off shore) without a Bimini blocking our vision
- We needed a solid support system on which the mast and booms could be secured when cruising French canals.
- The radar arch would provide a place on which to install enough solar panels for energy independence
- And, while not directly cockpit related we wanted a boom gallows just behind the mid boom traveler to ease reefing and to keep the boom in place during heavy seas.
So all in all, the most unexpected project on the-get-ready-to-go-punch list, was a redo of Saffanah’s cockpit. And like any cluttered room, Saffannah’s cockpit became a mess, one-step-at-a-time.
First step – Betty (the Aries Wind Vane)
Betty is a tilt up, 25 year-old Aries wind vane. She is definitely low maintenance and asks little as long as the wind blows. But she is a bit buxom, protruding beyond Saffanah’s transom 25 inches and, without her teak vane, her lithe figure extends 24 inches above Saffanah’s toe rail.
While Betty is heavily constructed, stern-to mooring endangers her framework. It is no easy task to remove Betty and stowing her is as cumbersome as those darn West Marine stadium chairs. So once on the transom “there ain’t no take’n her off and put’n her back”. She is no woman to mess with on a regular schedule.
Second step – a radar arch
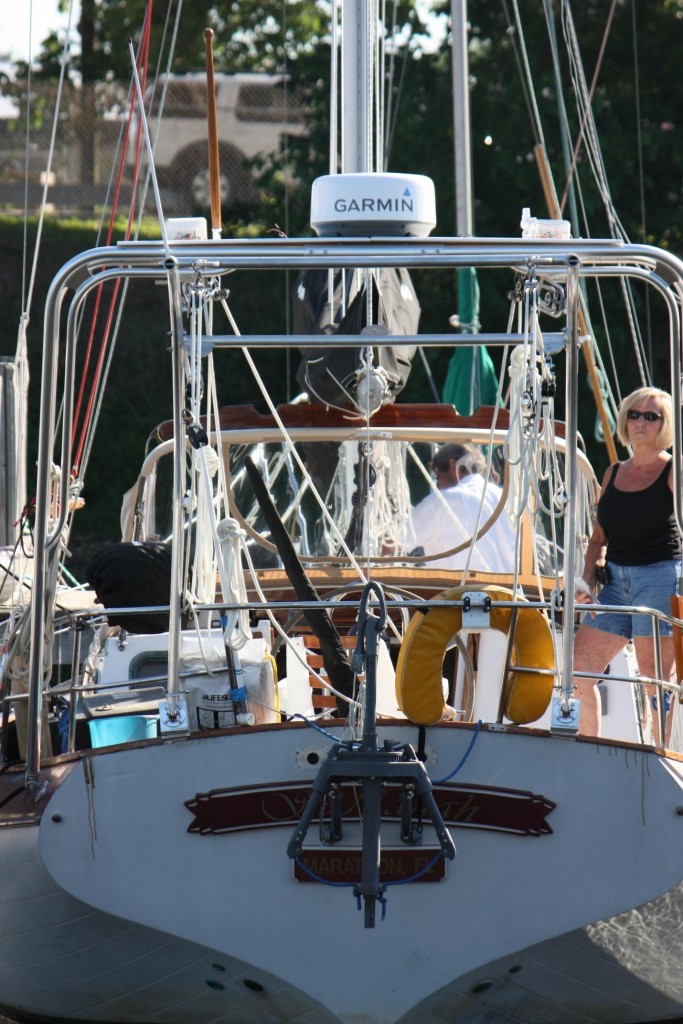
I do not really believe any radar arch can enhance the lines of a sailboat – in fact I think they tend to be on the ugly side. But they do have purpose – keeping the radar dome off the mast, accommodating the antennae farm (GPS, AIS, multiple VHF antennae) associated with modern marine navigation, and just providing a place to hang things. The nature of these things definitely offset my sense of propriety.
After speaking with a Downeast 38 owner in South Florida who had purchased an Atlantic Towers aluminum pre-fabricated radar arch, the giant box containing the new arch arrived, and a few days later was hanging over Saffanah’s transom. The “Tower-in-a-Box”, while a little awkward to handle alone, is pretty simple to install – field adjustable to accommodate various sizes of transoms, less than half dozen parts, less than 100 pounds fully installed, and fabricated from 2” heavy wall aluminum. On a relative scale of things the arch cost about one third to half the price of a stainless custom fabricated arch.
Because of its sturdy construction, the arch could be used to provide support to the set of dinghy davits I had in mind. Additionally, it could partially support Saffanah’s mast and booms when passing through the European canals. Because we had been warned that it would cost nearly $1,000 if the mast were un-stepped in Germany and transported via truck to Greece, we decided we needed to invest in a permanently installed mast/boom support structure on Saffanah that would be out of the way during the 90 or so days we expected to be on the European waterways.
Finally the arch would certainly become a home for the solar panels we planned to install.
Third step – the antennae farm
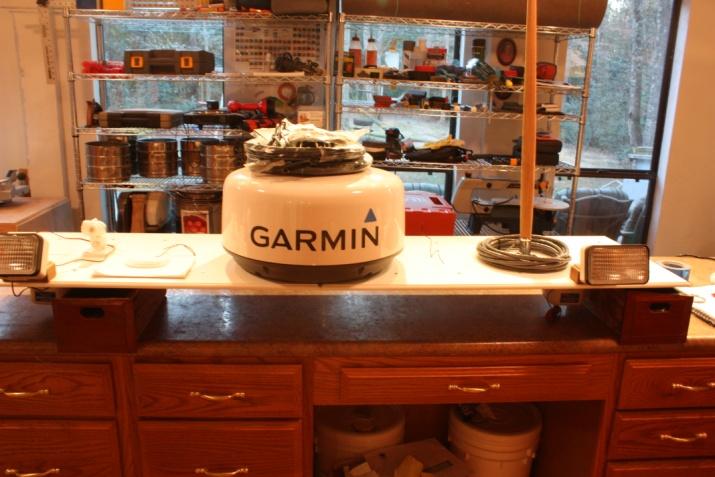
We first fabricated a teak and starboard platform on a bench where the various items bolted and prewired. Then the completed assembly was bolted to the radar arch. Stuff incorporated onto the platform included
- GPS antenna
- AIS antenna
- AIS/VHF back up antennae
- 18 inch radar dome
- Flag Staff
- Two deck lights to help when reefing at night
- A couple of red/white cockpit lights for night sailing
- A handful of U bolts to accommodate the purchases used to raise and lower the dinghy davits
- A stern navigation light and a back up anchor light
- Various cable runs for the electronic devices
- Stereo speakers and radio antenna
- VHF Hailer
- 120 V waterproof receptacle and a 12 V receptacle
The picture was taken in my shop to give some idea of the antenna platform as we began to add stuff before bolting to the radar arch
Fourth step – dinghy davits
There does not seem to be any commercially available dinghy davits that will extend far enough aft of the transom to clear a wind vane. But after spending more than a little time cramped in Saffanah’s engine compartment installing Betty, we decided removing Betty every time we wanted to hang Pee Wee from Saffanah’s stern was not to be a card in our deck.
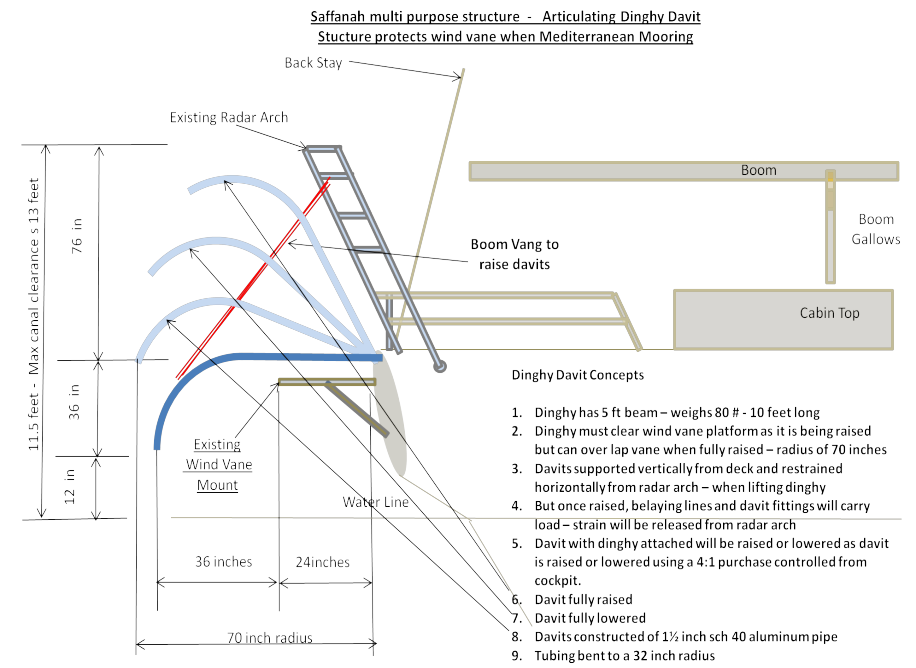
When considering a radar arch, the thought was prompted on how to use the arch to accommodate a set of dinghy davits. Traditional davits simply lift the dinghy vertically and the arch did not extend beyond Betty far enough to accommodate a simple vertical lift. To clear Betty with a five foot beam inflatable, the davits have to extend 72 inches beyond the stern. A lever arm that long would be impossible to support in even a modest chop. Additionally the weight of the davit and dinghy had to be brought closer to the stern to avoid interfering with Saffanah’s sail balance. The sketch below shows an approach I thought might work. When lifting the dinghy it would articulate the dinghy further aft to clear the vane but move back over the vane to the stern once raised.
A local metal fabrication shop rolled the schedule 40 pipe to a 32 inch radius. We purchased a set of aluminum hinges from Atlantic towers and fabricated mounting plates to support the davits when attached to Saffanah’s stern. The sketch below details the davits and hinges.
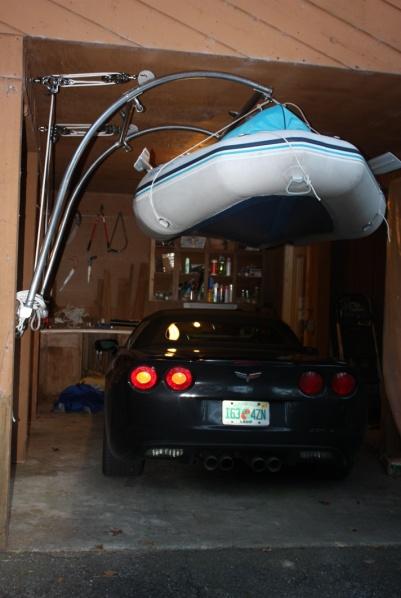
Using a couple of boom vangs, we assembled the davit arms and tested the contraption in the garage as you can see below. Once convinced the dinghy (Pee Wee), Betty, the radar tower, and the davits were compatible, we fabricated a couple of gussets to support the davits and installed them to bridge the cap rail and through bolt to the deck, of course adding to the cockpit clutter significantly.
We do not plan to support Pee Wee from the davits when making an off shore passage – Pee Wee will be deflated and stowed on deck in heavy seas. But the system does raise the dinghy well above the water line and will protect Pee Wee from being pooped should we cross a heavy wake. Also, when the davits are fully raised, Pee Wee is nearly seven feet above the waterline, and hopefully this will discourage dinghy thieves when traveling to more remote harbors.
Finally when Pee Wee is fully raised, we use a couple of lines to transfer the load from the radar arch to the deck.
Fifth Step – boom gallows
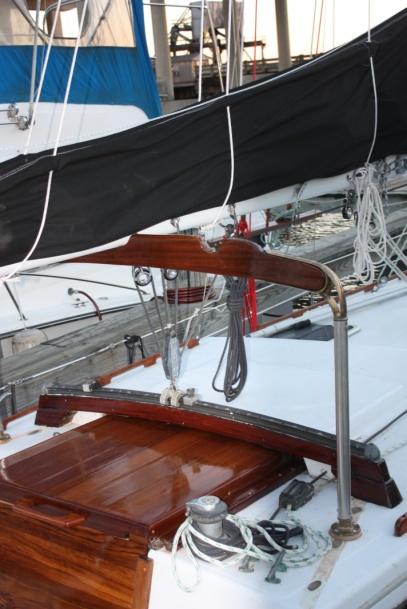
Boom gallows are definitely an asset when reefing and preventing damage to the boom when motoring in a heavy sea. Since Saffanah has mid boom sheeting, setting the boom gallows ahead of the traveler seemed logical. We found a nice piece of heart-wood teak on the internet and purchased a set of brass gallows brackets off of E bay. We wanted to use brass legs to support the gallows but the cost of brass was well outside of the budget. So we found two pieces of one inch, mill finished, 316 schedule 40 stainless steel pipe in a scrap yard, polished the pieces and the boom “got legs”. It took the better part of a day to fabricate the gallows from the teak and another couple of hours to install the legs, through bolting them onto the cabin top.
As you can see, while the boom gallows really does not contribute to the cockpit mess we have been creating, it does add just one more thing to the deck. By the way see the new hatch boards and companion way cover that we fabricated?
Sixth step – addition of pedestal steering and a helmsman seat
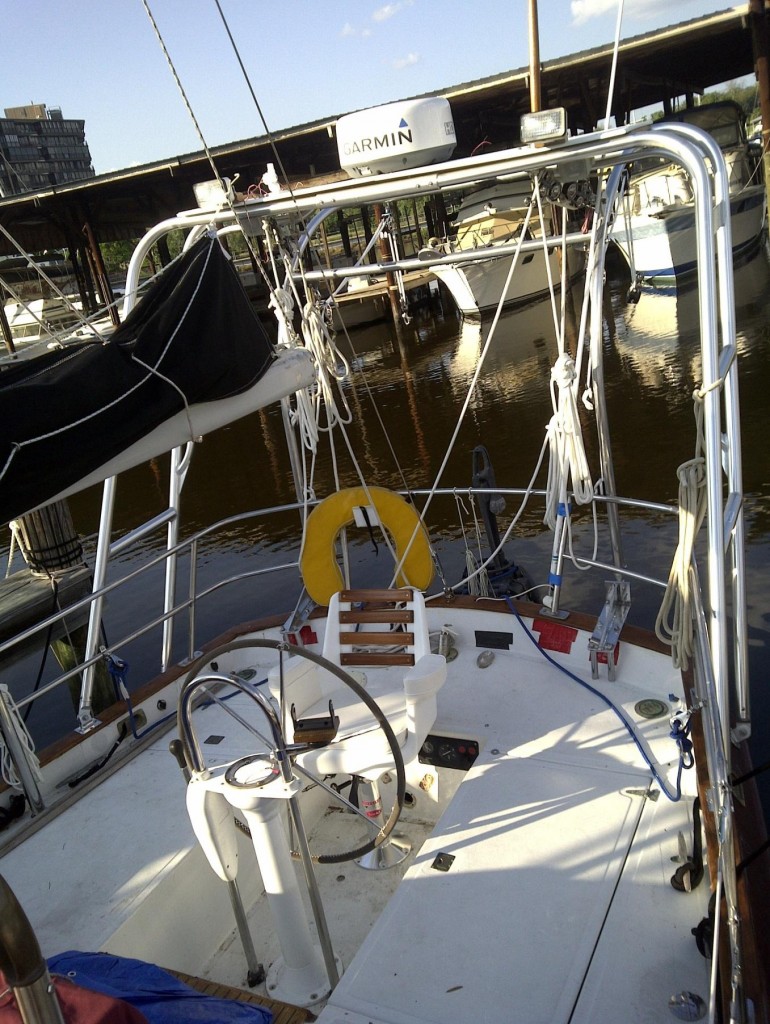
As mentioned before, I like steering with a tiller and the feel it gives when crossing currents or trimming sails. But sitting at a tiller, especially in the DE 32 cockpit, for extended hours was not very comfortable – even with the West marine over stuffed stadium chairs. A few weeks ago, a used Lewmar steering pedestal and wheel complete with rack and pinion attachments appeared on E-bay. It included a shifter mounted on the pedestal guard, replacing the Morse shifter mechanism that was so inconveniently installed aft in the cockpit foot well. The pedestal, wheel, guard, shifter and cables and a nice Plastimo binnacle compass arrived a couple of days later.
When I measured the push rod connecting the steering gear to the rudder shaft, I believed the steering pedestal would be located about 18 inches forward of the aft cockpit seat. I was so excited about the addition of a wheel, I went to work immediately on drilling the rudder post and installing the push rod – a very tedious and time consuming process.
It was only when the final holes were drilled in the deck did I realize the wheel was a good 30 inches forward of the end of the cock pit – unless we added a sixteen inches to our arms, we were not going to be able to sit on the aft cockpit deck and steer the boat at the same time. For a few moments I yelled at myself for rushing and not checking my measurements – why did I not take my time?
But the deed was done and upon reflection the result ended up better than planned. If the tiller was shortened four inches it would clear the pedestal and wheel and we could have a tiller or wheel anytime we wished! And, there is now enough room in the cockpit foot well to install a traditional power boat helmsman seat with a back rest! So when at sea and Betty is the helmsman, the helmsman seat can be removed from its pedestal, and Betty can manage the shortened tiller. But when motoring, the tiller out can be lifted of the way, the helmsman seat placed back on its pedestal and we can sit back (or stand up), just like a power boater, and enjoy the French country side.
Further the seat swivels and slides forward and aft, so we can hang a pole off the stern and who knows what we can haul in since the helmsman seat is really listed as a fighting chair in the West Marine catalog.
Hopefully the last steps to a messed up cockpit
Getting the outboard on an off the dinghy was addressed with the installation of a stainless off-the-shelf-motor-lift with purchase which also doubles for lifting groceries and laundry out of or into the dinghy and into or out of the cockpit. We added a small Magma grill to the newly installed cockpit clutter along with our horseshoe ring and life sling and man overboard pole.
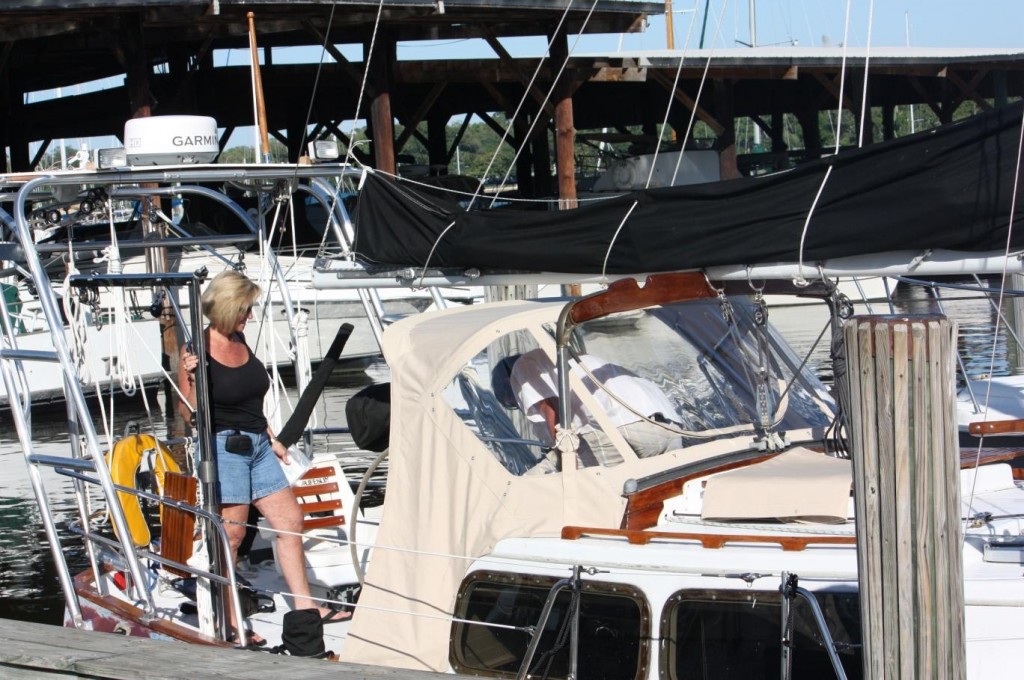
Saffanah’s old hard dodger is now on a little oyster boat that fishes in the St Johns river, and a new canvas dodger has been installed on Saffanah – completing the effort to clutter up the Saffanah’s cockpit. You can see the canvas covered tiller in the picture.
Draw your own conclusions– but have we not demonstrated how to mess up a perfectly good Downeast 32 cockpit?


Hi Bill,
I was curious how you mounted the main-sheet traveler and risers. Looks great! I know Jason Rose mounted his aft of the first cabin top stringer leaving less room for a dodger. How did you deal with yours? Any pics or tips you could provide would be invaluable.
Thanks-
Tim
I mounted the traveler arch over the stringers themselves, Wiil take a photo this weekend
I’d be grateful! Thanks.
-Tim