 Topic RSS
It seems that members are having issues uploading images so I thought that I would create a little tutorial on it. The upload image feature is not as straight forward as I would have liked. Hopefully this will help.
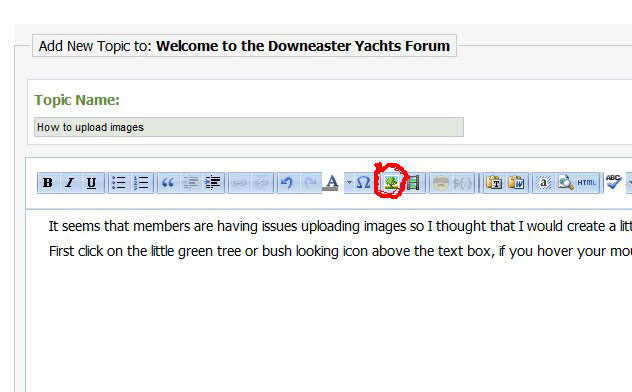
First click on the little green tree or bush looking icon above the text box, if you hover your mouse over it it will say "Insert/Edit Image" The below image shows the button circled in red.
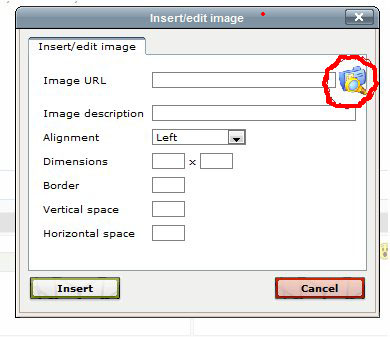
This will open up a dialog that looks like this.
You can at this point put a url in the image box or click on the icon to the box's right to upload an image. See icon circled in red
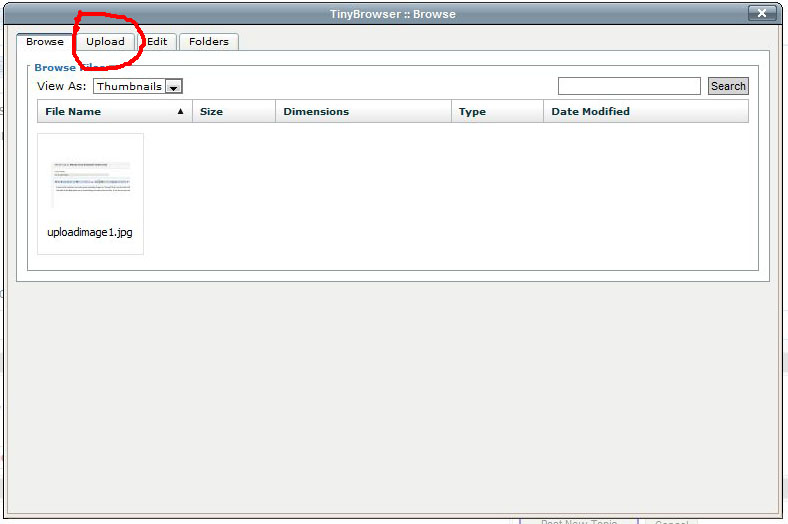
A new window will pop up with one of the tabs labeled upload. See below image. Click on the upload tab.
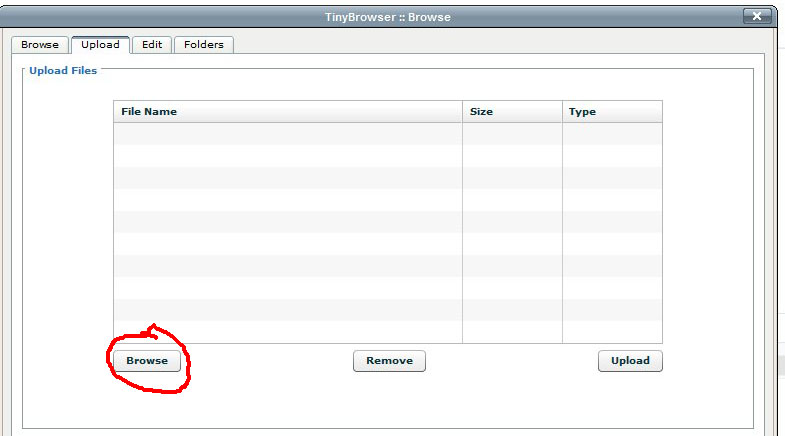
The upload screen has a browse button shown below that you can click on to browse for images on your computer. See below illustration.
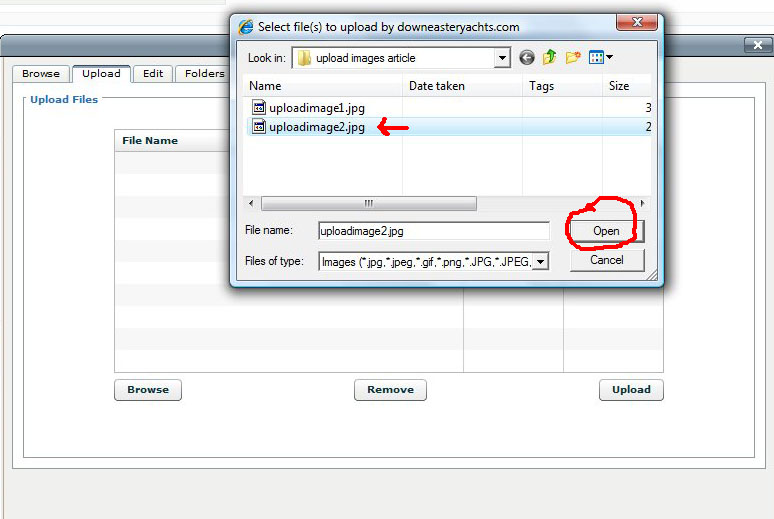
Now you get the selection box on your computer. You can select an individual file or multiple image files to upload at the same time.
See below illustration.
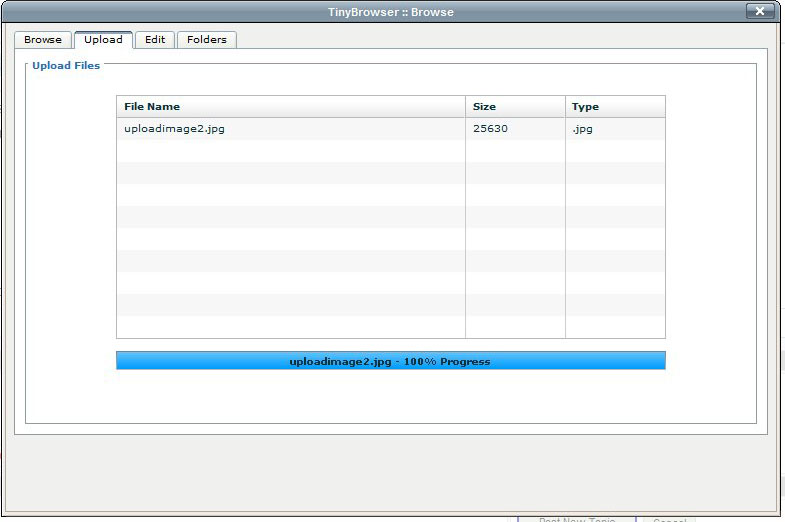
After selecting your images and clicking on open you then get a window that shows you a progress dialog for the images that are uploading. See below illustration
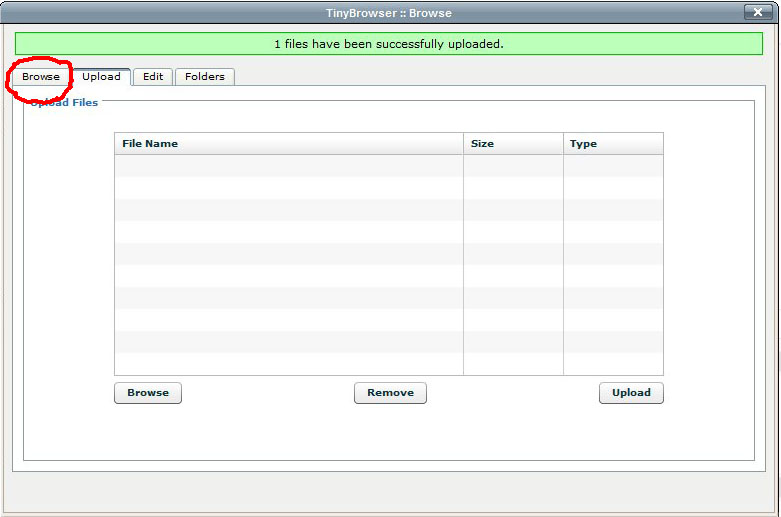
once the images are uploaded you will not be able to see them here, you need to click on the browse tab at the top of the window. see illustration below. Don't confuse the browse button at the bottom of the screen that you use to browse for images on your computer to upload the images with.
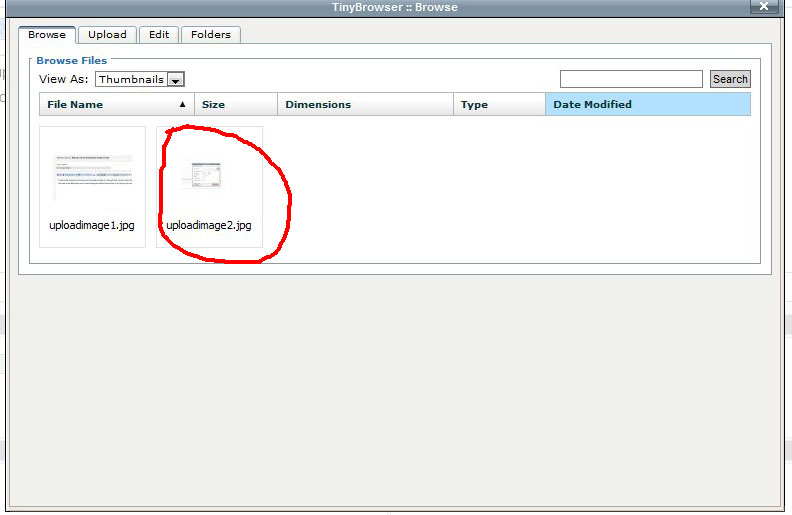
You use this screen to select images that have already been uploaded or that you just uploaded. To select an image you just click your mouse on the desired image and it will automatically select it and take you back to the original insert screen. See the below two illustrations.
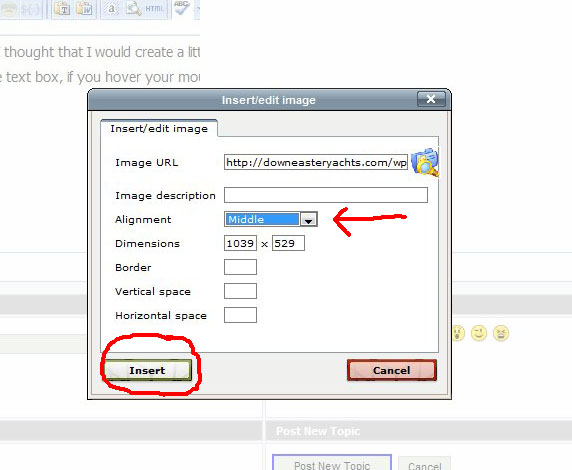
You can now click on insert and the image will be placed in your post. Notice above the red arrow pointing at the alignment selection box. By default this is set at align left. however I have found that this gives very strange layout results and that by changing it to middle that it is much more predictable. Feel free to play with it as you like though.
You will notice that there are a couple of other tabs in the upload images dialogs. Edit and folders. Edit allows you to delete images you have uploaded and folders allows you to create a folder and then upload the images or move images into that folder to keep them organized. I recommend using the folders feature and creating a folder prior to uploading your image. Then upload the image into that folder before selecting to insert it into your post. This will over time make your life easier when uploading images. Once you have a few in there you won't have to search as hard for different images. If you move images into folders after you have inserted them into a post they will no longer show up in the post until you re-insert them. By moving them into a folder it changes the url of the image. This is why I recommend setting up the folder and uploading them to it before inserting the image into the post.
This should be the same for both FireFox and internet explorer. I have one computer that I can not upload images using FireFox but it does work with IE. All other seem to work with both. If you have problems with Either IE or FireFox then try the other browser.
I hope this helps everyone. If there are any areas of confusion still just let me know and I will re-write this or expand it as needed.
Scott Carle
ps.. I used a normal member account to create this post and upload the images so that is not an issue. It should work fine for everyone.
Most Users Ever Online: 120
Currently Online:
4 Guest(s)
Currently Browsing this Page:
1 Guest(s)
Top Posters:
Jonathan Oasis: 174
bobmcd625: 165
CAE: 150
mgav451: 143
Rick: 94
svbodhran: 84
Member Stats:
Guest Posters: 7
Members: 366
Moderators: 1
Admins: 1
Forum Stats:
Groups: 3
Forums: 13
Topics: 745
Posts: 3834
Newest Members:
tonyflor, sailordad46, Spirare, BradHartliep, Duncan, MistyDawnModerators: Patrick Twohig: 134
Administrators: Scott Carle: 1480
 Log In
 Register
 Home
Home


