 Log In
 Register
 Home
Home

 Topic RSS


 Offline


I was talking with Bill Amt of Saffanah and he is looking for advice on replacing his spreaders. Funnily enough we did this on valkyr this past spring and I wrote a brief blurb on what we did for him. I thought it would be good to post it here also and solicit other stories from those of you that have replaced your spreaders also. I'm not sure if we took pictures of valkyrs. If I find some I will post them.
We manufactured new spreaders out of teak for Valkyr last spring. The old ones had been put on only a couple years earlier by a local boat repair guy and we aren't sure what he used but it rotted out in a couple years (we think it was just plain pine).
I'm not sure if any pictures got taken but the process was pretty simple.
We bought a board of teak that we could cut the two spreaders out of. It was about 300 dollars for that one piece of teak (the highest quote was about 550). We got our measurements by just using the dimensions off the old spreaders. First we cut the board or should I say beam in half on a table saw length wise. It was then two blanks the right thickness that we could lay the old spreaders on and trace them out. We were careful to keep the grain of the wood straight from one end of the spreader to the other. The old spreaders were a bit warped so we smoothed out the lines to give the new ones a totally symmetrical aspect. After tracing out the shape of the spreaders on the top of the board we also traced out the shape on the sides as the spreaders taper in both directions. We then used the table saw to cut out the long sides from a top view as if you were looking down on the spreader while it is on the boat. We left about a 16th of an inch of wood more than the finished measurement with those cuts. We then used a Belt sander to finish shaping the spreaders and to give them their taper top to bottom. We had not cut the spreader to length yet. the board we cut them out of was a couple inches longer than needed. After giving them the correct taper from the top and sides down to the correct size we then used the fittings that go on the tip of the spreaders to get the measurements for cutting out the tip. then measuring carefully we cut the spreader to the correct length and shaped the tip to get the finished spreader. We also had to cut out and shape the butt of the spreader to fit in its socket on the mast.
I don't believe we drilled the mounting holes in the inboard side of the spreaders till it was in place on valkyr and then we drilled them to make sure we got the holes correct for both top and bottom mounting plates. We then bolted everything back together. Putting the spreaders up we assembled the tip of the spreader around the upper shrouds and used a line to carefully slide the spreader up the shroud till it was at the right level to mount it to the mast. after loosely bolting it to the mast we then took up a little slack on the upper shroud to get it just a bit tight and then made sure that the spreader was angled correctly. With the fittings on valkyr this was at 90 degrees to the mast. The spreader wouldn't really move at all once it was bolted in at the base to the mast. Technically I think that it should be at an upward angle at the tips but we put it back in the way it came out.
We did not treat the teak in any way to give it about a year to weather before varnishing it. We will be doing that this spring. It took a while using 80 grit sand paper on the belt sander to shape the taper on the spreaders and then round the edges slightly. We finish sanded the spreaders to 240 grit with a palm sander after the rough shaping was done. It was almost sensual to run your hands over the spreaders after they were finished.
It took about 4 hours to manufacture the new spreaders and then I think about an hour to an hour and a half to install them on the boat the next week.
If we need to to it again while we own the boat I will replace the spreaders with aluminum spreaders. By then it will most likely be much cheaper to buy aluminum ones than to just buy the teak. I suppose the recommended material is a good spar spruce which is strong and a bit lighter. However it was very very scary looking at the rot in the spreaders. We could flex them across our knees and start to crack them when we pulled them off. The week before we had been sailing in the ocean in 20 knots of wind with all sail up. It still gives me a shudder to think of one of them cracking and letting the rig go over if we hadn't caught it.
The spreaders had been painted white and the paint hid the extent of the damage till you actually got up there and started probing the wood on the old spreaders. The new spreaders will never be painted. Just a good teak oil. Nothing that will trap moisture under it. Teak is much stronger and more resistant to rot also. We have sailed many a day in all kind of conditions since the new spreaders were put on and I think the difference in weight between the old ones and the new ones is pretty immaterial in righting moment on the boat.

 Offline
Bill Amt in Florida used some old spreaders of mine as a template to have aluminum spreaders buit. I'm pasting in an email he sent to me providing the particulars and the name of the firm manufacturing the new spreders. He reported back a month or so ago that he was very pleased with the new spreaders. The cost was about $450.
Scott
Great! If you can take the spreaders to a UPS store and have them call me I will pay for all costs to ship them and throw in at least one beer if not a couple of six packs and a bucket of chicken for the trouble. Such and effort would help me immensely.
Once I get the spreaders I will make certain they match mine – it is my understanding from others that there was only one design for spreaders and rigging for the DE 32. Once I confirm your spreaders and mine are mates, I will take your old spreaders to Johnson Sails in St Petersburg who has agreed to make a pattern for aluminum spreaders and make that pattern available to all DE 32 owners who wish to have new Al spreaders – I will cover the cost to produce the pattern. JSI is a aluminum fabrication shop and sail loft (owned by Doyle Sails) and has already made a fully battened main, yankee and staysail for me – so they now have the various sail dimensions – I have also worked with them to replace my standing and rigging – so they too have a record of dimensions for both standing and running rigging. I have also made a similar arrangement with Mack Sails who produces a similar product to the Doyle stack pac lazy jack system. So future owners will not have to pay for measurements as long as the sail plan dimensions match the original specifications.
Once they have the pattern for aluminum spreaders made I will ship your old spreaders back to you.
Hopefully another owner who will go through refurbishing as you and I will then have a growing resource and not have to reinvent stuff time to complete their project.
For many years I owned a Westsail 32 and, from my perspective, one of the reasons W32 maintained their value was the effective owners association and the original plant manager who had a copy of every drawing used to produce the W32 – he had a business of fabricating the parts and surveying old boats before beginning the refurbishment process. As a result replacing parts and broken stuff was pretty straight forward. If we as owners can build a similar data base of information, such an effort could enhance or improve the value of our boats
Bill Amt
Offline
That is awesome.. We used teak for our spreaders as the old ones were not that old but had rotted badly in just a few years. I think the teak for ours cost about $350. To get aluminium ones for not a lot more than that is a great deal. ours are about two years old now and they are looking beautiful though.. a nice silvery sheen... However we will be staining them with Teaqua soon. We left the un-treeted to let the oils leach out of the surface just a bit so that stain would actually stick to the teak.
scott
Update: the man that invented Tequa died and his company disappeared. We really liked the product but it is no longer available.
Offline
Hi:
I replaced my spreader seven years ago with aluminum ones that I had fabricated by the Custom Spar Shop in St. Petersburg, FL. . Price then was $350. They seem a little bulky and add to weight aloft but are pretty much bulit proof. When I changed the spreaders I noted that the mounting holes on the tangs were elongated and put them on my list for repair. Got aroound to the fix this past winter.
I tried to remove the whole assembly but the large bolt that holds the lower shroud tangs was frozen pretty solid - I also figured that I would snap off the 1/4 inch SS bolts that held the contoured plates to the mast.
My initial impulse was then to have the holes filled up by a welder and then re-drill - however, after some consideration I opted to build sister plates of 5/16 aluminum and epoxy the plates to the existing tangs top and bottom - then drill out and rebolt. My reasoning was that the welding might alter the metal - possibly make it more brittle.
I used a new west epoxy product that had less strength but more flex and acid etched everything before epoxying. Looks OK from the deck so far - only concern now is that the alloys are compatable and I don't get any corrison. I believe that the elongation was due to the poor design of the original wood spreaders which had alum. plates over spruce which moved around too much.
Best Regards All
Offline
I was poking through my Valkyr pictures and found the ones of the old spreaders that we replaced and of constructing the new ones.
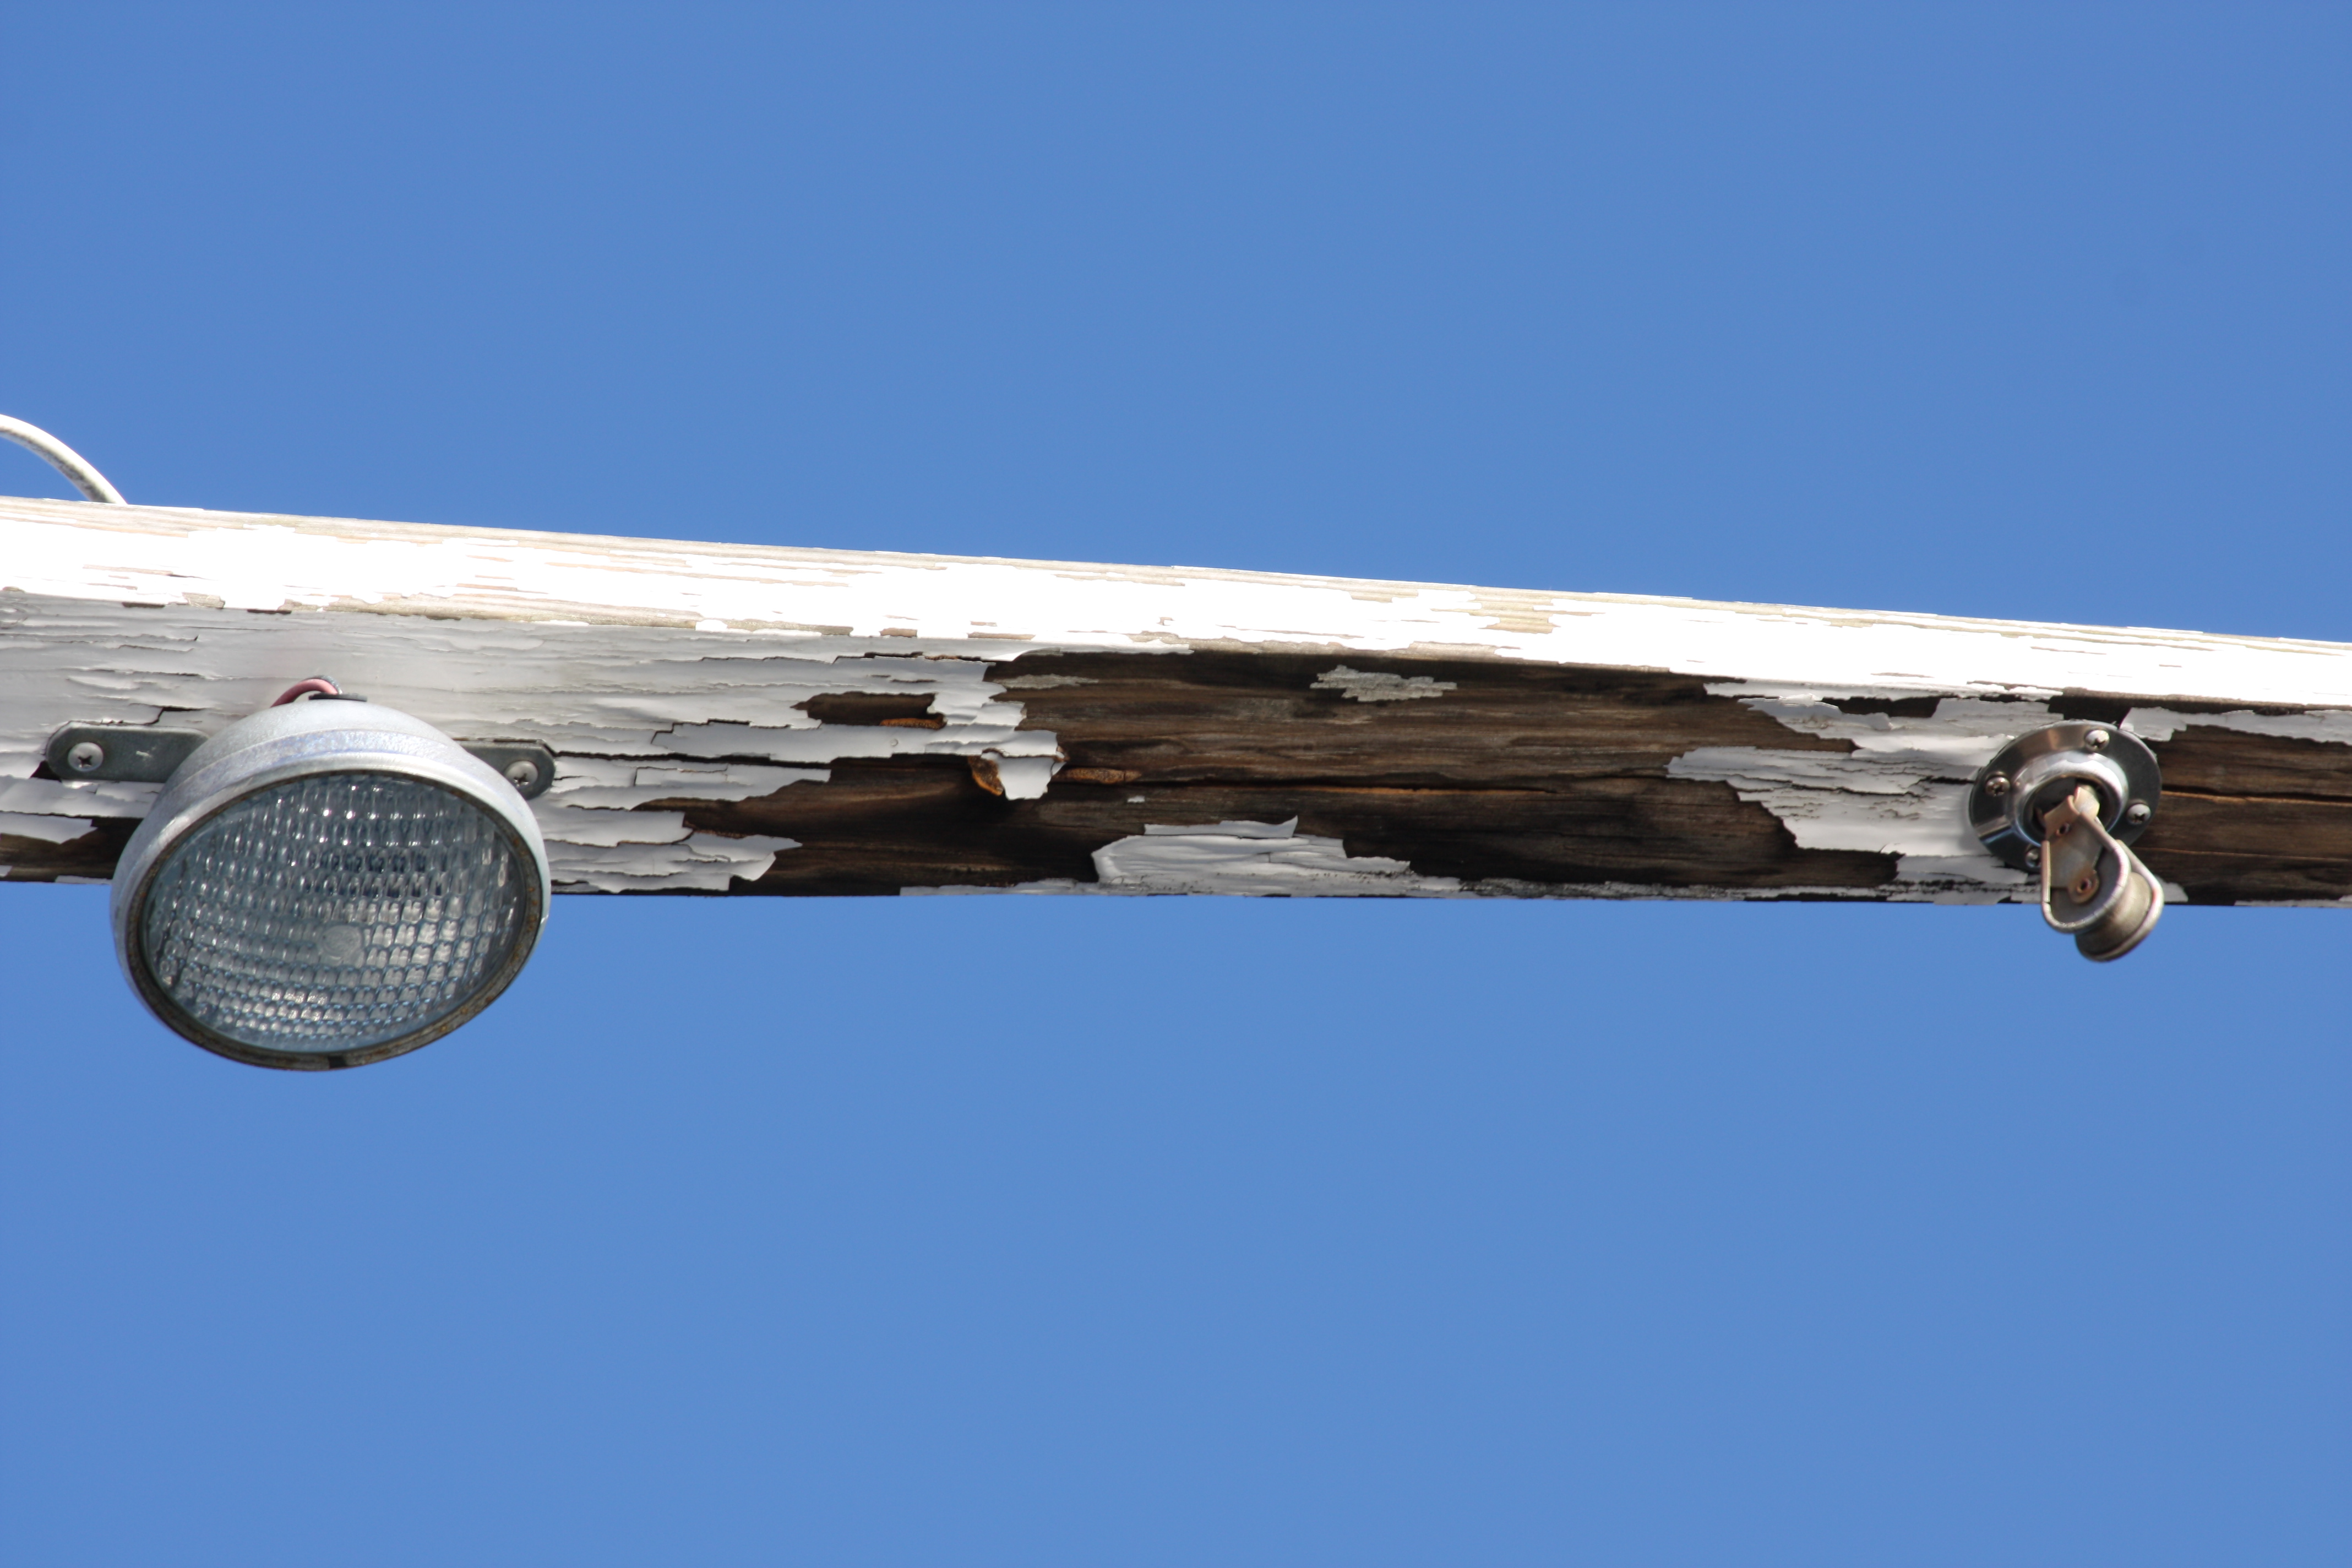
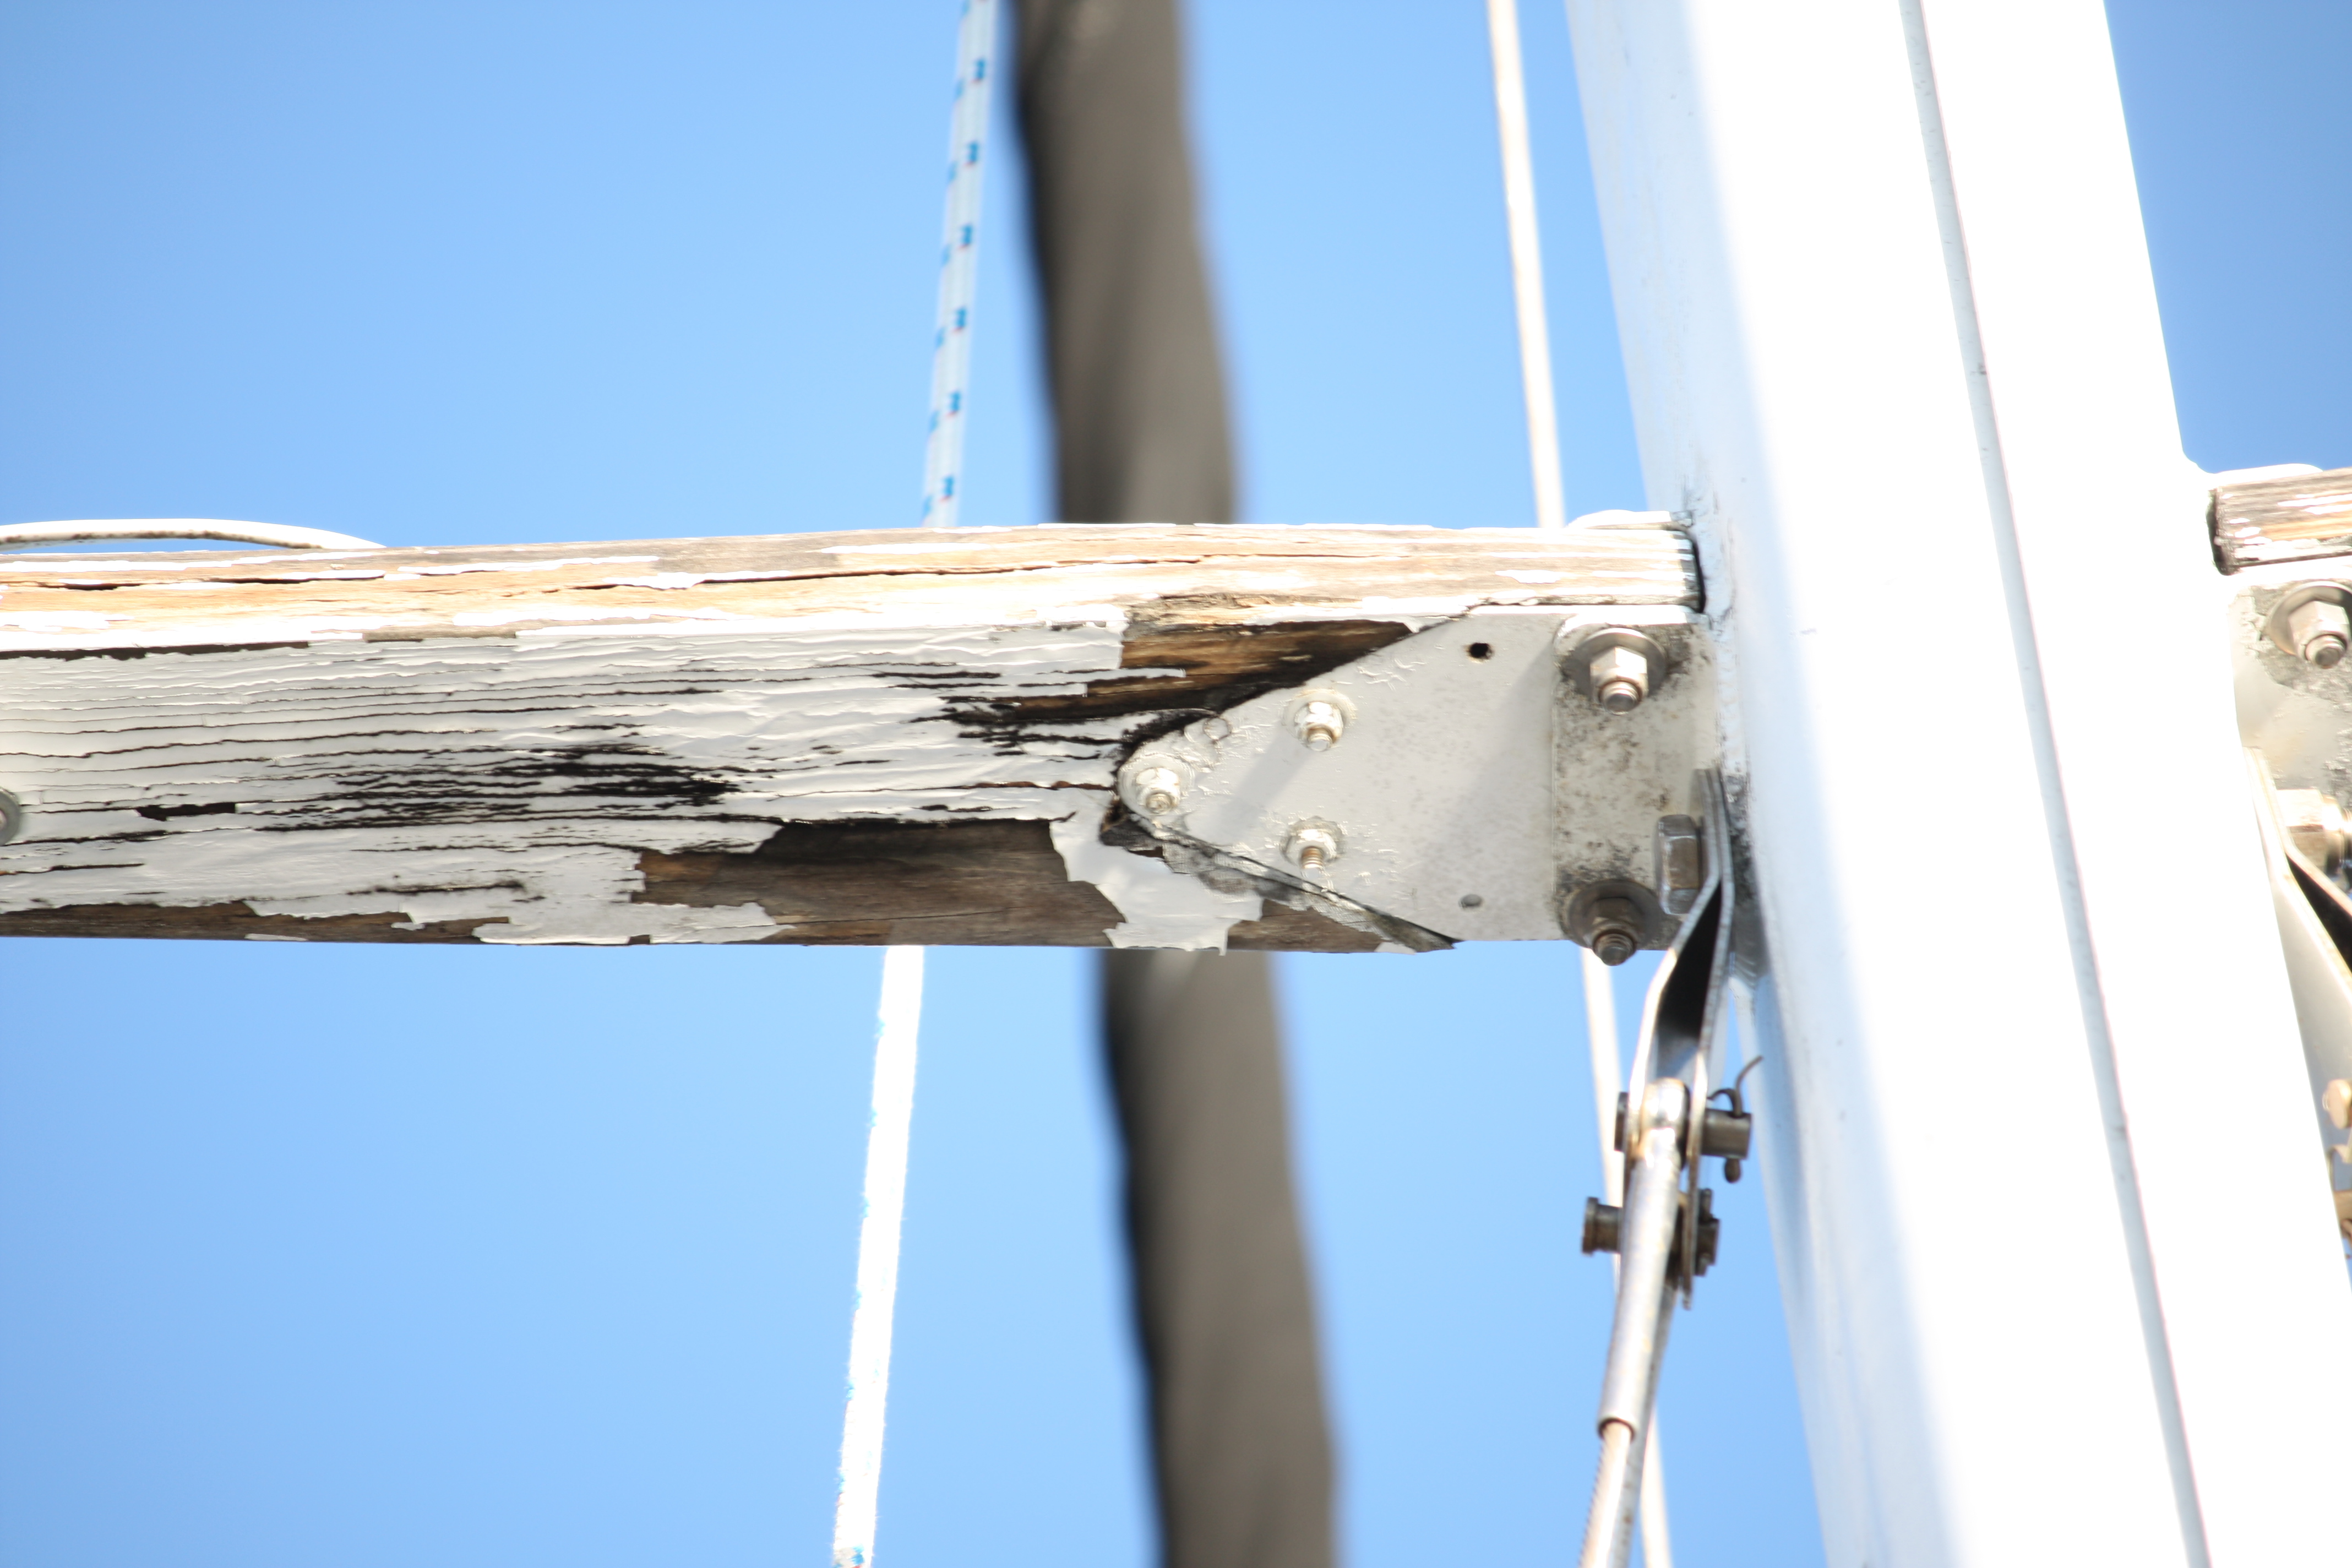
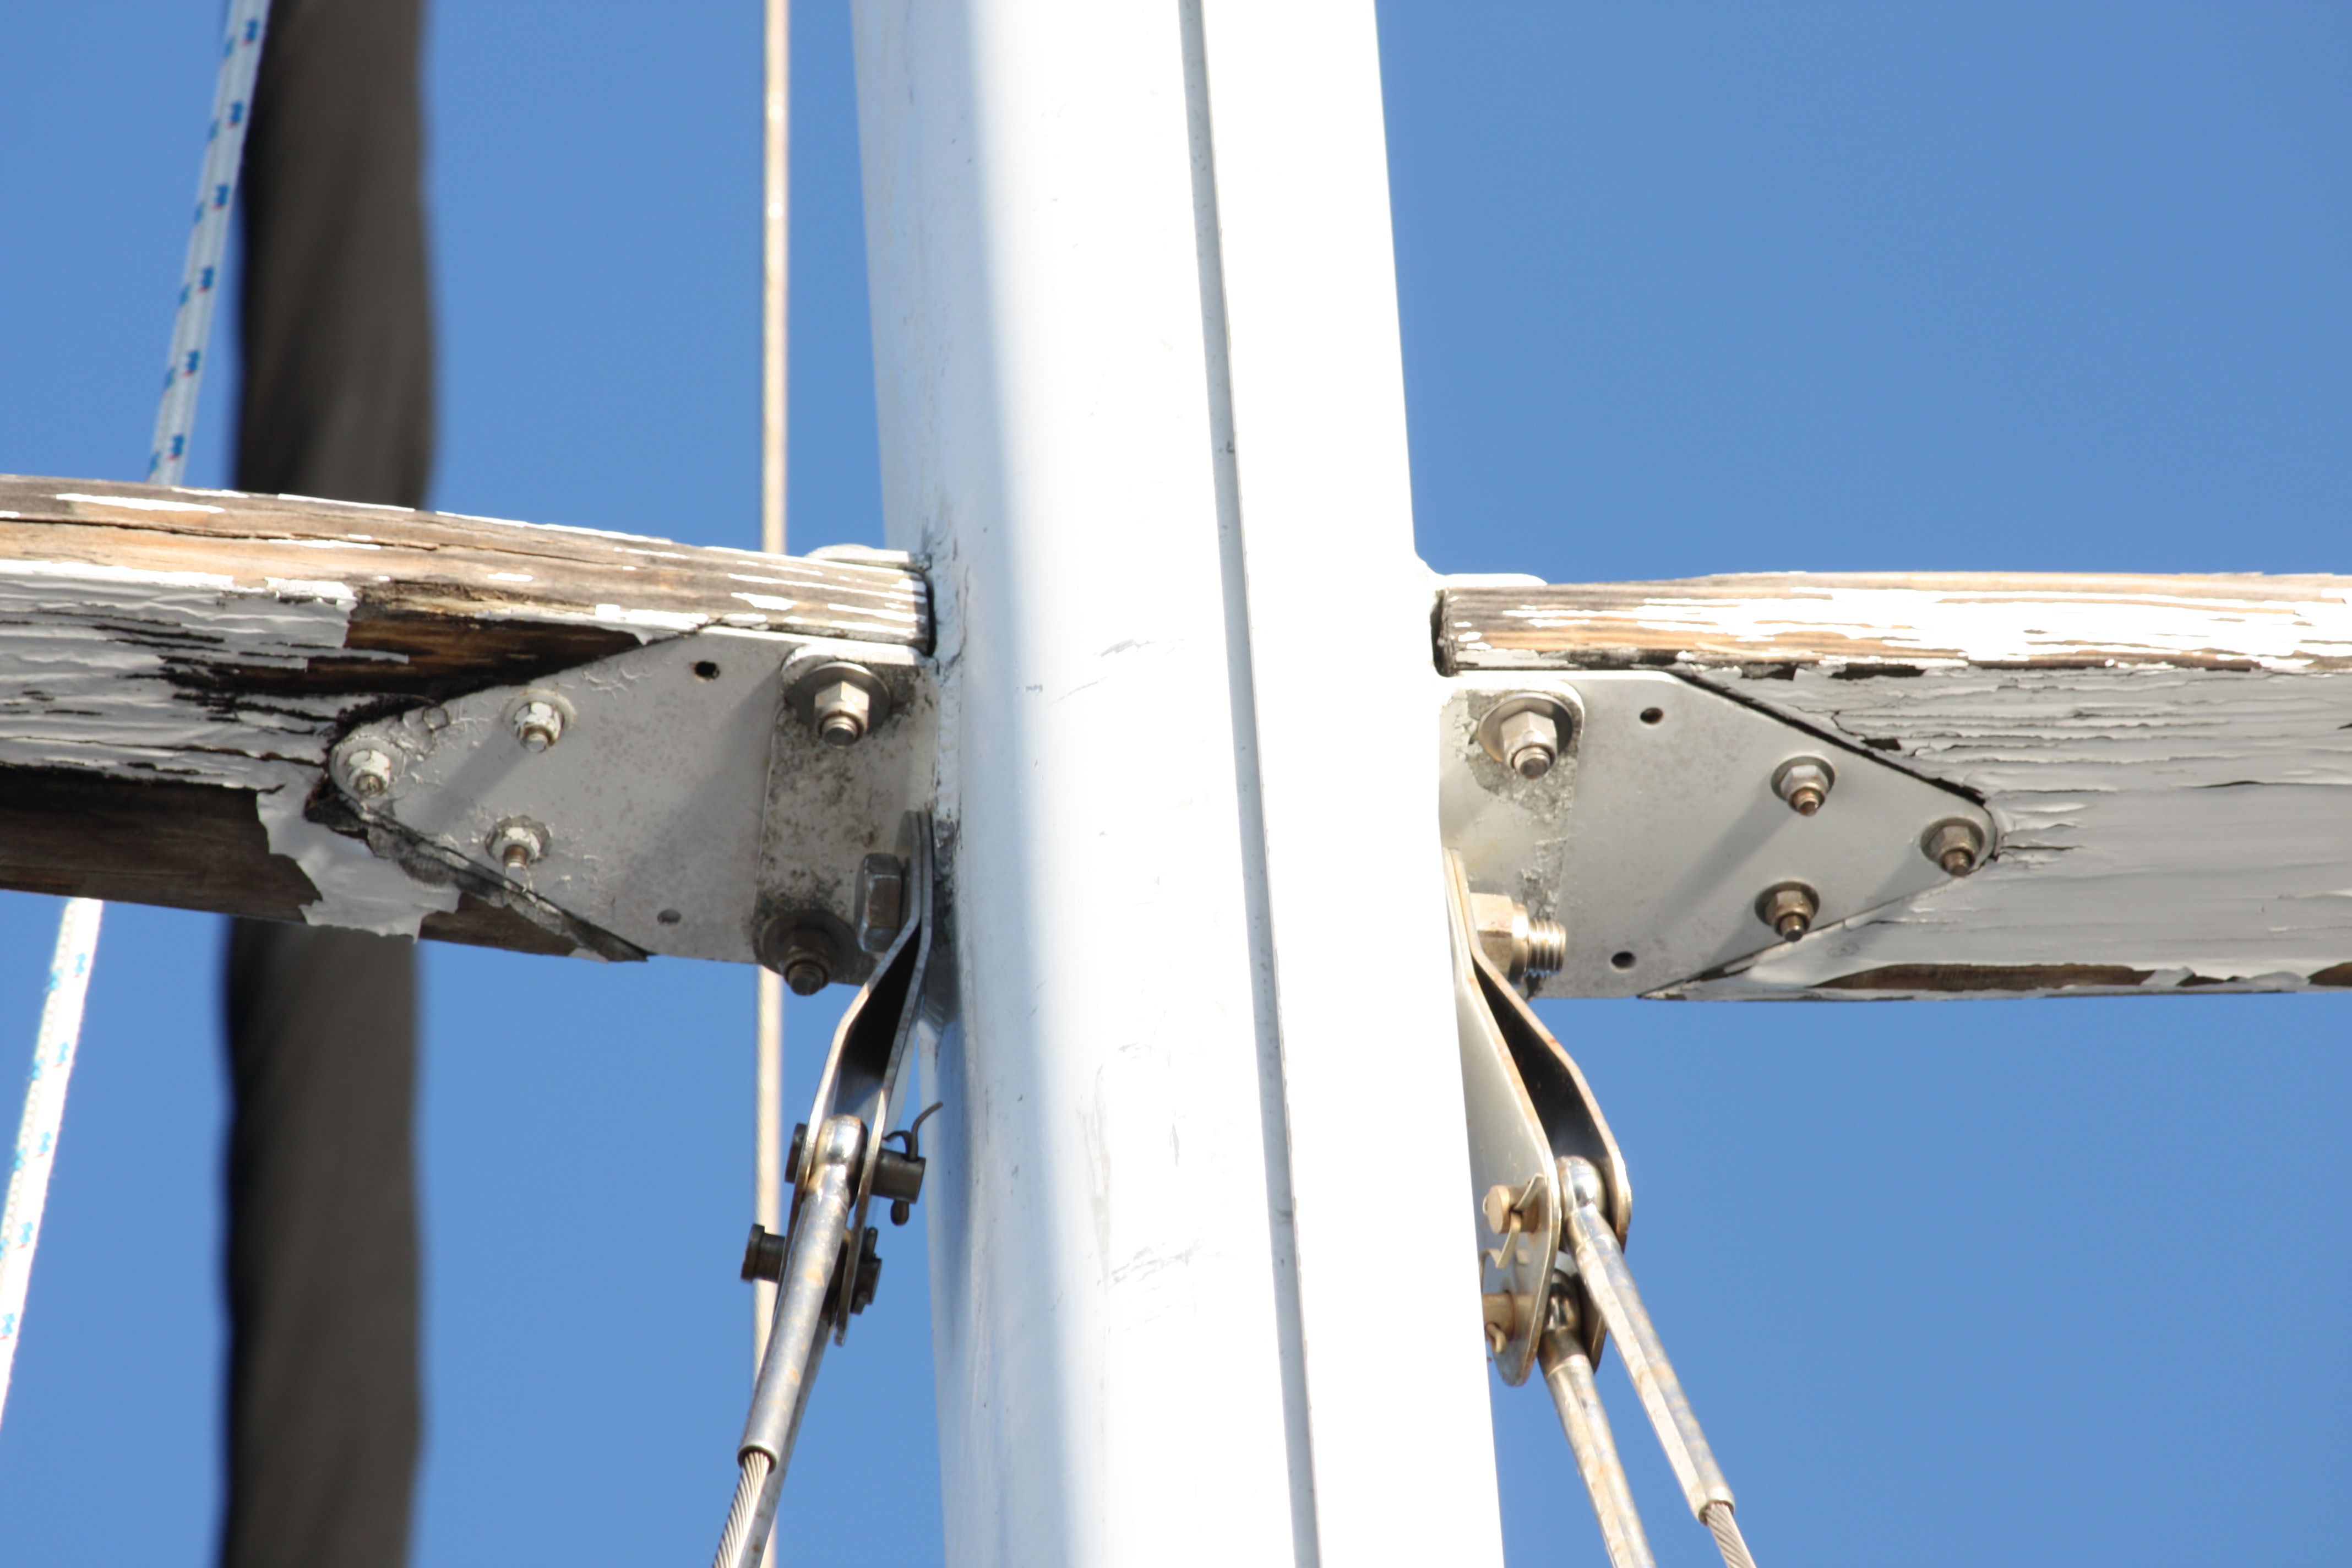
As you can see the old ones were pretty scary. Supposedly these spreaders as you see them here were only two years old. They installed about 1 year prior to the owner before me buying the boat. my thought is that either it wasn't done or the wood was totally the wrong kind of wood.. When we took them down it looked like common untreated pine to me, but im not great at identifying woods. As you can see they are very badly split but what isn't totally obvious is that they are rotting in a lot of places and the wood just punky.


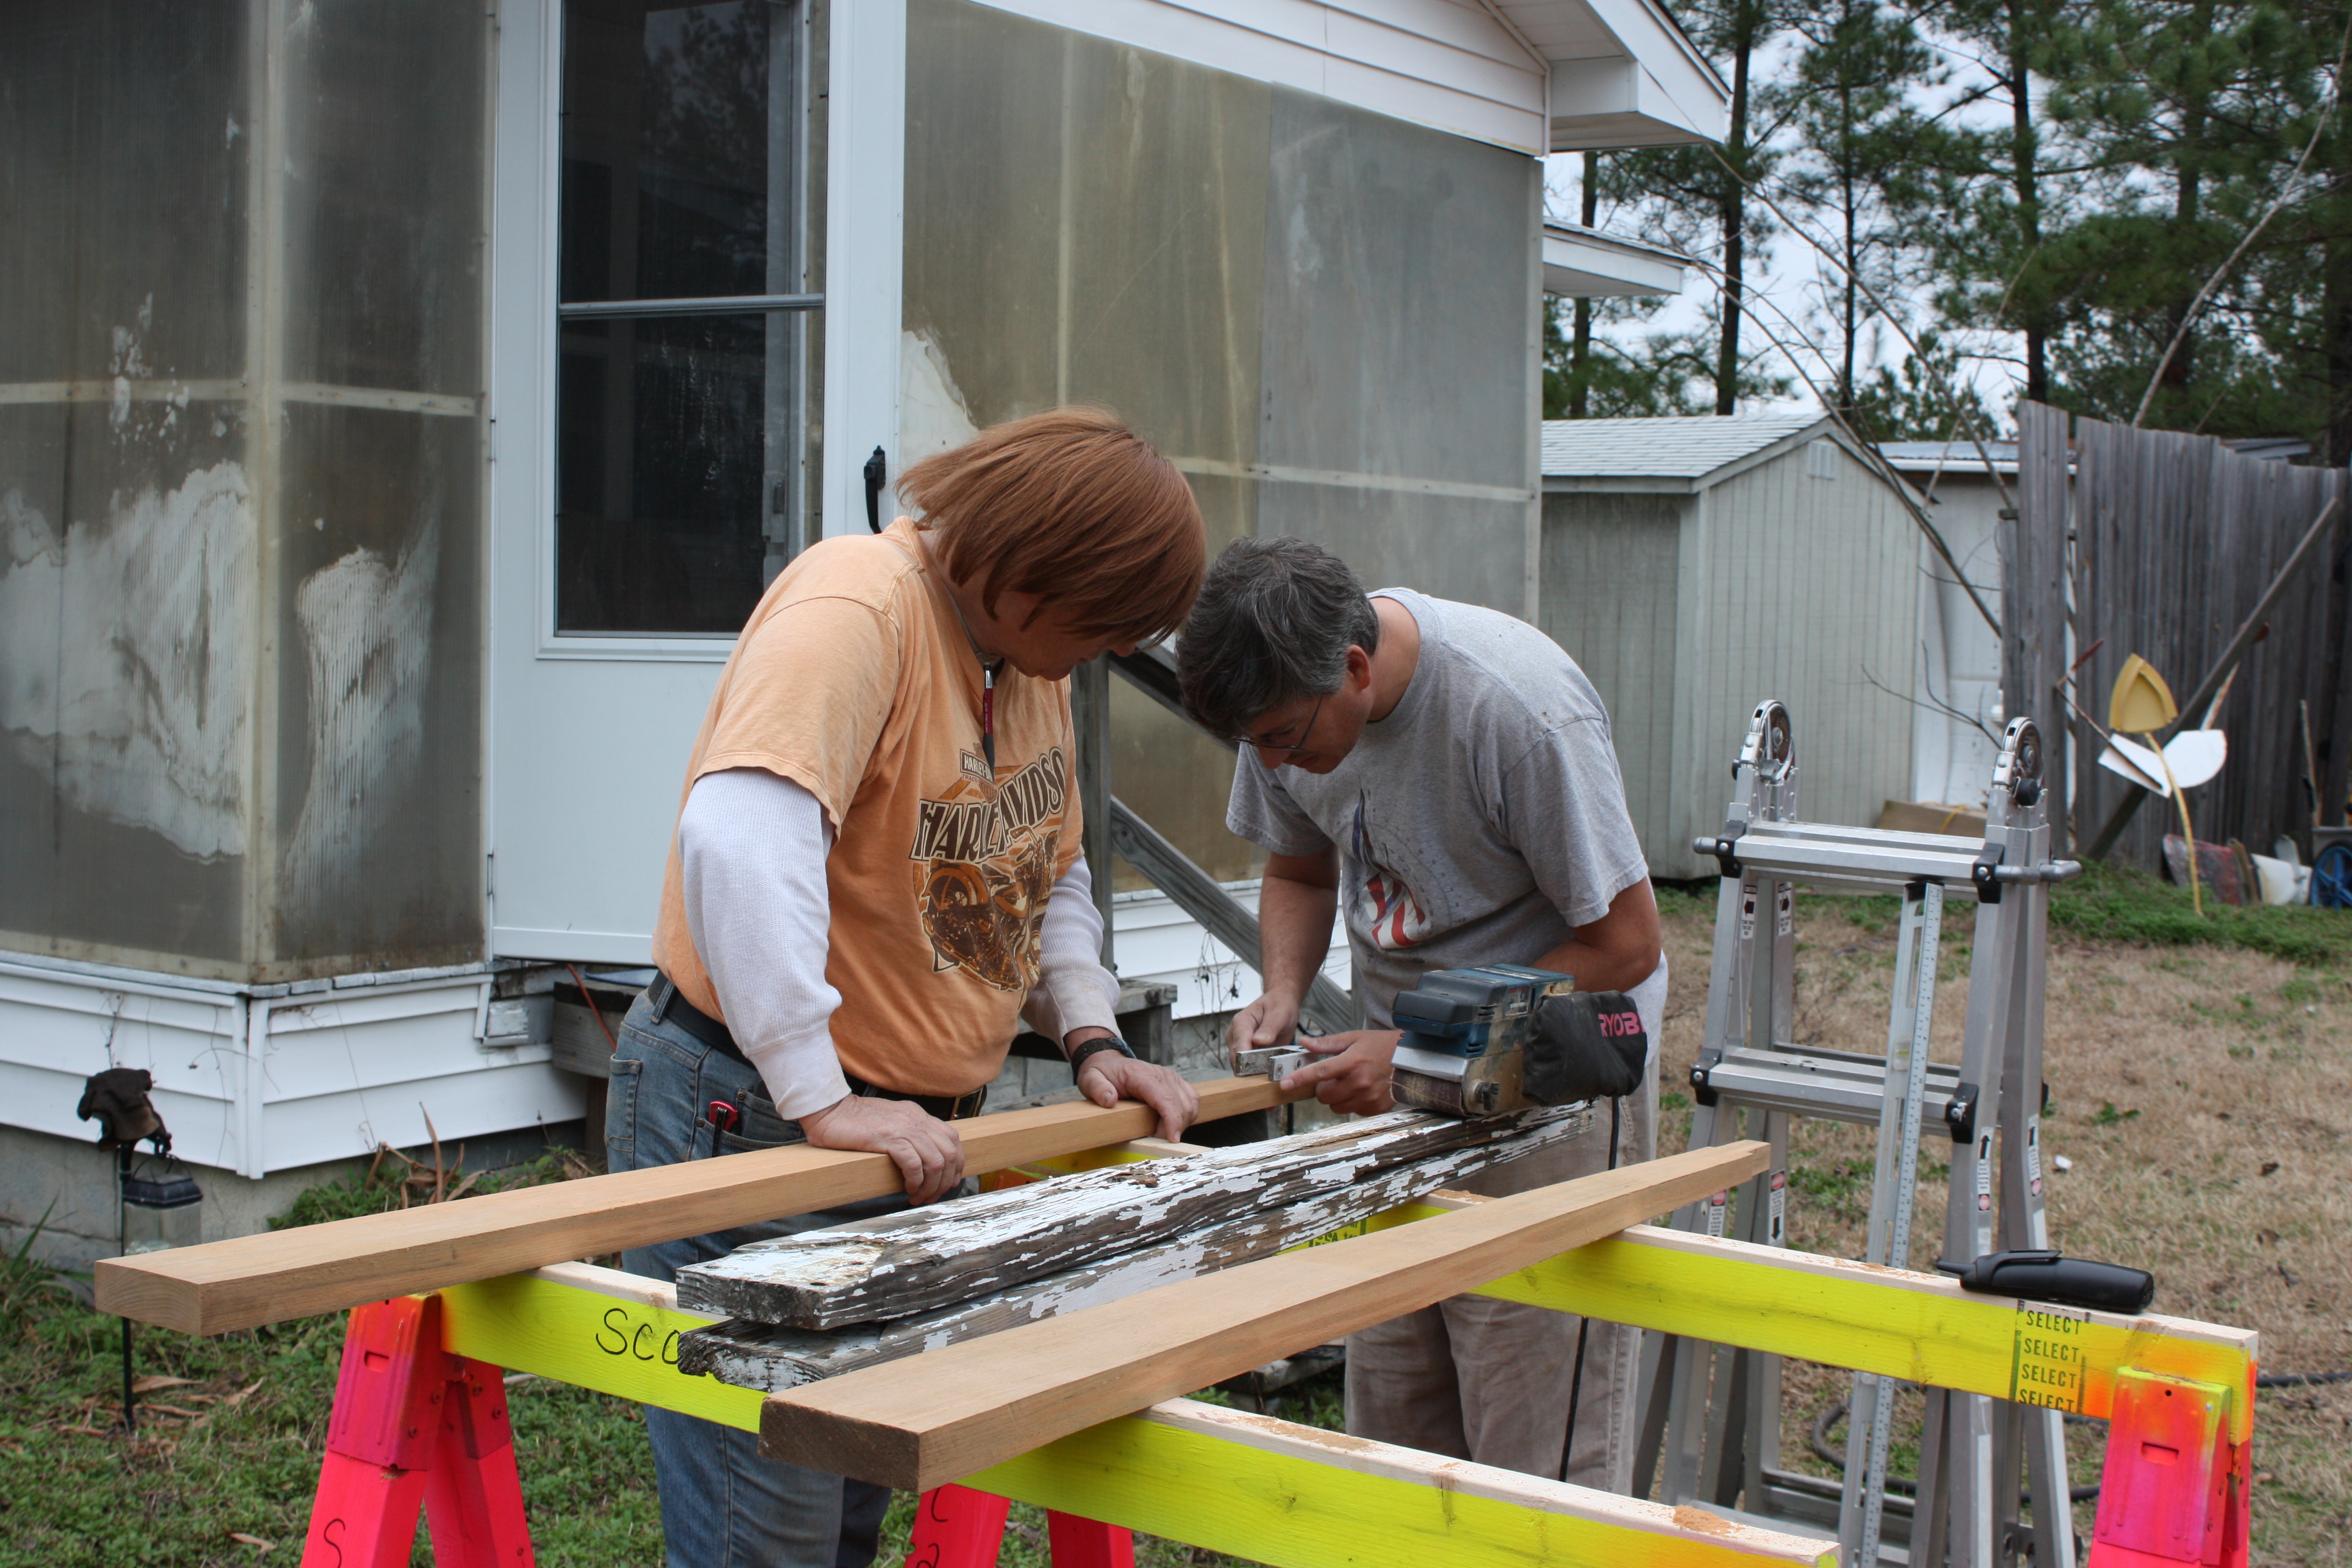
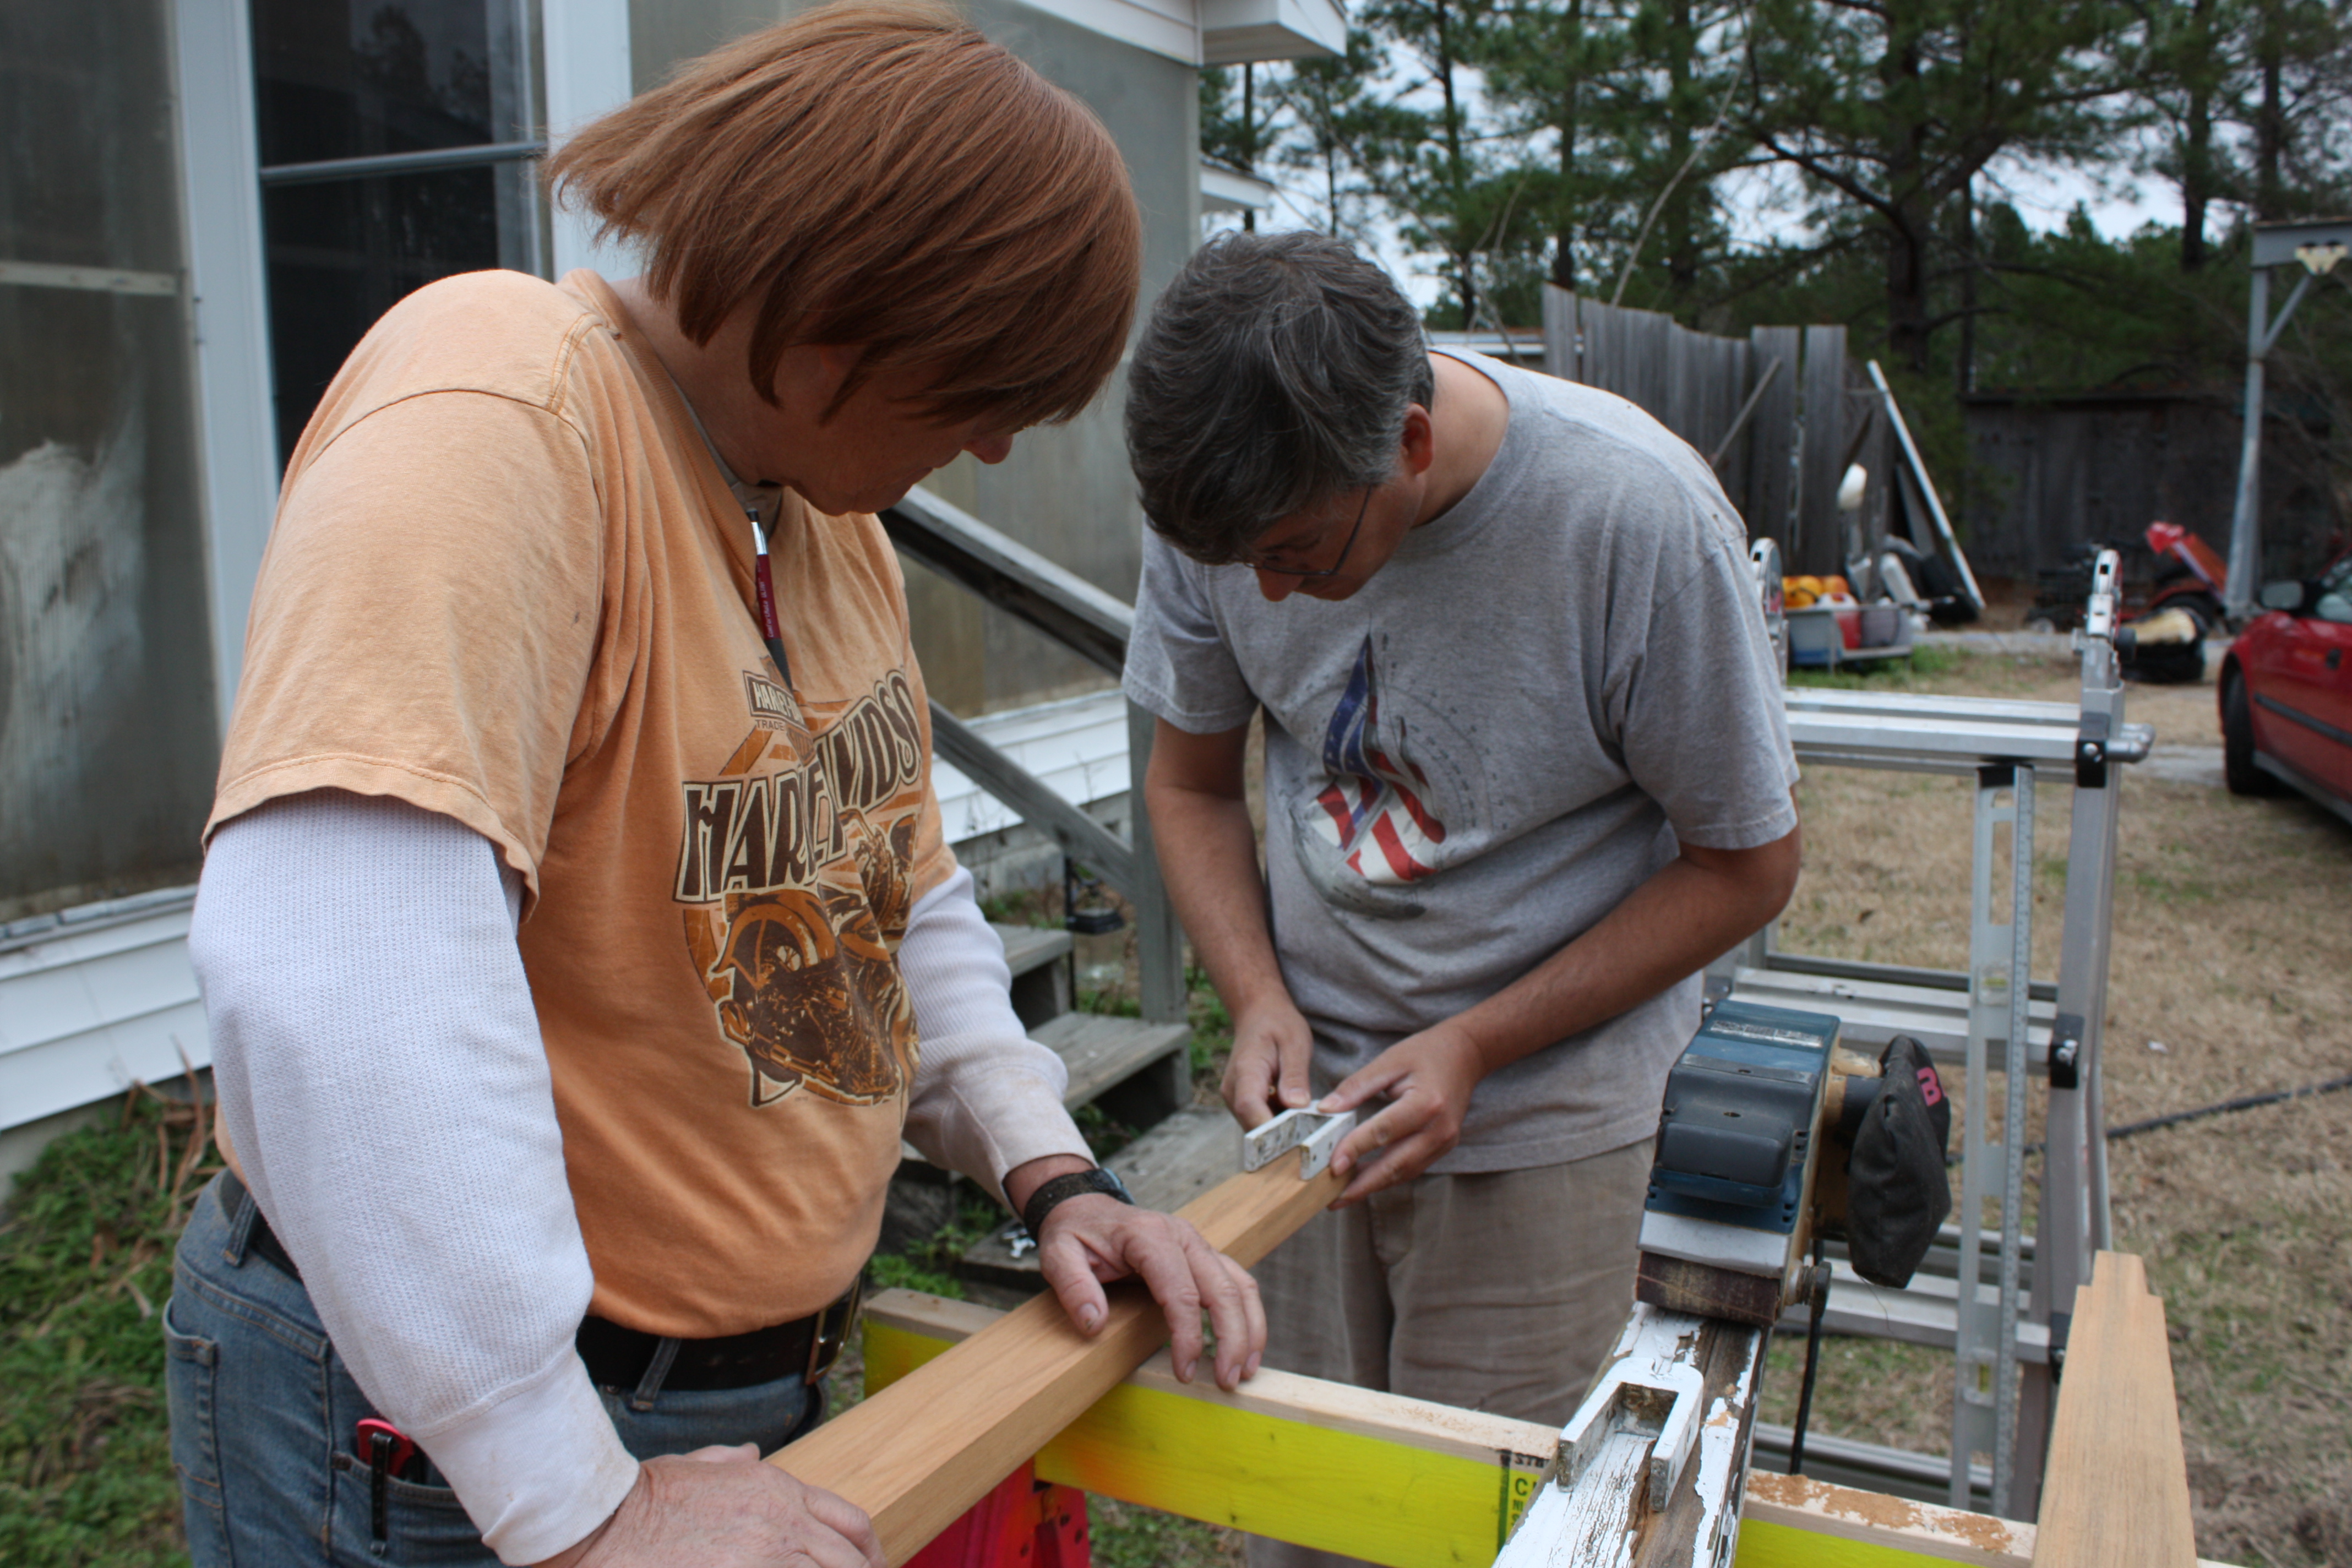
Here are some pictures of us building the new spreaders. Angela who owned the boat at the time purchased a single 2 inch thick by 8 inch wide by 6 ft long plank of teak... Like I said above I think she got it for about 350 dollars. The downside of using teak is that it is much heavier than say spruce. the upside is that I doubt that we will ever have issues with rotting 🙂
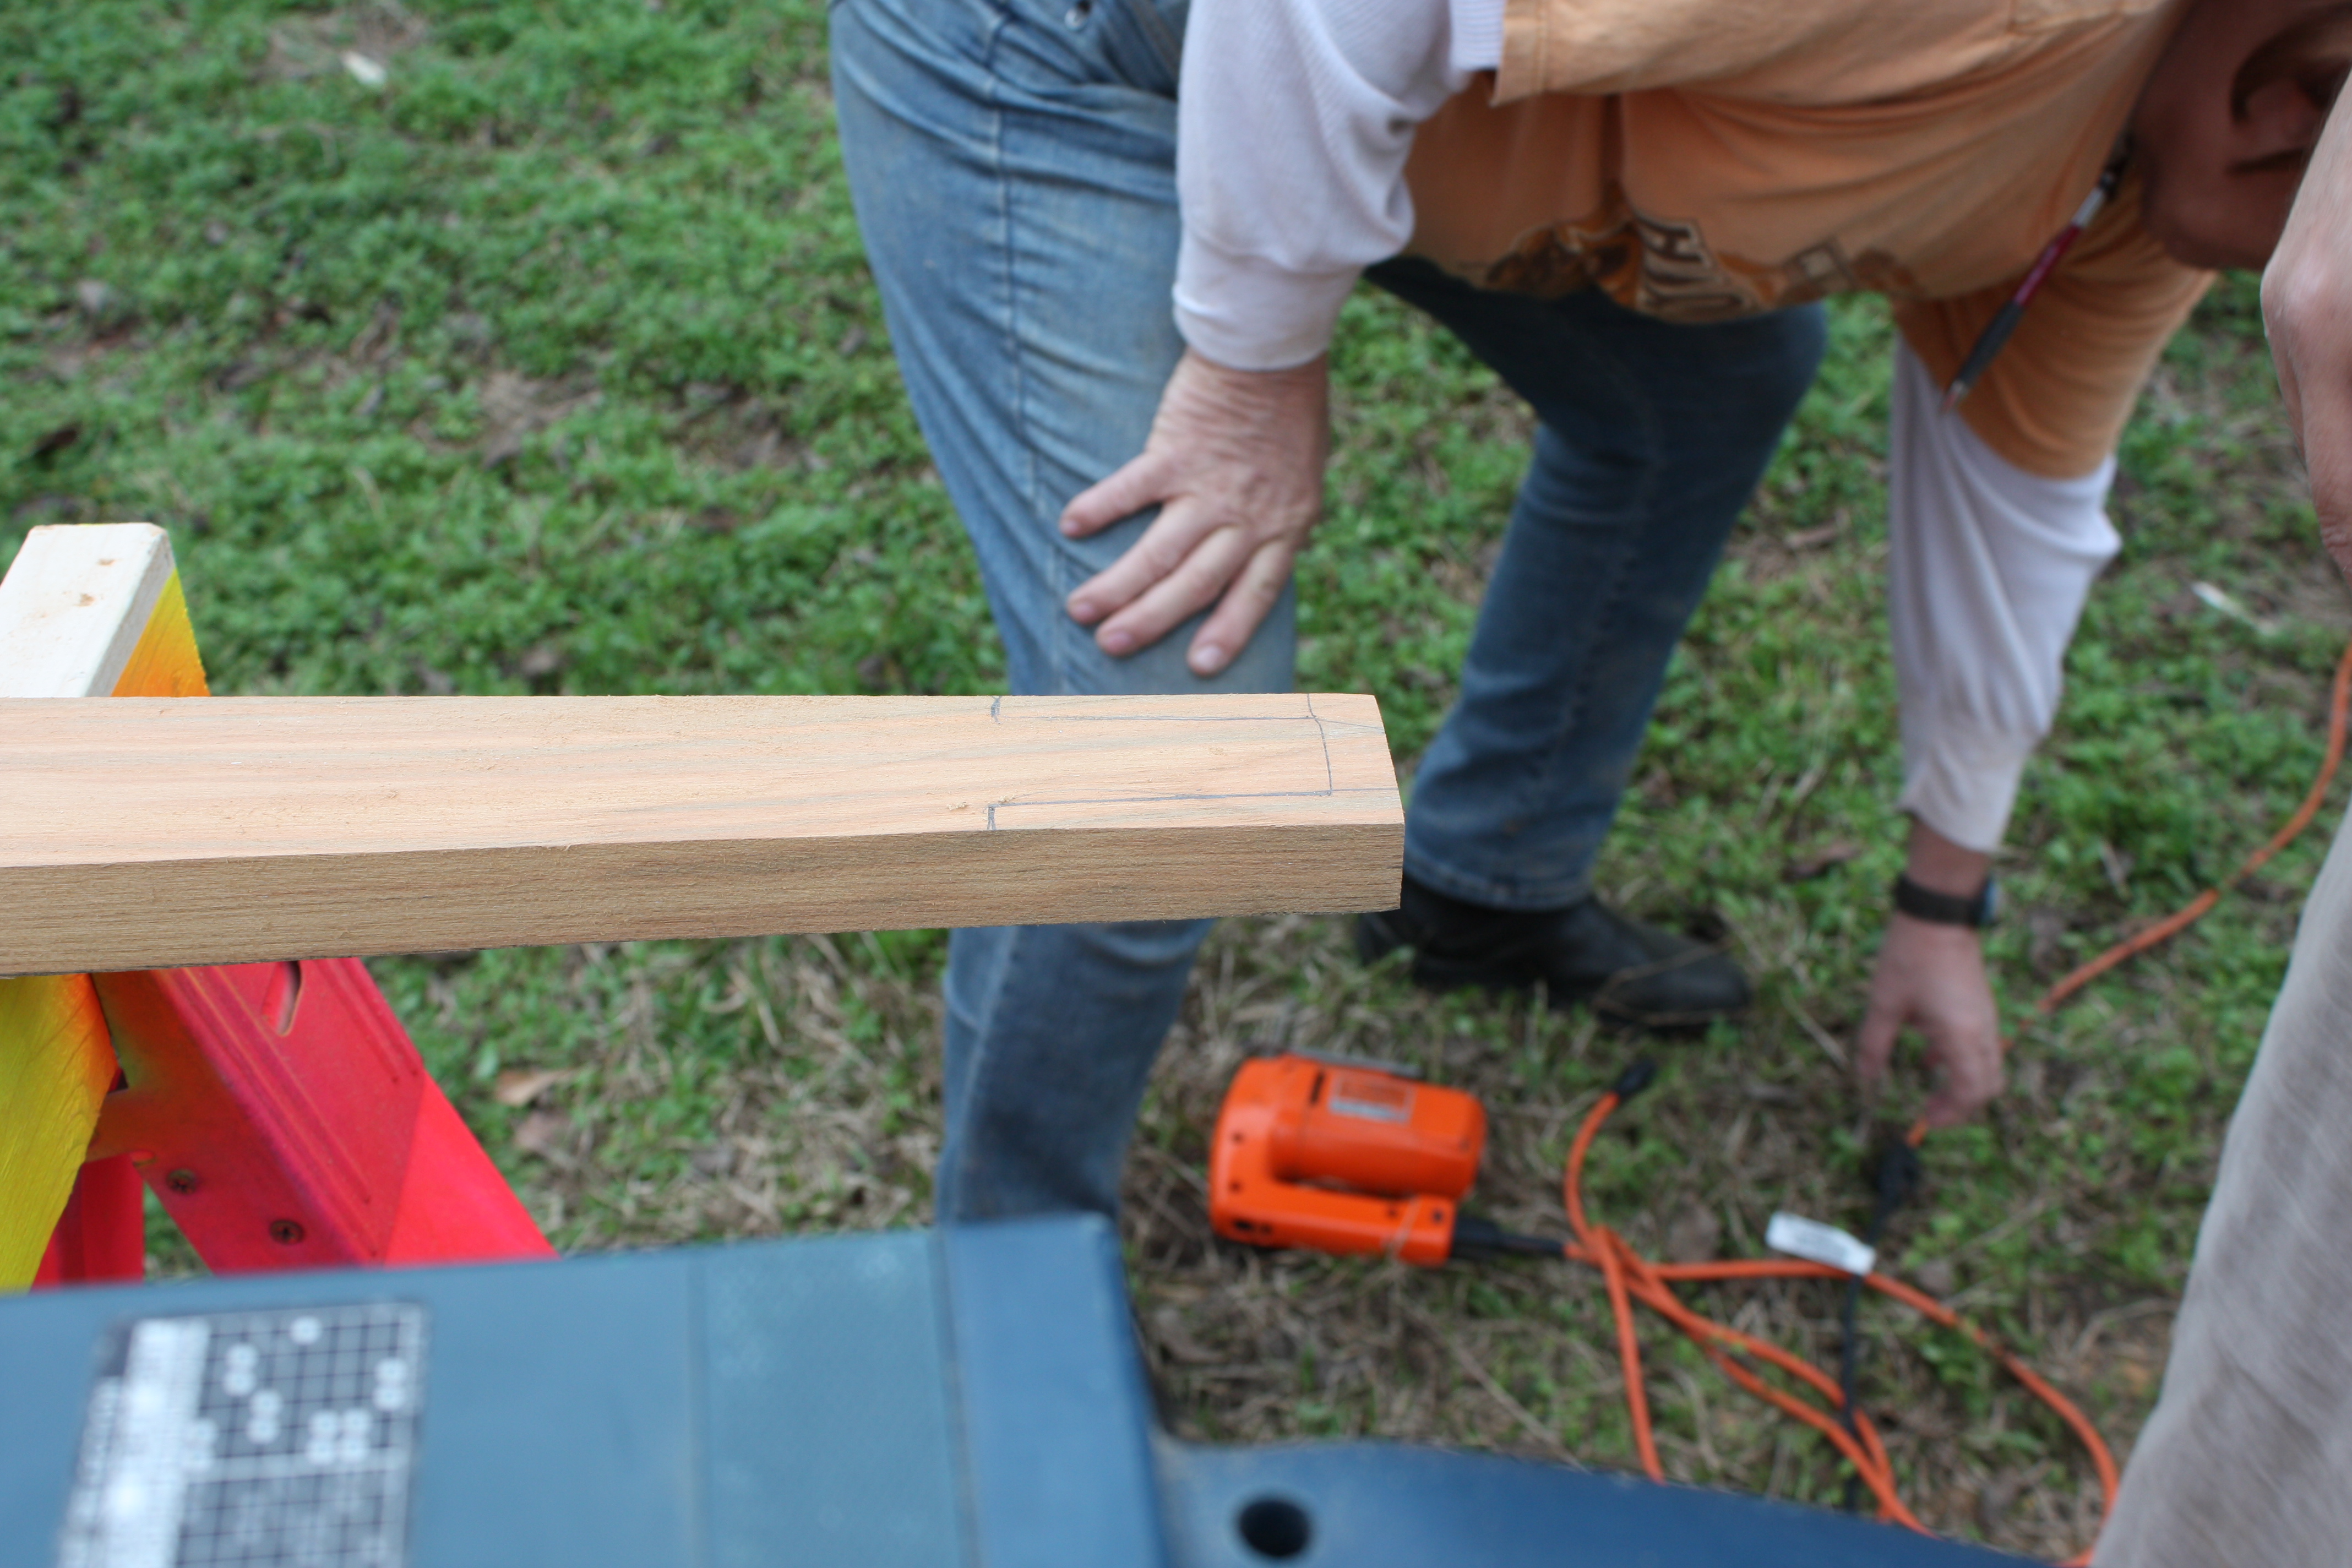
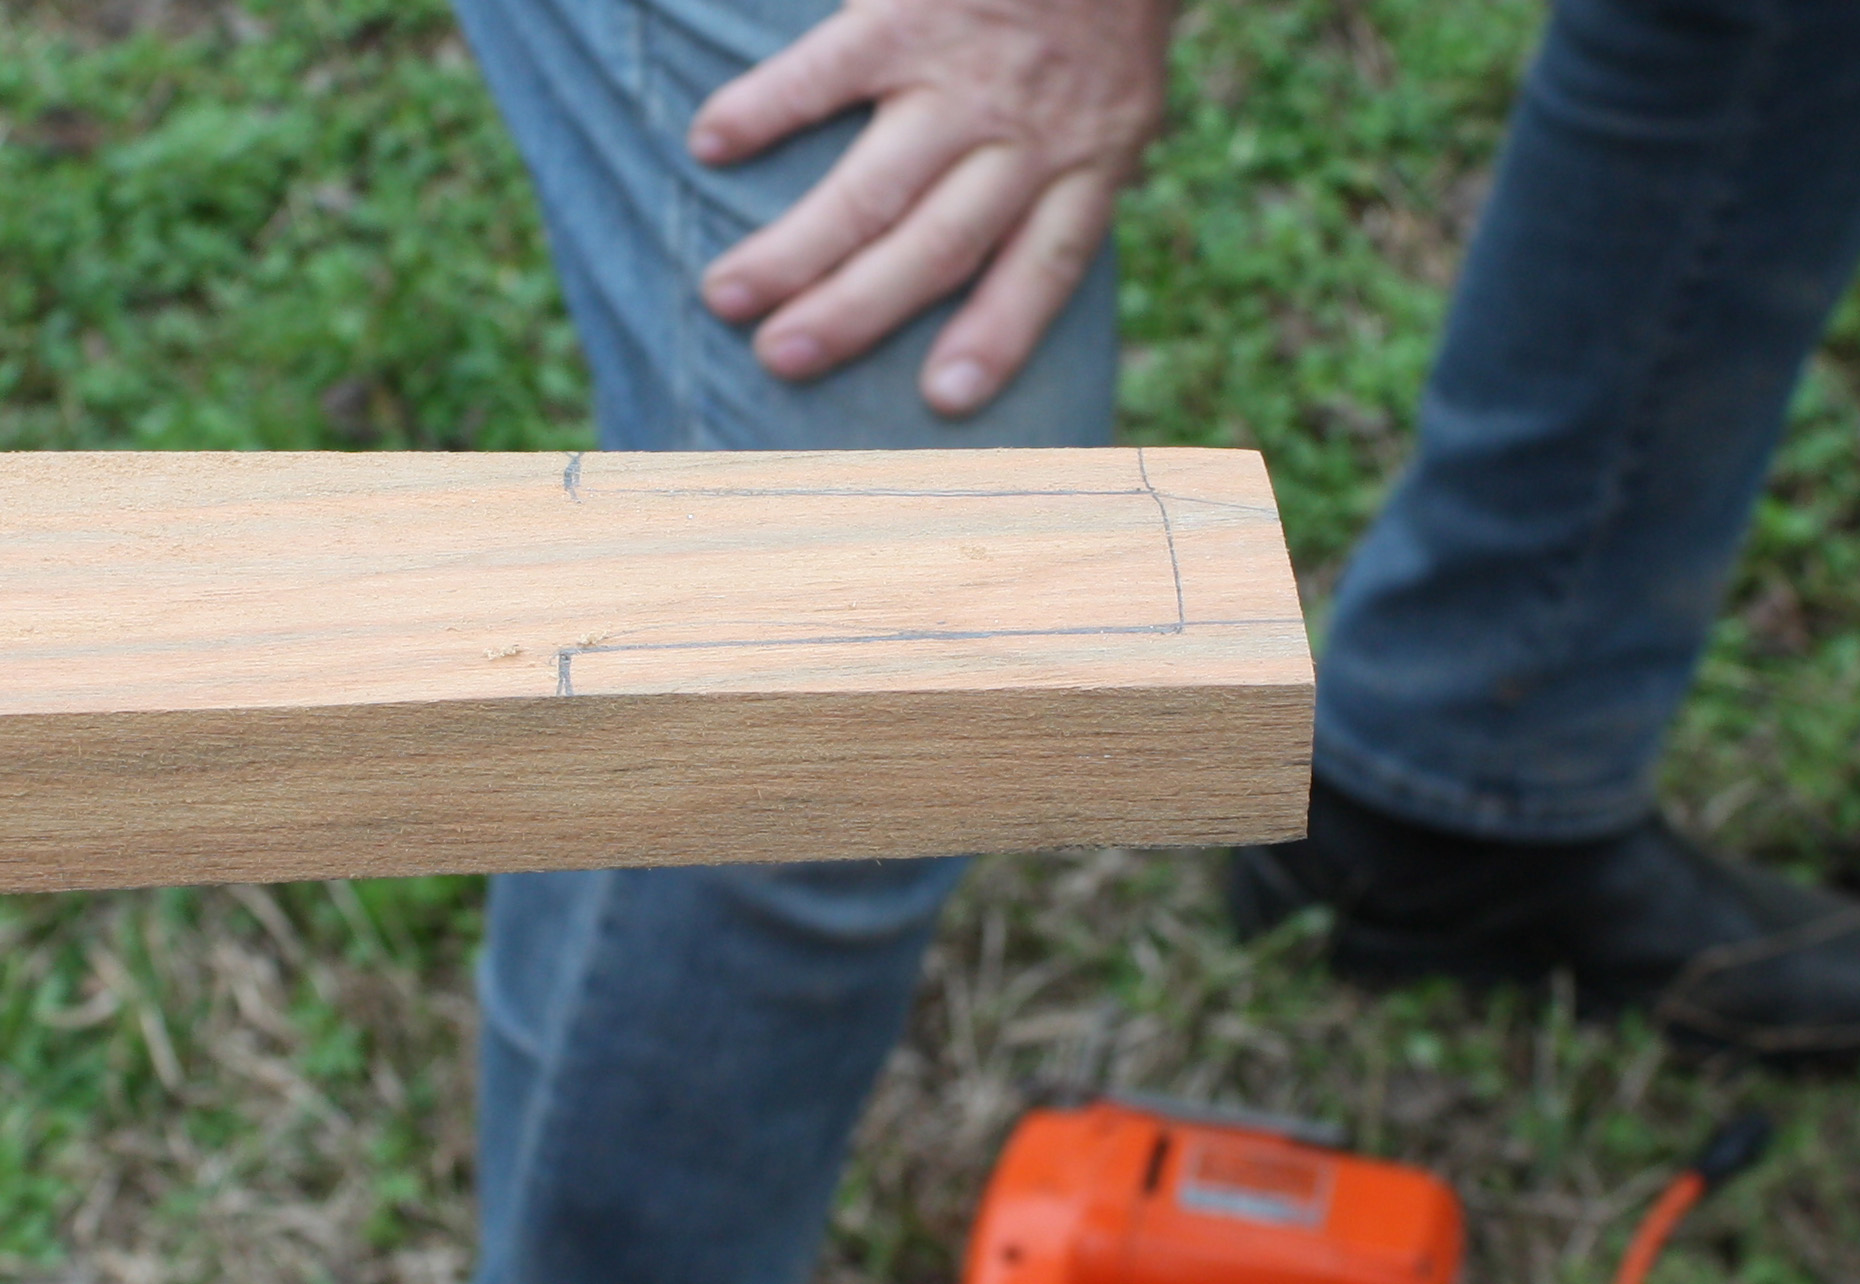
We ripped it to rough size using a table saw and then used the old spreaders as a template and drew in the lines on the blanks. We then used a 18 inch sander with 36 grit to mill it to shape. then gradually went all the way to 220 grit to give it a nice smooth finish. I used a jig saw to cut out the tip.
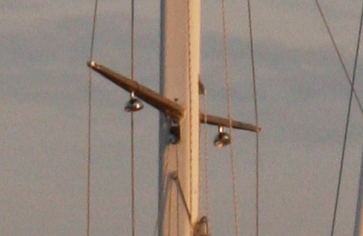
I can't seem to find any decent pictures of the new spreaders on the boat. I cropped out a picture that showed the whole boat after they were installed showing them here. However the resolution isn't that great.

 Offline
Scott,
Your new spreaders look great.
The old ones look like made of plywood...
Did you have the spreaders replaced with the mast removed from the boat ?
I am also changing the spreaders on mine and a bit worried the mast might bend in the middle standing unsupported.
Cheers
Helmuth
Offline
Helmuth,
No worries on the mast bending. So what you are going to do is take the tension off the fore stay, staysail stay, aft stay and both port and starboard upper stays. don't let them get real slack just take the tension off. You should be able to leave the lowers tensioned to do this as all you are messing with are upper stays
This is what we did, we slacked the upper port side stay so that it put no tension on the spreader at all and then unbolted the spreader and let the fitting that goes around the stay just slide down the stay as we lowered the spreader with the spinnaker or jib halyard. Person going up the mast used the main halyard. Depending on the fitting on your spreader that wraps around or attaches to the stay on the spreader tip you might need to hang out there and remove the fitting in place. We didn't have to do that. Then repeat for starboard.
The only issue with doing it this way was that you had to make sure the spreader went up and down evenly at both ends as it would bind on the stay if the fitting at the tip of the spreader got much higher or lower than the base. Actually removing the fitting in place before lowering it would make bring it up and down easier. However it is harder to reach the tip in place as well as the risk of losing parts overboard if you dropped something while up there. pros and cons to both methods.
The mast will stand just fine with you going up and down it like a monkey with just any one stay slacked all the way or even removed, while the other stays are pulled tight but not tensioned. I wouldn't even have and issue with any two opposing lowers being removed at the same time. Say a forward port and aft port one. Remember that this rig is designed to withstand thousands of pounds of both static and dynamic loading. Your little amount of weight doesn't mean anything to any of the the stays or mast itself. Just just don't want to remove all the port side or starboard stays at the same time ![]() stuff tends to fall down then
stuff tends to fall down then ![]()
We replaced the entire rig with it sitting in the slip by slacking the rig and then removing and replacing the stays one at the time, including all upper stays. on the uppers we did use the jib halyard to put light tension on the rig in place of the stay we removed. So for the jib stay we ran the jib halyard down and tied it off in one of the fwd hawse pipes and lightly tensioned it.. very lightly. The goal is to have just enough tension to have everything not wiggle around but not enough to actually pull the mast in any given direction while your doing this. That way when your remove a stay or slack one totally there is not enough tension on the mast from the opposing stay to pull the mast out of column.
Ok .. now you have both spreaders off.... we used the main haylyard and jib halyard to port and starboard respectively to lightly tension the mast top in place of the now totally slack port and starboard uppers while we fabricated new spreaders using the old ones as templates.
When we put the spreaders back up we attached the tips to the stays while on deck and used the jib halyard near the tip to pull it up the stay while I walked the base of the spreader up the mast at the same time till we got it in place. I have steps up the mast to the spreaders so that made that much easier for us. You could still do it without steps by having plenty of people on hand to pull you and tip up at same time or one person pull you up a couple feet then the tip a couple feet and wash, rinse, repeat.
hope this helps. if I didn't make any of it real clear just let me know and I will try and expand on it more.
Scott
Members
Offline
While we're on the topic of ratty spreaders. Here's a picture of mine I snapped while aloft.

I was thinking of redoing mine with aluminum round stock, and having the machine shop turn some custom bungs out of Delrin for the tips of the spreaders. Has anybody tried that?
Edit: Please ignore the mess on my deck.
Offline
lol.. that looks awfully familiar ![]()
I think ours were in a bit worse shape but lots of flaking paint just like that. I think that a round cross section would work but honestly would just get a pair per-fabricated from one of the sources here or just go back with wood. I used teak but a decent piece of fir would work great.
I just looked at the full size image blown up and to be honest is there anything wrong with the wood other than the paint? I would take an ice pick and test the wood for any rotting and if good just refinish it. obviously I can only see one side of one spreader but the wood on the surface looks good.
Members
Offline
The wood is good. I poked it with a screwdriver a few times I didn't detect any rot. I had a professional rigger do the same, and he agreed. However, by the time I go to the trouble of getting the things down and refinishing I feel like I could just as easily fabricate a new one. And since I like metal fabrication, I figured I could make new ones out of aluminum.
On the other hand, my bowsprit has some rot that I can't ignore for much longer. That I do need to address.
Offline
Yep,
bow sprit is a project for the future on valkyr also. I keep thinking a nice 316 stainless square tube welded up with all the fittings on it as well as a nice platform on it. ![]()
Members
Offline
Don't forget to braze the little bronze star on the front.
Offline
?
Offline
Scott,
thank you very much mate. You're a life saver again and again.
After New Year the old rotten spreaders come off.
The thickness of your new spreaders is 2 inches ? Mine are a tad over 1 inch.
Cheers
Helmuth
Offline
So, thickness...as long as they fit in the fittings on ether end then it is going to work.
Here is my recollection at this late date of our thinking, process and materials treatment. Just remember that it is a few years ago. Maybe take this and combine it with my earlier write ups in this topic to pull information out.
I think the blank we got was a rough cut board a true 2 inches thick. We milled it down from their to the shape of the spreaders and just on my rough recollection it was maybe 1.5 inches thick at the base tapering to maybe an inch thick or more at the tip. I think... honestly we just used the old ones as a template. It has to be the same thickness at the base to fit the fitting on the mast and also at the tip to fit the fitting there. The rest of it is flexible in thickness though I wouldn't go thinner than the old one personally. I do know that ours were thicker than the base by a hair and we notched them out to slide into the fitting on the mast.. same for the spreader tip. basically the thickness at the tip was the over all thickness of the tip fitting. Not the inside width of the tip that the spreader slid into. So if you slid your hand over the tip toward the spreader it was a smooth transition from fitting to wood. Same thing with the fitting at the mast. I think... then it just did a smooth tapper from one fitting to the other front to back and top to bottom.
When we got started with it like I said we used the originals as a template. They were a bit warped so we used a long straight edge to get our lines on the blank and used a table saw to cut out rough blanks for both spreaders. We made sure that the we cut the blanks out with the grain running straight from the center of the tip to the center of the base to give the most strength in compression After getting the blanks cut out with the front to back dimensions roughed in we used a belt sander with a 36 grit belt to sand them down to the exact lines we drew in on the top of the blank to get the taper we needed. After getting the front to back dimensions we then drew in the top to bottom taper on either side of the spreaders from base to tip with a pencil, again making sure it was centered on the grain from one end to the other. Then back to the belt sander to bring us down on the lines. At that point its just a matter of using a jig saw, chisel and sander to cut out the notches for the tip and base so that they fit inside the fittings snugly. Once we had it down to the lines we sanded with 80 grit, 120 grit and then 200 grit to get it nice and smooth. we didn't treat them at all before putting them us as we wanted the teak to weather a bit so a good varnish or surface treatment would stick to them when we treated them. Honestly I have never gotten around to treating them and it is what, 7 years later?, and they still look great.. just weathered silver but no damage from rot or anything at all. Gotta love good teak.
So now that we have said all that here is a post from years ago by long gone members of one of the older websites for our boats that has more good information. Mostly aimed at making a bowsprit but the wood choices apply to spreaders also.
http://downeasteryachts.com/in.....eplacement
Offline
thank you Scott.
How do you measure the tension on your standing rigging,- after loosening everything for the spreader removal ?
I could mark the turnbuckles but then I am not sure the previous owner had them up to the right tension in first place. Besides I want to do this right.
Belated MERRY CHRISTMAS !
Helmuth


Offline
I use a rigging gauge. I tend not to tighten it to specs though as standards are bout 1200 lbs on the lowers given the size and 800 to 900 lbs on the uppers. do some research but usually it is 10% of breaking strength I think. I tend to just get most of the stretch out of it and so that I cant pull on it much more than an inch out of line by hand. I'm out of town right now and don't have time to dig for more than that right now. do a search on the forums and on the home page for "tension" and see what it pulls up. After a while you get a feel for it and though I like to use a guage as it is more precise I would be ok just doing by by feel now. Big thing is keep the mast in column ![]() Don't let it bend in the middle.. get just a bit of pre-bend in it so that the top is bent toward aft. Not more than 4 inches or so.. Our boats aren't race boats with bendy masts
Don't let it bend in the middle.. get just a bit of pre-bend in it so that the top is bent toward aft. Not more than 4 inches or so.. Our boats aren't race boats with bendy masts ![]()
You outboard fitting on your spreader is totally different than mine. Not bad just different. does exactly the same thing at the end of the day that mine does.
Offline
Scott Carle said
I use a rigging gauge. I tend not to tighten it to specs though as standards are bout 1200 lbs on the lowers given the size and 800 to 900 lbs on the uppers. do some research but usually it is 10% of breaking strength I think. I tend to just get most of the stretch out of it and so that I cant pull on it much more than an inch out of line by hand. I'm out of town right now and don't have time to dig for more than that right now. do a search on the forums and on the home page for "tension" and see what it pulls up. After a while you get a feel for it and though I like to use a guage as it is more precise I would be ok just doing by by feel now. Big thing is keep the mast in columnDon't let it bend in the middle.. get just a bit of pre-bend in it so that the top is bent toward aft. Not more than 4 inches or so.. Our boats aren't race boats with bendy masts
You outboard fitting on your spreader is totally different than mine. Not bad just different. does exactly the same thing at the end of the day that mine does.
Will do my best not to turn the mast into a Banana. 
Offline
The boys in the boat yard where my DE38 is now, say that the wood spreaders are toast and the standing rigging is not reliable. For the spreaders I see that several of you have fabricated new ones from wood stock. I also see reference to making aluminum units. Anyone done that? Are they so different from other boats' spreaders? Any drawings available?
for the rigging, the wires were replaced 7 years ago, but the turnbuckles are older. Any advice on this issue? Probably have to bite the bullet, but have to ask.
thanks in advance
Bob
Offline
ok.. 10 years on a set of rigging unless your sailing all the time as in going around the world or have done a couple massive storms off shore is the insurance industries recommended replacement time. This is a don't look at the condition just replace it time scale so there is no risk.
For someone to tell me that my 7 year old rigging is bad and needs to be replaced I would be very skeptical. They would need to show me dye tests on all fittings showing cracking in the swages on the ends of the cables. Stripped threads, abraded cable, broken strands, Rigging that has stretched to the point you can't tension it anymore as all the take up on the turnbuckles is gone. Extensive rust on the cable or in the swages. Not just a wipe it off stain layer but real rust. If the turnbuckles are older, depending on their construction I would want to see the same thing, visible evidence of degradation. quality bronze can last for decades as in more than 2 decades.
If they can't both tell you why it needs replacing and show you why then I would not do business with them. If they can show you one or two issues in specific stays but not others then I am also iffy if they are not giving you the option of just replacing those stays to make it safe. If at the same time they say "well for peace of mind or to keep the rigging the same age you might replace it all and we will give you a deal on a full rigging replace" then I would be ok, I understand. But if they say "your whole rig is unsafe and needs to be replaced" I would go get another opinion or two. Personally I would feel smoke being blown up my ass and they would never touch my boat as an issue of trust.
If the swages on the end of your stays are showing evidence of cracking the last people either did it wrong or used substandard quality parts.
If they were talking about your turnbuckles then you could just replace those without replacing all the rigging unless you just want to.
Next I would want an itemized list of costs to replace the rig not just a one price quote. I would want to know where the wire came from and the specs on it. Exactly what brand and model of fittings on the wire as well as turnbuckles.
When I redid valkyr's we did it ourselves and went with good quality mechanical fittings both top and bottom on all stays. A lot more expensive than just swage fittings and we used 3/16 stainless wire (slightly less strength but better corrosion resitance. We moved up the size of the uppers to the same 9/32 that the lowers used to bump the strength up and only added a 4 or 5 lbs or less to the weight of the rig). still came in at 2200 dollars in materials. We reused the existing bronze turnbuckles. They were still in good shape even 20+ years old. I like stainless fittings with bronze turnbuckles. Using stainless and stainless can seize up. Bronze on stainless is like having anti-seize in it.
Offline
Thanks very much, Scott. I will have them show me each and every piece they want to replace. So far it is only a general statement and I am 5000 miles away. Will see them on Monday, now armed with your good thoughts. Stay tuned.
bob
Offline
Well I was at the boat yard yesterday to see how bad the rigging was. There is a lot of surface rust on the wires and the swages but could not find any broken wires. The old turnbuckles are pretty bad so I agreed to replace the lot just for peace of mind. I could have soldiered on, but felt that this is a good time to get these things behind me.
One of the spreaders was rotted out and literally broken in two due to water coming in through a hole for the spreader light wire. Stupid to bring the wire through the spreader. So they are making up new spreaders from Douglas Fir. Decided to not replace the spreader lights, but to have a combined steaming and deck light on the mast.
One question did come up was how to treat the outboard end of the spreaders. The wood worker does not like boots as they can trap moisture inside and rot the wood. But there should be some protection for the wood being worn out by the wire. Any suggestions?
Thanks again as always.
Bob
Offline
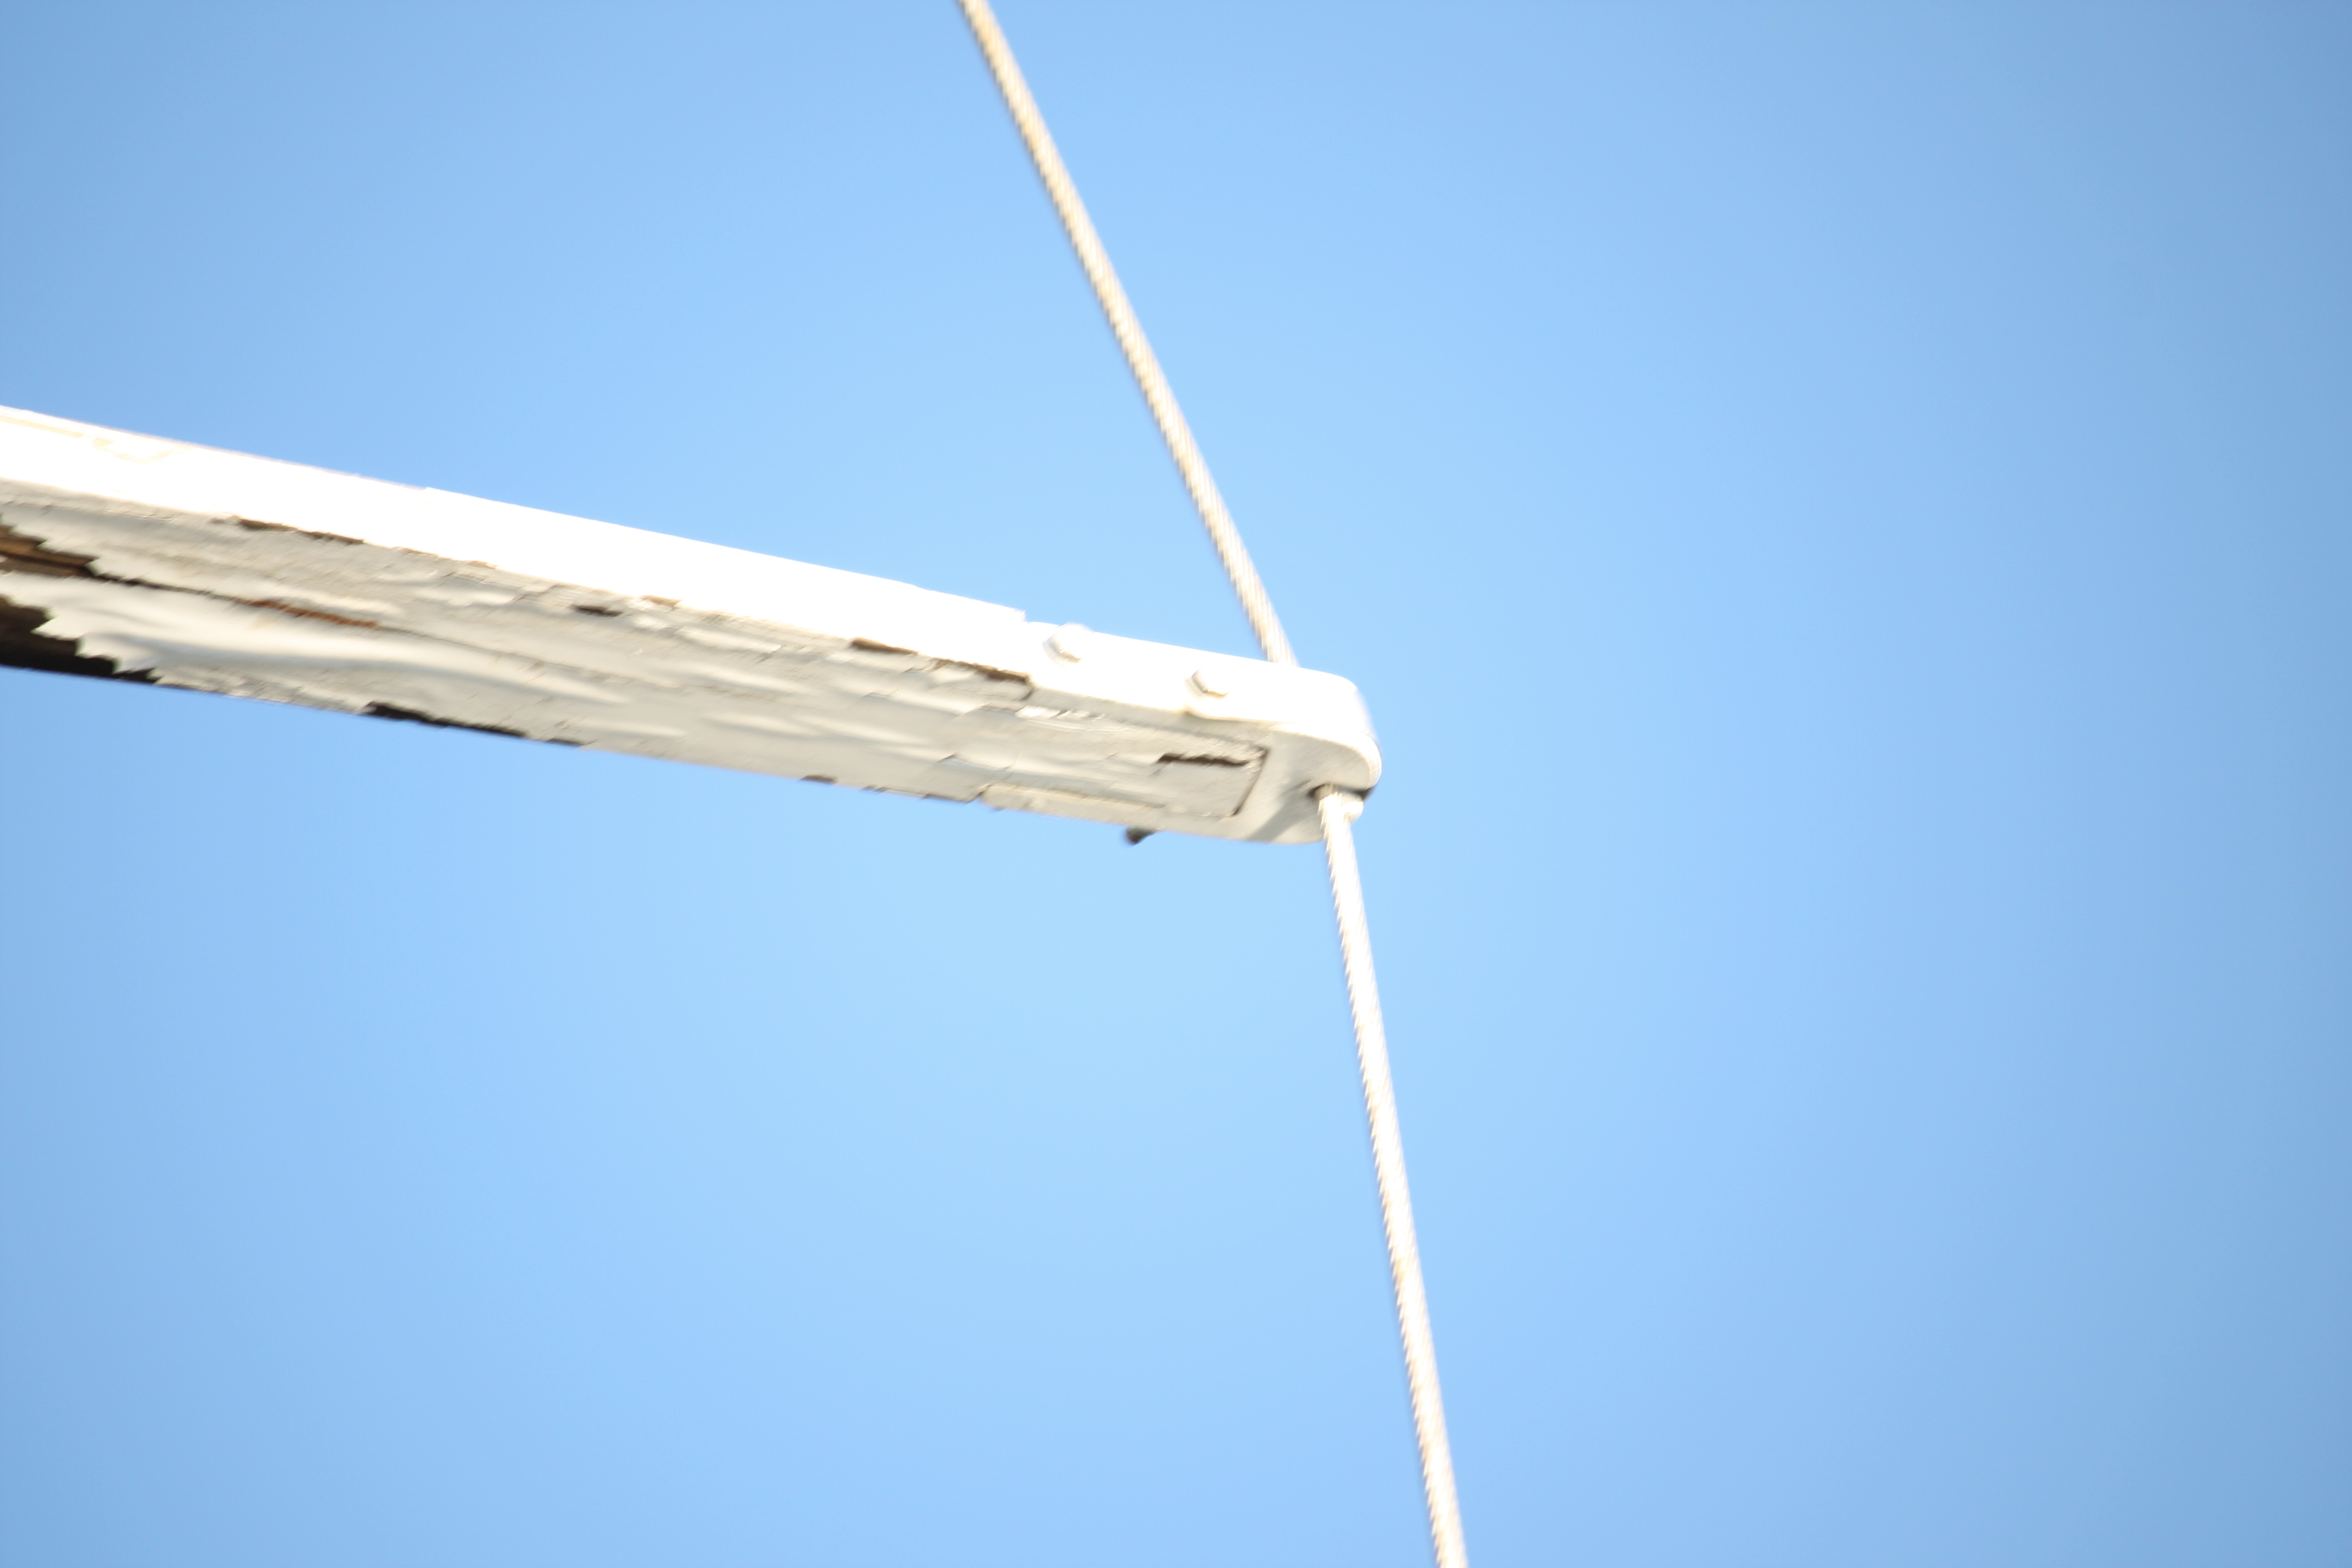
Interesting on the spreader tips, I would not install without a metal fitting on the end of the spreader. All the ones I have seen have a fitting on the end of the spreader that the stays run through. Here is a post with pictures of the fittings used on ours. I have seen other designs on our boats also.
http://downeasteryachts.com/fo.....ement#p829
Offline
Thanks, Scott. I totally agree with the concern and have gone back to the boat yard showing them one of the photos you connected me too.
As this must be a common problem for all boats with wooden spreaders, can you refer me to a company which makes such fittings? Could be fabricated, of course.
Best regards
Bob
Offline
Off hand I did not know of any place selling old style wood spreader parts but got a quick hit with exactly what you need.
You can try looking more but I went through a lot of looking and this was all I could find. If anyone else knows of someone else that makes them or sells them post a link as this is something that 90% of our boats use that is a pretty old school part.
http://www.rigrite.com/Spars/S....._Wood.html
Most Users Ever Online: 175
Currently Online:
2 Guest(s)
Currently Browsing this Page:
1 Guest(s)

Top Posters:
Jonathan Oasis: 177
bobmcd625: 165
CAE: 150
mgav451: 143
Rick: 94
svbodhran: 84
Member Stats:
Guest Posters: 7
Members: 366
Moderators: 1
Admins: 1
Forum Stats:
Groups: 3
Forums: 13
Topics: 747
Posts: 3838
Newest Members:
Tools of the Smith, tonyflor, sailordad46, Spirare, BradHartliep, DuncanModerators: Patrick Twohig: 134
Administrators: Scott Carle: 1481
