 Log In
 Register
 Home
Home

 Topic RSS


 Offline


This is a major pain.. I had about a three page story written up and the browser blinked and I lost the whole thing so.. here it goes again.. maybe not as long 🙂
We started working on the decks on valkyr this past Thursday and the teak was the first thing. Valkyr's teak probably hasn't been touched in 10 years minimum. It is very rough and weathered, totally grey with no stain or varnish or finish of any kind left on her anywhere. Over the years the surface of the teak has lost about an 1/8th of an inch due to weathering and prior sanding and maintenance. It's easy to see this due to the raised teak under the stern pulpit mounts where it has been protected from sanding and weathering. At this point enough of the teak is gone that you can no longer put bungs in about 50% or more of the holes where it is screwed down. The heads of the stainless screws are flush or close to flush with the surface of the teak now.
We got about 70% of the teak on valkyr sanded in a three and a half hour sanding marathon with me on a six inch random orbital sander and zsanic on a mouse palm sander. I was hitting the big areas aggressively with 60 grit and she was following behind and catching the curves and corners that I couldn't reach with 50 grit on the palm sander. The teak was in such bad shape that it took the aggressive sanding to get it done in any reasonable time frame. We were both very pleased with the results. The random orbital sander had to be managed carefully not to let it do to much but as long as you kept it moving it did fine. We decided not to go to 120 and then 220 grit for a super fine finish. The stain/oil that we are using gives a mostly flat finish anyway so it saved us a lot of work.
We researched a lot of different products and finally picked one called Tequa to use due to its simplicity in prep and usage as well as it's claimed durability and resistance to staining people and clothing that might rub up against the finished wood. All the teak in the following pictures were done with 3/4 of a quart of the Tequa for one medium thick coat that soaked in. We will be going back and doing second and even third coats till the wood quits soaking it up. After this it should be an annual one coat treatment after a prep of simply washing it down and letting it dry before application.
After sanding on Thursday afternoon we just fresh water rinsed the boat down to get rid of all the sanding dust and let it dry overnight. Nine AM in the morning we started staining. We did not tape anything off as the tequa isn't very runny and didn't drip bad at all. It's consistency is a kinda thick and muddy brown/grey color in the can. It goes on fairly clear and when it soaks in you can't see any of the color it has in it. It took the two of us about 2 hours of staining to get the first coat on the areas we had sanded the prior day.
so here is some pictures.. When we get the rest of the boat sanded and two or three coats of this stuff on I will post more pictures.
Here are a couple before and after sanding pictures

We have replaced the cowls on the dorade boxes with nicro solar vents which has helped immensely. We have two more to install back in the galley, chart table area.
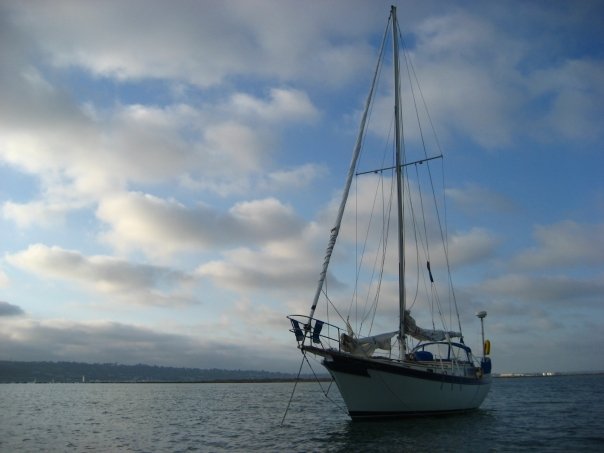
[Image Can Not Be Found]
Here is a before of one of the hand rails. You can sea how coarse the wood is.
After sanding it looks much better. You can still see a few grey streaks where I didn't want to sand any more depth off the surface.
Here is after the first coat of Tequa. The Sampson posts were really badly weathered and it took a lot of creative sanding to get them smooth again. Looks pretty good.
[Image Can Not Be Found]
You can see the difference between the stained cap rail here and the grey weathered trim strip underneath it that hasn't been done yet.
[Image Can Not Be Found]
We are extremely pleased with the finished look of just one coat so far.
[Image Can Not Be Found]
once we get the pin rails and hatches and sky light done she will look really good. We also purchased a gallon of brightsides in white to repaint the cabin sides and all non-skid deck areas. That will be happening soon.
[Image Can Not Be Found]
huge clutter of lines and such here but still the newly stained wood just pops!
[Image Can Not Be Found]
Sailor the cat checking out the new look. He wasn't to happy about all the power tool use but now is liking his new looking wood. The sail covers are off the boat for week or so to get re-stitched. Actually Zsanic is in the next room right this second stitching up the staysail cover.
[Image Can Not Be Found]
 Offline
looks very good. how did you keep from resulting in dips at the life line stanchions? i've seen other boats where after sanding there is a pronounced difference at each stanchion.
Offline
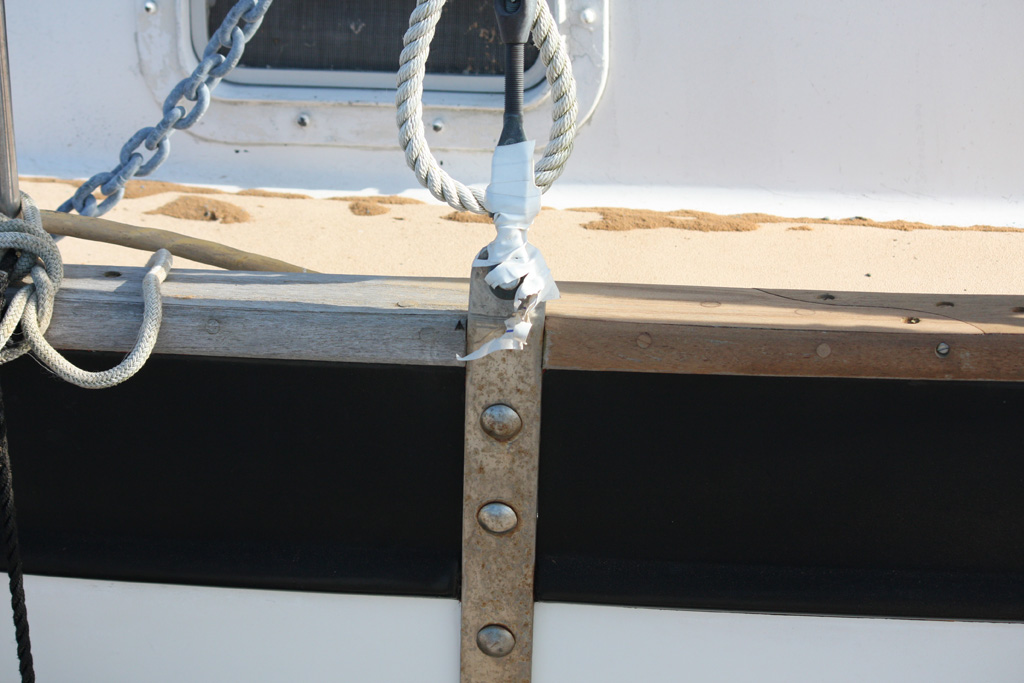
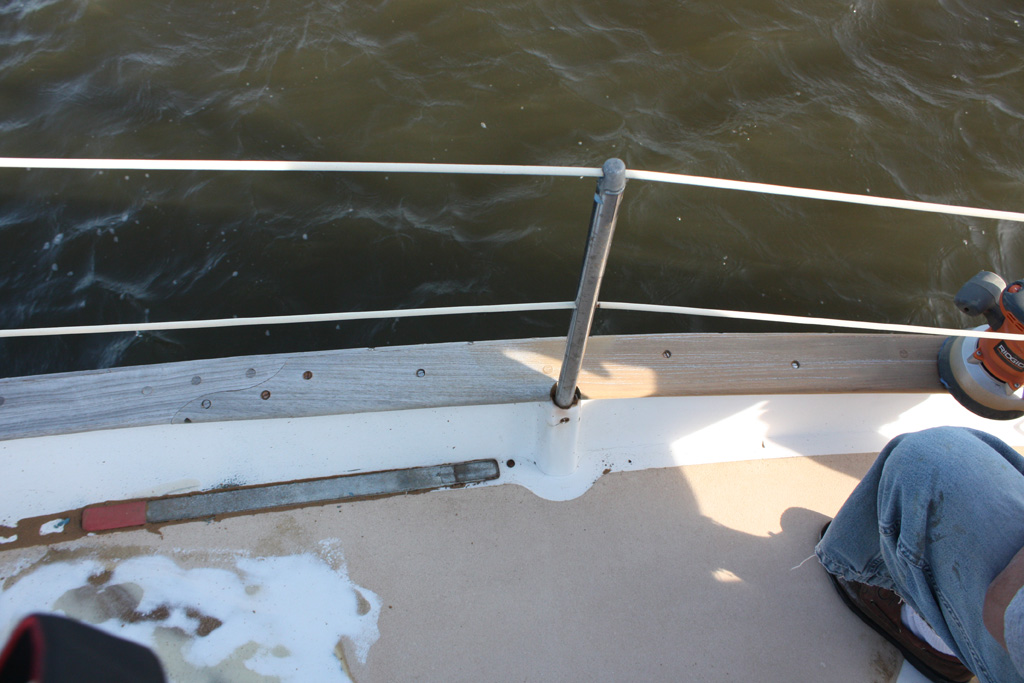
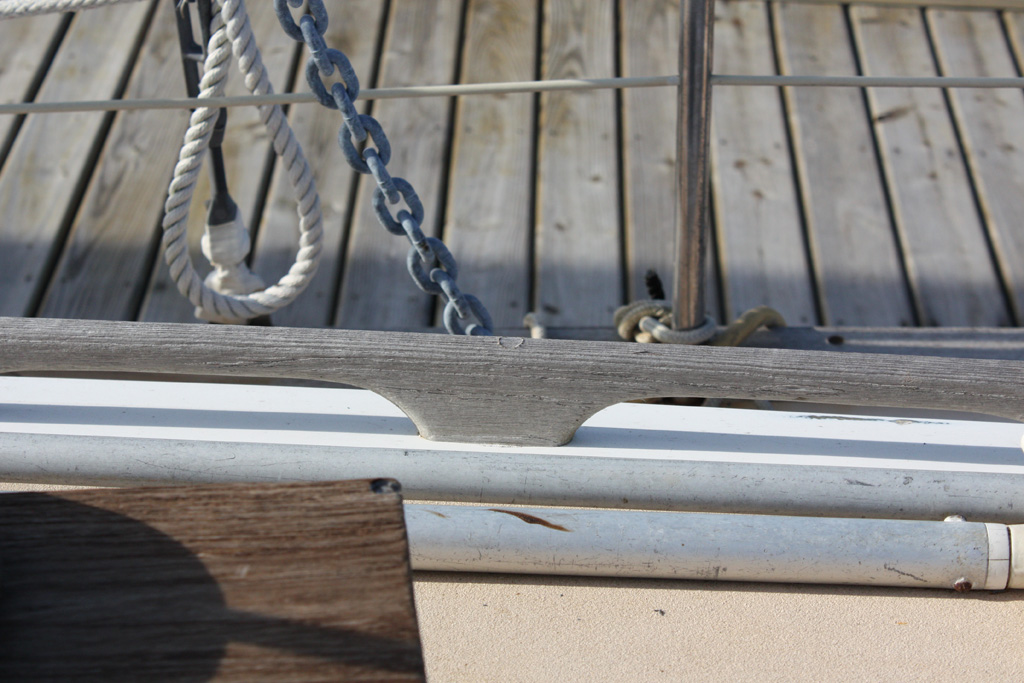
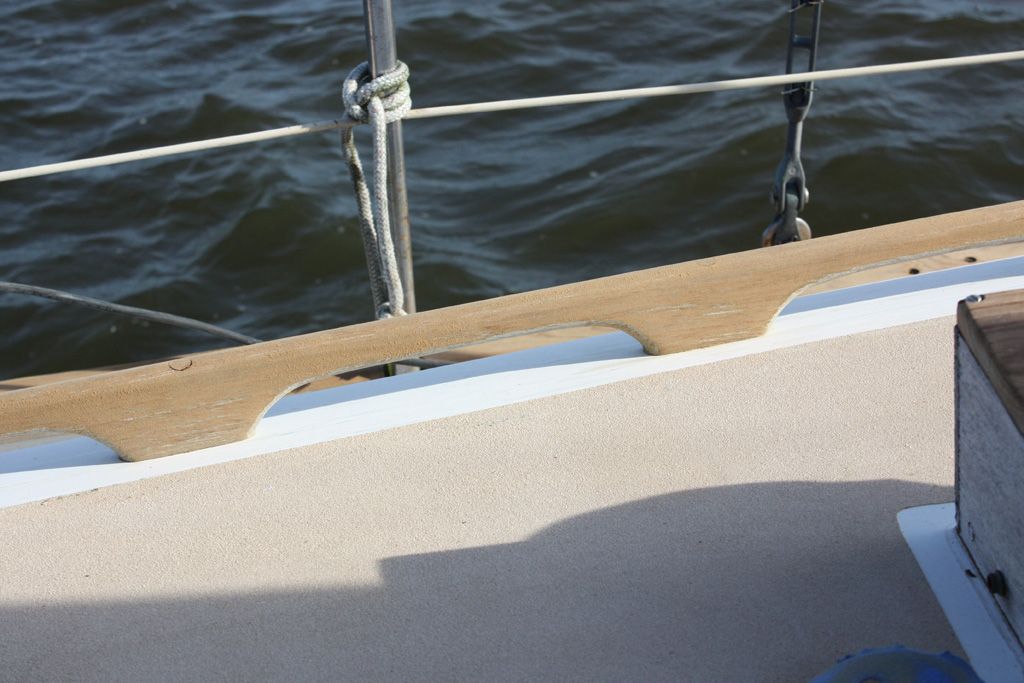
Other than the stern and bow pulpits all the stanchions terminate in fiberglass sockets just inboard and below the cap rail (the second picture shows one of the stantions just through the inboard side of the caprail into the fiberglass socket). At the stern and bow pulpits the bases of the legs sit on a raised teak base about an 1/8th of an inch higher than the surrounding teak due to sanding. A lot of the earlier boats had stantions that bolted thorugh the cap rail and would have also had the same effect under them ( the sixth picture down shows the bow pulpit where the base plate bolted through the caprail is standing on a raised area of teak) The other difference in caprails that valkyr has is that the chainplates are external and never went through the cap rail at all. You can see in the first before and after picture how the chain plate is bolted to the side of the hull and a teak trim strip is attached to the outer edge of the cap rail on either side of it.
Offline
Scott Carle said:
Other than the stern and bow pulpits all the stanchions terminate in fiberglass sockets just inboard and below the cap rail (the second picture shows one of the stantions just through the inboard side of the caprail into the fiberglass socket). At the stern and bow pulpits the bases of the legs sit on a raised teak base about an 1/8th of an inch higher than the surrounding teak due to sanding. A lot of the earlier boats had stantions that bolted thorugh the cap rail and would have also had the same effect under them ( the sixth picture down shows the bow pulpit where the base plate bolted through the caprail is standing on a raised area of teak) The other difference in caprails that valkyr has is that the chainplates are external and never went through the cap rail at all. You can see in the first before and after picture how the chain plate is bolted to the side of the hull and a teak trim strip is attached to the outer edge of the cap rail on either side of it.
I will be very curious to see how well the Tequa holds up...
bob
s/v Eolian
DE45 #11
Seattle
Offline
If it even comes close to the manufactures claims I will be happy. So far it has been super easy to use... just a matter of durability now. So now we wait!
We are hoping to get back up to Valkyr for a couple days this week to work on the rest of the wood and start sanding the coach roof in prep for painting it with brightsides. However I'm not holding my breath that it will happen. I picked up a new client last week and have had more work with them in the last week that with all my other clients combined in the last couple months. This is a really nice injection of funds into a economically flat time and I am making it a priority for now.
Offline
Looks good!
I'm confused about the product though. Is it a stain or an oil?
Offline
A bit of both, I think. Its a kind of inbetween product from what I can gather.
Offline
We actually spent three days working on the boat this week. The teak on deck is now at about 90% and in some area’s even has three coats of Tequa. We are really liking the Tequa, it goes on thin and penetrates on the first couple of coats and on the third coat gives the teak a soft luster that is just beautiful. So far we have used about one and a quarter quarts and it has covered 90% of the boat in two coats and some parts of the boat in three coats. I think we will stop at three coats and then see what durability is over time. Pictures of all this will be forthcoming in the next week or so.
Offline
Reallly interested in seeing how the product holds up over time in Florida. I've decided against varnish, and have almost settled on leaving it silver. But now I am considering an oil, or something like what you used.
Offline
I think this stuff would be worth while even if you had to do it twice a year. One coat on the whole boat should only take one person about 4 hours total... it is taking a lot longer for us because we are doing the sanding and three coats for the first treatment. I will have pictures up in a week or so of the finished boat. I also think that once it has been treated that one quart would probably do one coat of all the exterier wood on the boat. The saving grace for this in my opionion over varnish, cetol or two part finishes is that you can just slop it on quickly and spread it thin with a brush without worrying to much about brush strokes etc.. If you spill some on the jell coat you can just wipe it up easyly and even on my really porous jel coat it doesn't really stain it. It is a soap and water clean up.
I will post lots of pictures after I take them.
I will say that sanding the wheel was the most detailed and time consuming part of it with the pin rails being the next most time consuming.
Offline
We are so close to being done with the teak that I can almost taste it. Most of the boat now has two coats of tequa on the teak now. Only the companionway hatch and the midships skylight teak left to sand. Though the caprails are the biggest pieces of teak on the boat they were the fastest to sand down. The wheel took a long time and the pinrails also were pretty detailed in sanding around the pins etc.. The forward hatch also took some time because of the care that had to be taken to mask the acrylic and then sand the strips accross the face of the it. I have the feeling that the companionway will be a lot easier and the midships skylight will be tedious and detailed. Now that most of the teak is done she is looking nice. However with the teak all done it really points out the issues with the jellcoat on deck. Next will be sanding the jell coat and then priming and painting it.
 Offline
it looks great after application - how's it holding up so far?
Offline
Not to well.
I am finding a lot of mottled fadded areas as time goes on. I am going to use up what is left over the next couple years but at this point I am going to have to say I'm not to impressed by the durability. It wears off almost instantly with any abrasion such as lines rubbing on the wood. however I will give a little on phyisical abrasions .. thats pretty harsh for any coating. The areas that I am seeing light colored splotches and such in have not been worn by abrasion.. It just seems sun faded etc.. maybe my wood soaked it up unevenly with some areas being more pourous than others. However it all looked even for a while and then gradually started doing the mottled look. It still looks ok but it isn't wearning evenly.
Offline
Well I am sorry you are not happy with the results, as it would be nice to have an easy product that would work, as you said even if you have to do it twice a year. But it is good to hear results even if they are not positive.
Offline
a little later this spring we will be going back and doing the next years coat.. I will report on that torward the end of the summer and see what transpires for longevity with a second years coats down.
Offline
Thanks for the report Scott.
Bob
s/v Eolian
DE45 #11
Seattle
Offline
No worries glad to share 🙂
actually I haven't seen the boat in a few months.. just have someone checking up on it and stayin on it some of the time. I'm interested in seeing what the wook looks like now myself 🙂
Offline
So the tequa final verdict. After a couple years we had 5 or 6 coats on and the wood finally stopped soaking it up and it started lasting about a year between coats. Right now it has been a year or two since the last coat and it is starting to look a little worn. Many areas though that got the most tequa still look good. Over time and with repeated coast of tequa the wood has turned darker and darker. It is a very dark brown at this point but to me looks good. At this point we really liked it. At this point we also ran out of the original 4 quarts we purchased.
When we went to buy more we found out that the owner of the company died and took the tequa with him. It is no longer available. I am working on my own home brew version at this point and if it works well will let everyone know.
Most Users Ever Online: 175
Currently Online:
2 Guest(s)
Currently Browsing this Page:
1 Guest(s)

Top Posters:
Jonathan Oasis: 177
bobmcd625: 165
CAE: 150
mgav451: 143
Rick: 94
svbodhran: 84
Member Stats:
Guest Posters: 7
Members: 366
Moderators: 1
Admins: 1
Forum Stats:
Groups: 3
Forums: 13
Topics: 747
Posts: 3838
Newest Members:
Tools of the Smith, tonyflor, sailordad46, Spirare, BradHartliep, DuncanModerators: Patrick Twohig: 134
Administrators: Scott Carle: 1481
