 Log In
 Register
 Home
Home


 Topic RSS

 Offline


Hello
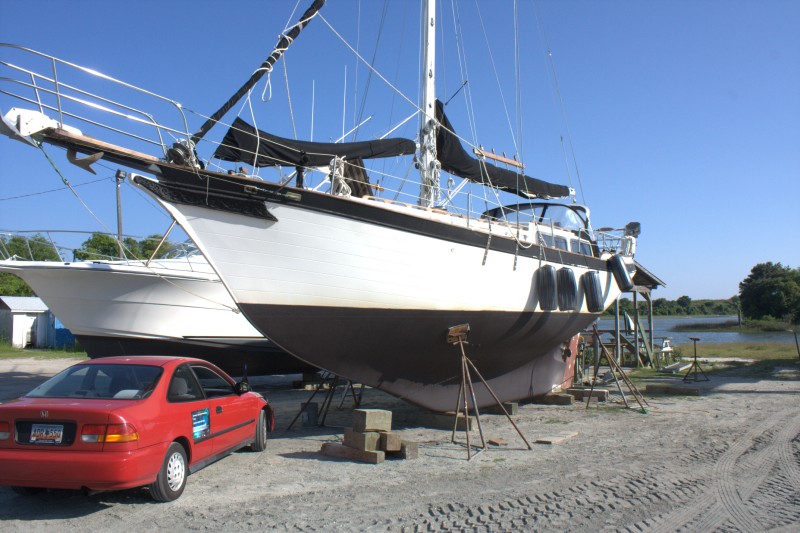
It's a bit of project boat, but mostly cosmetic work needs to be done. Some deck repair and paint, companion way hatch rebuild, new cushions, headliners, etc...
Just thought I'd introduce myself.
Peter


 Offline
That's awesome! I just bought a 1980 DE 38 (today!!) [Image Can Not Be Found]and she needs pretty much the same stuff! I'll be documenting stuff online, have been on this forum some and found it helpful. Congrats!
 Offline
Peter,
Welcome to the website and glad to hear you got one of these grate boats 🙂
hang out and share with us all the cool projects you now will be doing 🙂 Lots of info here to help you with them as you work on them.
scott
Offline
Thanks you guys. I just sailed her from Stockton to Berkeley in CA, yesterday. Motored, really. Took me and friend about 15 hours. But it shook everything loose that needs attention. All kinds of little stuff. But the basics are pretty good. Now I've got to totally empty her out and clean. Then start to fix things. The companion way slide is warped and delaminating....real attractive! And a few scuppers need rebedding. Bow sprit is not right and I need to get a good look at a proper one to know what needs fixing/changing. And it goes on and on.....
Offline
Glad you got in and nothing major was an issue. A boat on the ocean needs a place for everything and everything in its place. The problem is that we always forget to get everything in its place.
Have fun with the cleaning. We did that soon after we bought ours and it was a major job. Some areas we just took a hose too with scrub brushes and oxyclean, clorox and vinegar.. 🙂 not all at one time. Then we took a hose and sluiced it out and turned the bilge pump on. I have never worried about getting the solid teak wet in the boat such as the strips up in the v berth or the trim. I try not to soak the floors and bulkheads that are teak ply. We are 4 years later about ready for another major clean.
I will try and get some good pics if I don't have them up already of our bowsprit for you.
Hatch boards are pretty easy if you use plywood and use the old ones as templates. On all my boats the first thing I do is take some acrylic or lexan and replace the wood drop boards with it. It is strong and more importantly it lets light in. 🙂 I have used 1/2 inch on our DE38 currently as I had some sitting around. 5/8 would fit better but the 1/2 inch works well and is strong enough. They are a lot heavier than wood ones though. Acrylic and lexan are super easy to cut if you just do a couple things. First use a jig saw and clamp a guide/straight edge onto it to run the jigsaw against. Then take a hose and let it run a small stream of water across where you are cutting while making the cut. It will not gum up from heat and your cuts will just about look like they were made with a laser. I didn't use special blades just a medium to fine wood blade when I cut ours. I free handed the curve in the top of the top drop board and it didn't look as nice but I ended up using a sander with 60 grit paper in a 6 inch RO sander to put the bevel in it and smooth out the outline. Then used fine and finer sandpaper to smooth it out and polish it. Biggest issue with acrylic drop boards is they get scuffed up easily. Every year or two I seem to have lots of little scratches and scuffs and take a headlight buffing kit to polish them out.
Have fun with the scuppers. I replaced the hose on the forward scuppers port and starboard on our boat and that was pretty easy. the pulling them out and rebedding them a bit more difficult. Kinda hard to reach the nuts on the underside from where they are bolted in. The scupper fittings are really bad for sweating in cold weather. This past winter I thought one was leaking I was getting so much water coming from it in the galley cabinetry. I figured out it was just sweating from how cold it was. This winter I am going to insulate it. Not sure how yet.. maybe insulative paint, or some spray foam on it.
Good luck on the projects and keep us updated on your progress 🙂
scott
Offline
Hi Peter! So we are *almost neighbors. Our boat will be berthed in Benicia. My boyfriend and I are looking at undertaking a lot of our projects in the next year. Our first biggie is a soft spot on the foredeck that feels like we could "fall thru the ceiling" at any time. My email is on my contact info, I think. Lets keep in touch and we can share project notes both here and email. I'm crazy excited about all the projects. My boyfriend had many years in construction prior to becoming a nurse and he thinks I'm just plain crazy. 🙂 Glad your motor through the Delta went well. We just have about 10 miles down the Carquinez straight to get ours from Vallejo to Benicia. Currently she's blocked up in the Vallejo yard getting thru hulls serviced and bottom job. We bought this boat unexpectedly and neither of us has a spare minute right now for projects. That will change sometime in October. :-). Congrats again!
Hilary
Offline
Thanks Scott. I look forward to seeing a proper bow sprit...kind of a pun.
Hilary, I stayed in Benicia marina last night. So we are on the same wave length. You guys should do well.
I'm still getting used to maneuvering in tight spots, like into and out of my slip. But I guess it comes with practice.
Offline
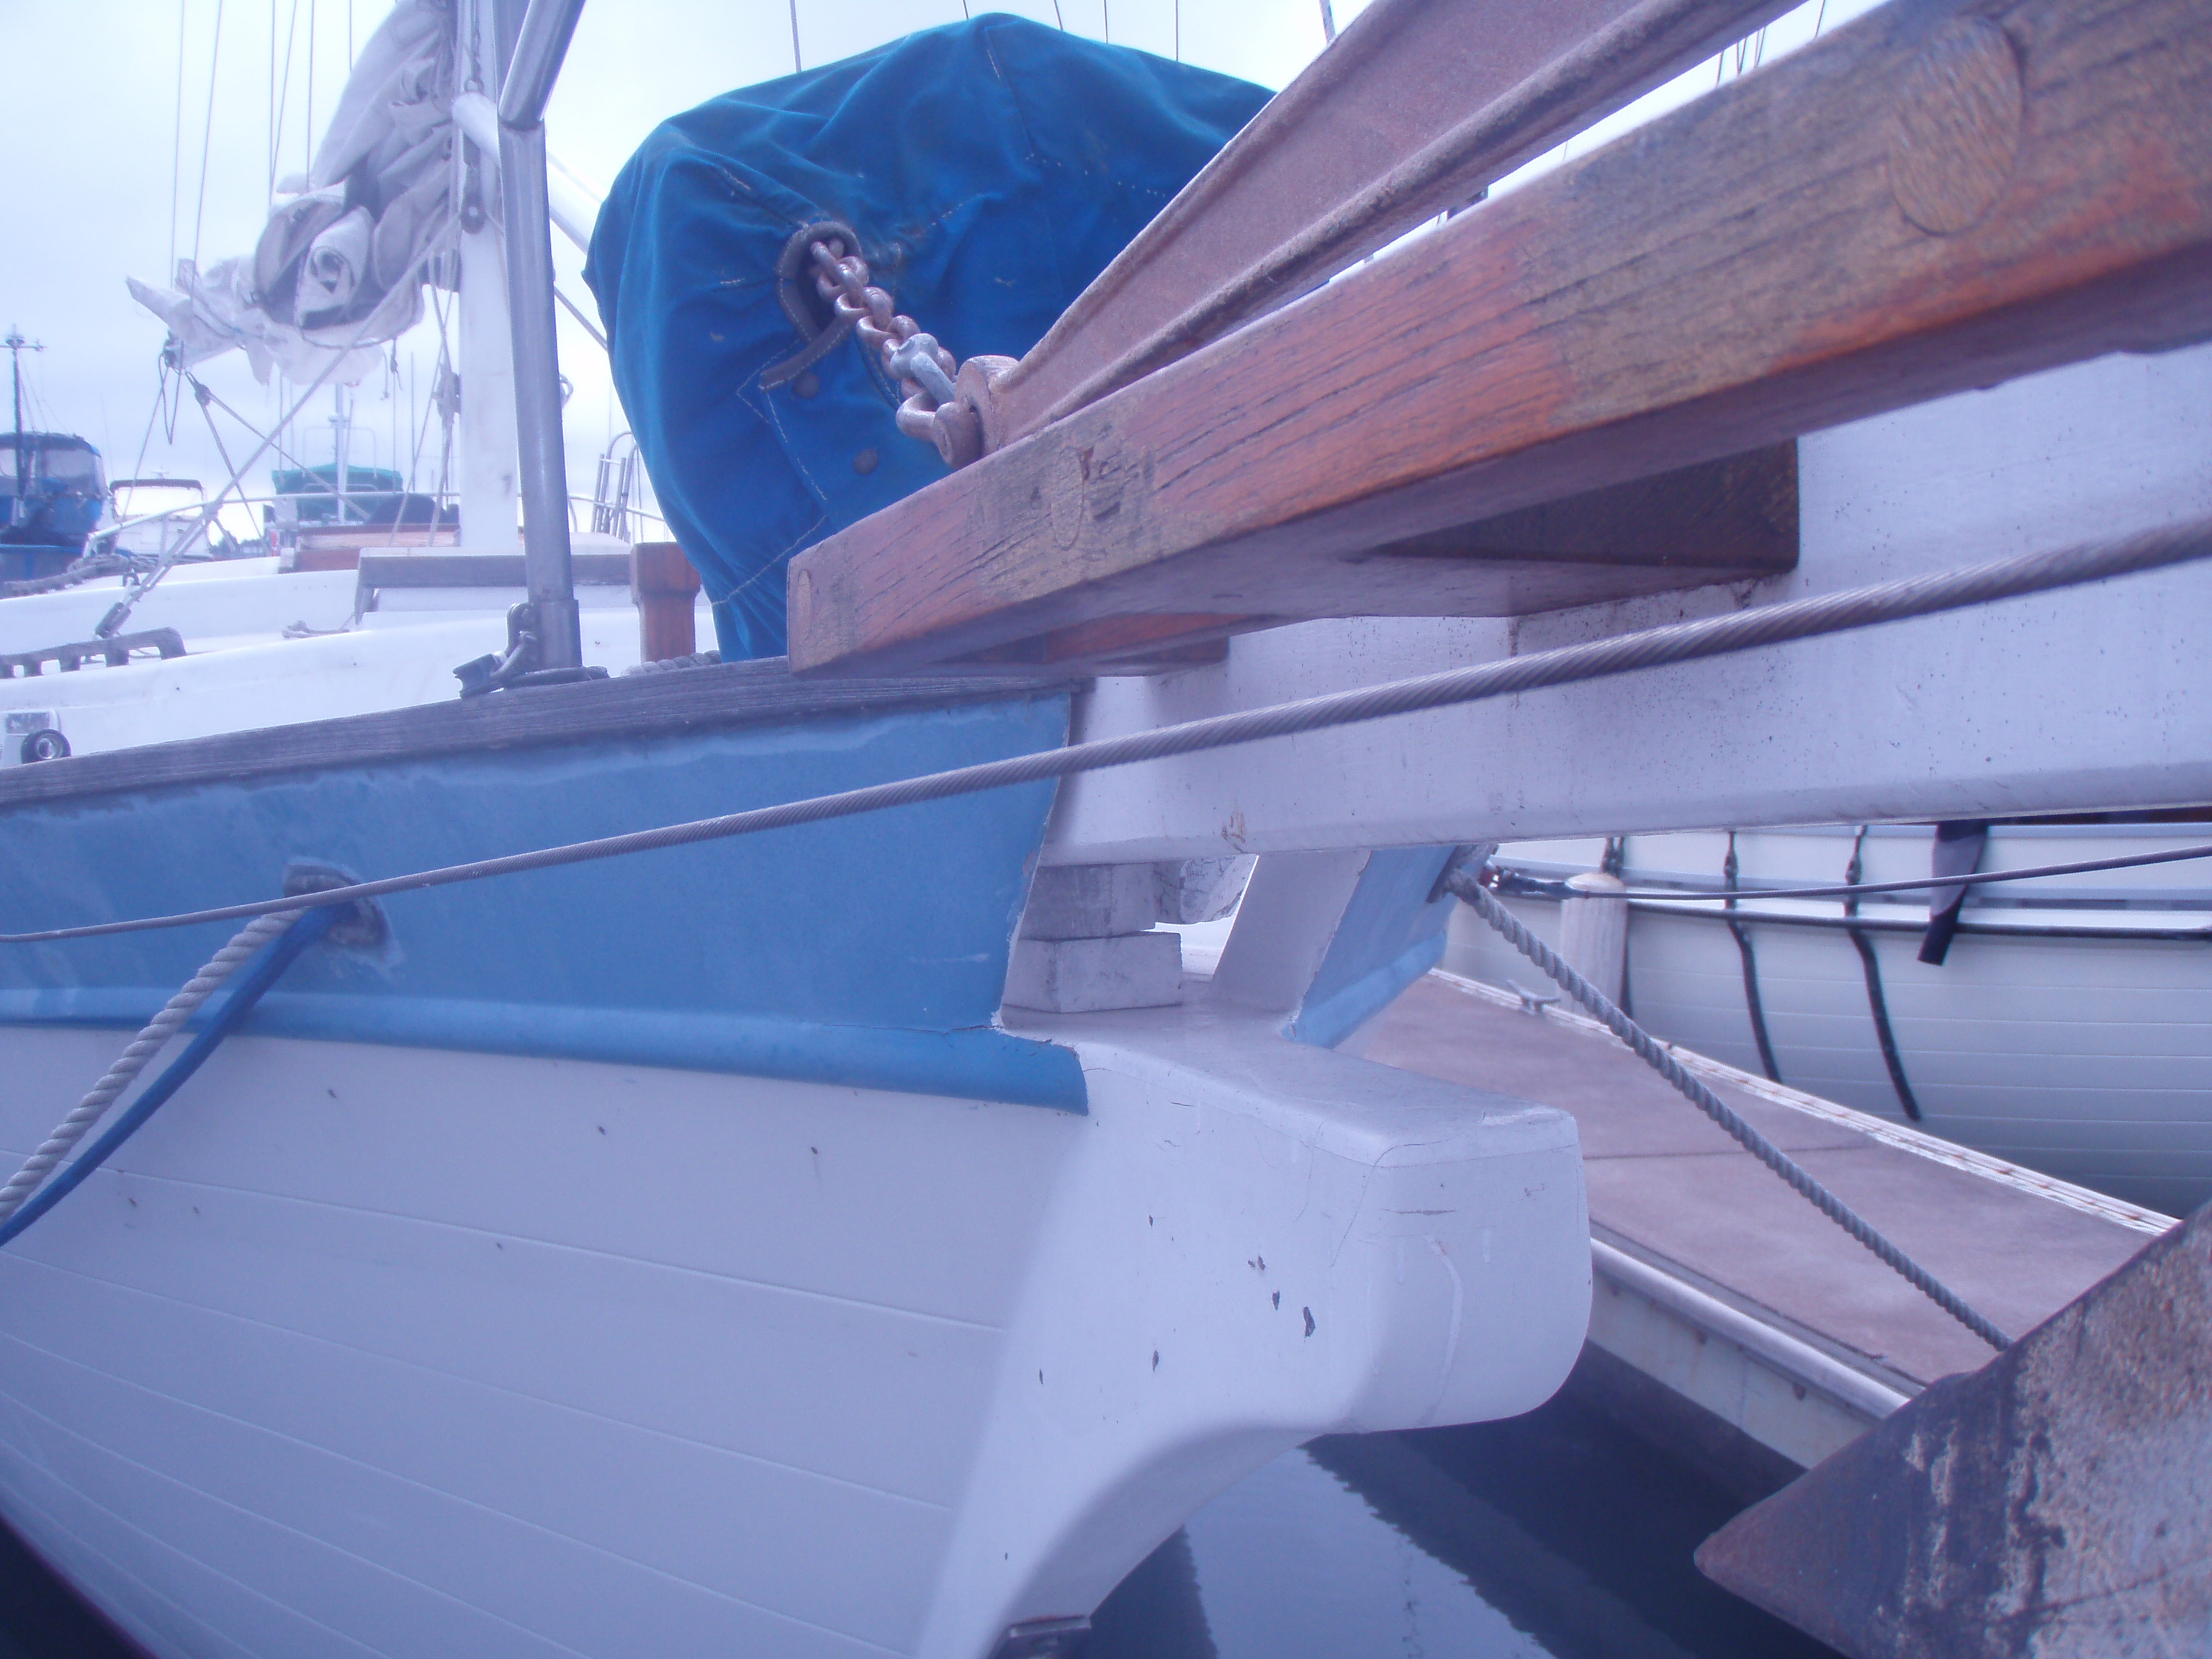
I'll try to post a pic of my bowsprit here:
Offline

here is a writeup on bowsprit replacement
/info-index/rigging/notes-on-bowsprit-replacement
here is windsong a DE38. He shows in this post pulling the bowsprit off.
/archives/2511
Offline
Thanks Scott. The previous owner had modified the bow sprit so that it was at a higher rake than when he bought it, because he thought it was "drooping down" lower than other DE 38's. So he put some wooden blocks underneath it in order to raise the angle. But, it does now look like it has an angle that's a a continuation of the cap rail. Which I think is normal.
If I could upload some pics it might make more sense. But I've looked around the site and can't figure it out how to upload pics.
Offline
our bowsprit has a block under it near the bow that is about 2 inches thick raising it in the front so that sounds similar to what I have. I believe that it does need to be tilted up so that it bisects the angle beween the forestay and the bobstay. The closer to bisecting it comes the more the force is kept pushing down the length of the bowsprit rather than pulling at it up down or to the sides. I'm not an expert at bobstays but that is my understanding. I would love for someone that has more knowledge than me to pipe up.
Here is a tutorial on uploading images on the forum. /forums/welcome-to-the-downeaster-yachts-forum/how-to-upload-images. Hopefully it helps with the uploading images issue.
Offline

Offline
I don't think ours is raised that hi. I will measure it tomorrow if I get a moment and then post how high it is. Moving it up and down will change the length of the forestay and or the rake of the mast. You might check how much adjustment there is on the forestay length as it will probably need to be adjusted out. I'm ok in a rule of thumb sort of way for this stuff but you might want to talk to a good rigger if your not comfortable with it.
Scott
Offline
Ours needs some work also, so I'll be interested to see what you come up with, Scott. On ours, seems like the wood needs reinforcement on the port side. But I'm not an experienced sailor so maybe it needs a lot more...
Offline
Thanks, Scott. Yes, the forestay is now looser than it should be because the rake was increased on the bow sprit. There's a furler on it as well. So I might have to shorted the forestay and the furler to bring back the proper tension on the forestay as the turn buckle may not have enough adjustment left in it to take up the slack. The PO said it's a Norseman cable fitting arrangement.
On another note, I have some slight rot on two bulkheads that are on either side of the head, against the hull. It was where an old window leak had ran down to the bulkhead and settled. Is there a way to repair this without replacing the entire bulkheads, since the bulkheads are 98% ok?
Thanks again for all your help.
Offline
You should be able to remove the worst of the rot and then treat whats left with a penetrating epoxy to stabilize it and then maybe filling with a thickened epoxy to rebuild the shape. If the rot extends a fair distance into the bulkhead say a couple inches or more you could cut out the damaged area and then splice in a new piece of plywood. You should post some pictures. In some areas you could have bit of rot that doesn't affect it structurally at all or it could be in an area that it would cause concern. Those are such large bulkheads that I think you could have localized areas of rot without affecting the boats structure at all. On my boat the bottoms of the bulkheads are not even tabbed in over the fibreglass pan that the head sits on and the end of the port settee is the same. So any rot in those areas should be easy to treat in place by the aforementioned treatments.
Lucky for us we have pretty much no issues inside the boat like this. The issues we deal with are scuffs, sun fading and some of the wood being drier than I would like due to not enough treatments with a good teak oil. We have been using a citrus solvent and tung oil over the last couple months to treat the interior teak to get deep penetration of tung oil that builds up till it stops soaking in. At that point it will form a surface treatment.
Bowsprit.. if you have rot in the bowsprit then it will potentially need to be replaced. Limited rot in certain areas can be treated like the bulk heads with penetrating epoxy and then thickened epoxy to build back up. I have heard of people doing this to very localized rot around the bolt holes etc.. however if you have rot that extends down the length of the bowsprit anywhere then it probably needs to be replaced. That or any areas with rot need to be replaced with a spliced in piece that is the full length of the sprit. Again not one of my areas of expertise. I would probably be comfortable make such a repair on my boat but would be hesitant to do so for someone else as I am not an expert in that particular repair.
Building a new bowsprit seems like a fairly easy task though. You would use the old one as a template to draw the lines of the sprit on a large beam and use a circular saw to cut out the rough cut shape. You would probably need to cut from both side to cut through the full depth. You would want a beam with a smooth straight grain. Then use a belt sander with 50 grit sand paper or 36 grit to smooth it down the the final lines. Then go to 80 grit, 120 grit and then maybe 220 grit to finish smoothing it. Drill your holes and shape the end for the iron to go over it. I think I would treat the holes and ends with penetrating epoxy so that it was harder for the spar to soak up water and rot in those areas. Then paint and install. You can also use thinner planks to laminate a spar also. Our spar is constructed this way though I did not do it. The posts above with the links go to discussions on this. I would probably also do a search on the internet for building spars. The wooden boat forums would probably have some valuable insights also. A lot of the traditional wooden boat guys hang out there and talk about rigging and spars and such.
I have actually though about using a steel tubular section to replace ours with if it ever needed it. I would probably decide which cost less and go that route. Steel is something I am comfortable working in so it wouldn't be a big deal one way or the other. I have seen DE's with both the traditional wood and steel bowsprits.
Offline

Offline
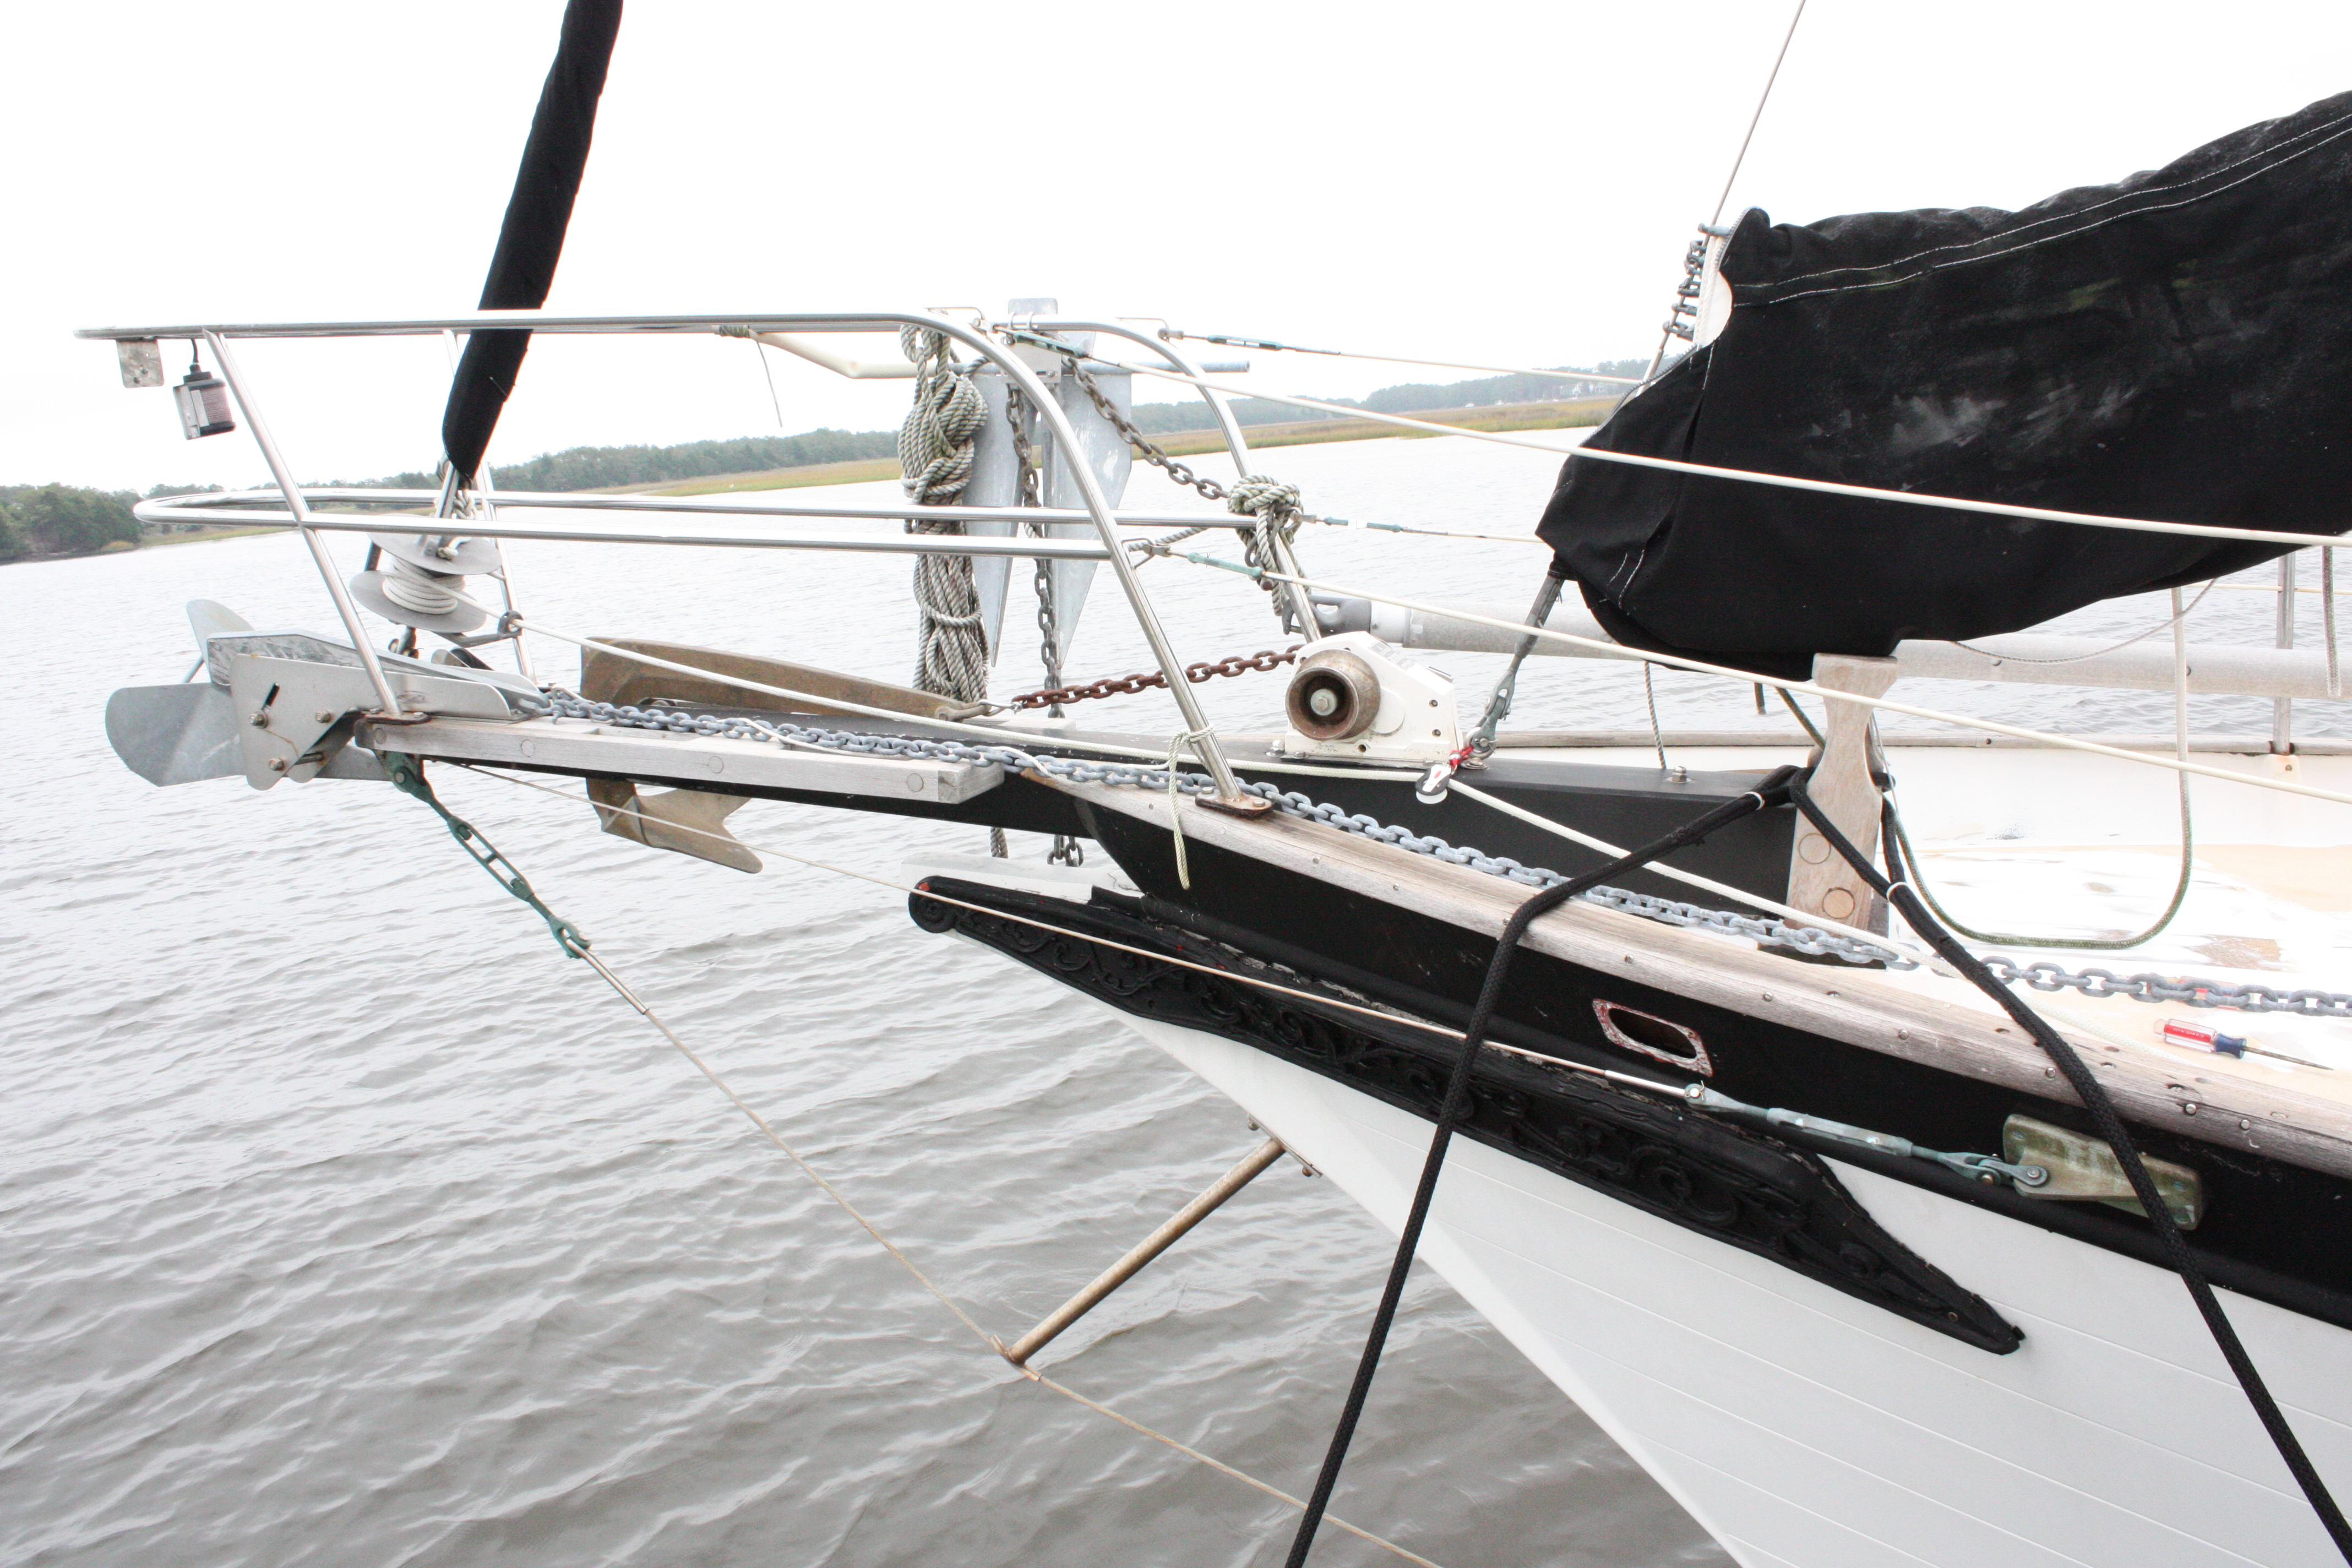
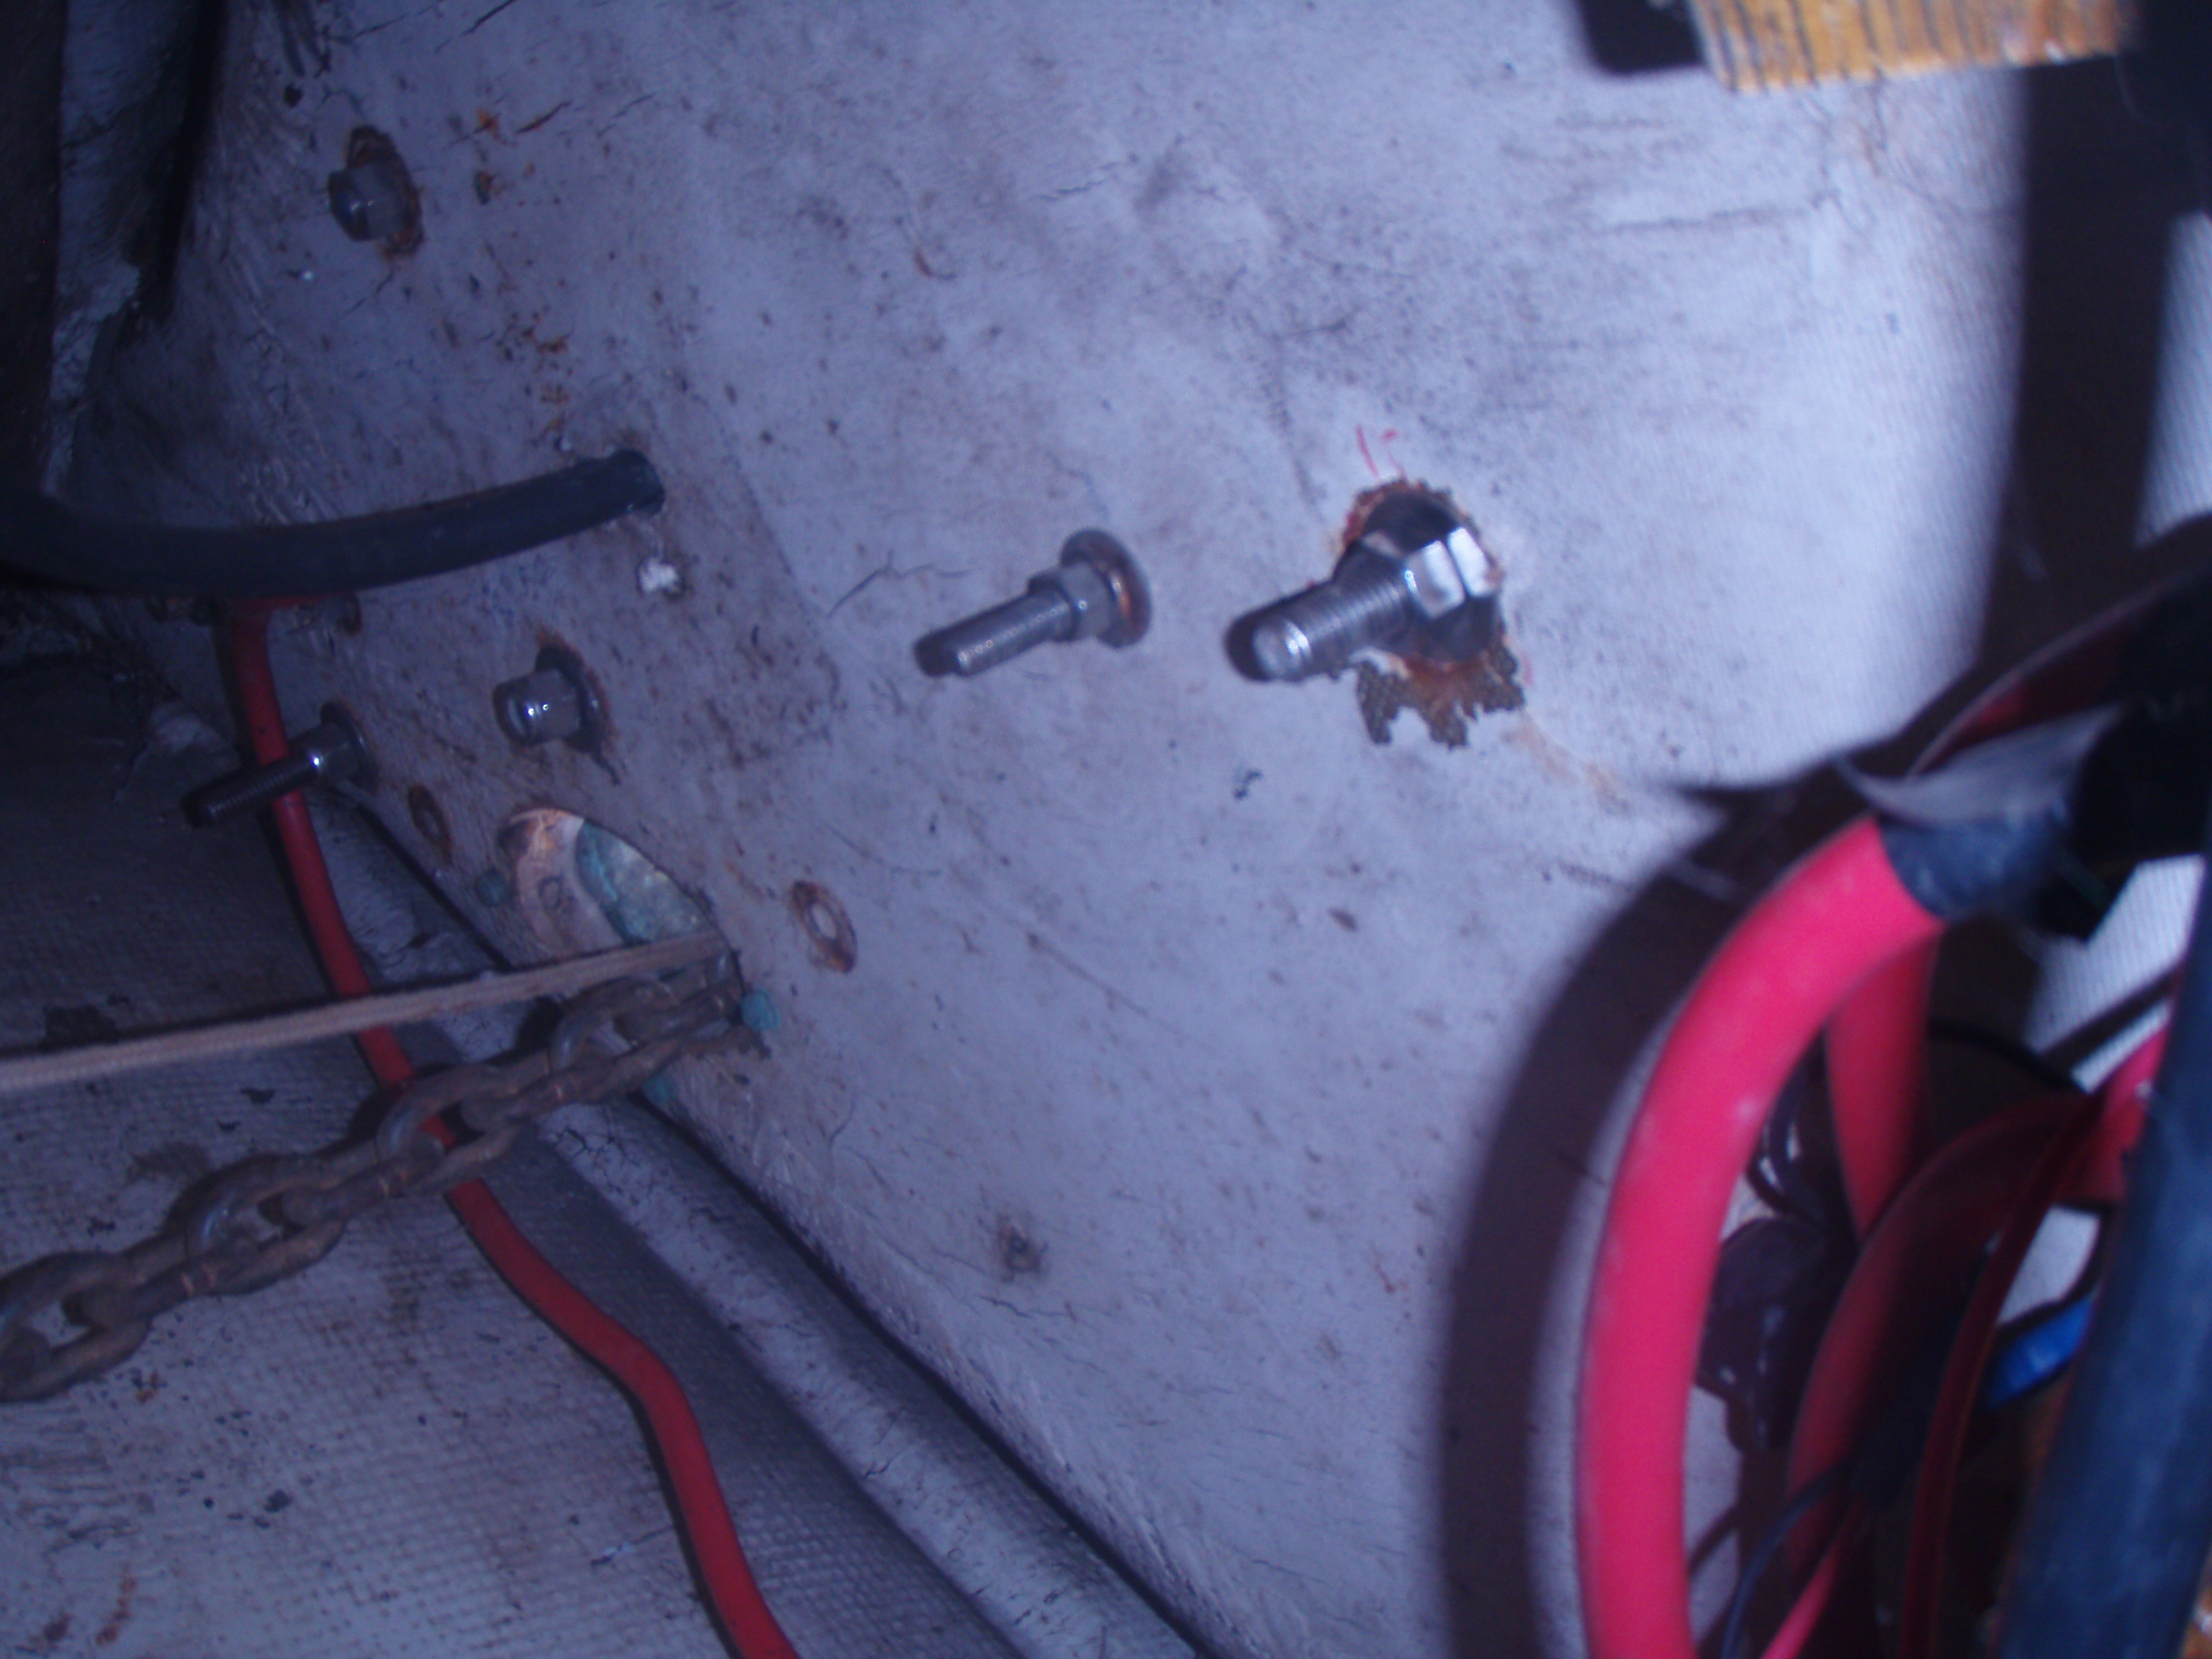
ok .. bowsprit backing plates 🙂
I think that is factory as that is what ours is like. It is on my todo list to install backing plates.
Unless the idea was that if the bobstay broke and the rig started to come down that the bowsprit should be able to pull out doing minimal damage to the foredeck so as not to rip a huge hole in it. All the normal stress is supposed to push the bowsprit inline from front to aft. There shouldn't be any lifting forces in normal usage. The bowsprit when pushed back pushes into the sampson posts that are bolted to the chain locker bulkhead.
If you notice in your picture there where the chain comes through the deck. It doesn't look as if they sealed the core where they cut the hole through the deck. That is pretty standard for these boats and I am pretty amazed that they haven't had more issues than they have with core delamination. A testimate to the decent quality materials they had back then. I would take and wallow that area between the upper and lower lamination’s out and remove the core back about a half inch and fill the gap with thickened epoxy to totally seal the core there. The same thing for any bolt through the deck there that you take out. Check for the core being exposed and seal it appropriately if it is.
rot..
that doesn't look bad at all. If there is still some structural wood left in the rotted areas I would take a wire brush and get rid of the loosest and punkiest stuff and then paint it with penetrating epoxy till it won't soak in anymore. Let it cure and then make some epoxy putty with some sawdust with any teak saw dust or sanding dust to give you a close color and mix in enough after mixing the resin to make it the consistency of peanut butter. Stiff peanut butter. It is a lot of saw dust. probably as much sawdust as epoxy or even slightly more. Before mixing that up tape off the hull and just at the line where you need to fill voids in the bulkhead with this thickened epoxy. use a putty knife to fill it all in good and tight and as it starts to tack up/cure pull the tape to give nice clean lines. You might need to do a very minimal amount of sanding if you get it smooth enough. You could come back in and lay a trim strip of wood over that curve to hide the repair if it doesn't look nice enough after it is finished. I would expect you would need to treat both sides of the bulkhead there with penetrating epoxy and epoxy putty to do the repair. While you have the penetrating epoxy out you might tape and treat the areas adjacent to that also to preemptively stop future issues in case of a leak.
If you don't have enough wood left to give a good support to the epoxy being trowled in then I would suggest cutting out just the rotted area and the using paper or cardboard to create a template of the missing piece of wood and use it to cut out a good piece of ply or solid wood that shape and the correct thickness. Treat that section with penetrating epoxy until it is saturated and let it dry. Then Treat the cut edge of the bulkhead where that piece will go in with the penetrating epoxy also. After it cures you can glue the piece in. If you want extra reinforcement take and lay a strip of 20 oz bi-axial glass cloth in epoxy along the curve of the hull covering the splice so that it comes an extra 3 or 4 inches across the splice joint and past each end about that far. This will require a bit more int the way of cosmetic covering afterwards. For cutting out the bad wood and cutting the plug I would use one of the multifunction vibrating cutting tools we talked about the other day. It will make it a simple and easy job to cut out the old wood in such a tight area and give you very clean sharp cuts.
I would if I was doing it prefer to do the first type of repair rather than replace a whole plug of wood.
for epoxy ... west systems seems to be the name brand go to name.. however I have done a lot with a company called Raka in florida http://www.raka.com . their prices are pretty good and you can get great deals on Fiberglas on there closeouts section for small jobs and such. I just tried to check their website and it isn't coming up.. not sure what the issue is there but you can try and see if you can get through. I found them to be really helpful over the phone. If you order from them or west systems or anyone else you want to get one of the pump systems that you can do measured pumps of material into your mixing container. It helps a lot giving accurate measurements. I found order a two to three gallon kit of epoxy though pricey to be a better value over all. I think I got my cost per gallon down to about 60 dollars a gallon. I have also ordered from http://www.aeromarineproducts.com/ in San Diego CA before and their products worked well. For you guys there in California if your close enough to pick up it would save a lot of shipping charges 🙂
Whatever epoxy you end up getting take and mix up a small test batch and play with it before doing a serious project. Take and paint a scrap of wood with it after mixing it and then take the rest of your test batch and mix in sawdust to get a feel for how much you need per volume to get it to different consistency. It will also give you an idea how long you will be able to work with it before it hardens up.
You can use vinylester resin and fiberglass a lot cheaper than epoxy but I have always used epoxy for the extra edge in strength of repairs and bonding to whatever I am repairing. Just a personal preference.
Offline
CAE said:
Thanks, Scott. Yes, the forestay is now looser than it should be because the rake was increased on the bow sprit. There's a furler on it as well. So I might have to shorted the forestay and the furler to bring back the proper tension on the forestay as the turn buckle may not have enough adjustment left in it to take up the slack. The PO said it's a Norseman cable fitting arrangement.
Thanks again for all your help.
Just a thought.. you could remove the blocks and tighten the bobstay adjuster to pull the bowsprit down until the jibstay/forestay is tight enough and then put a new block back in at that thickness. The bowsprit should still be higher than the deck at that point.
Offline
Scot you're a wealth of knowledge. :-). Trav sent me pics of our bowsprit today and it's not rotten, actually wood feels sturdy but it's seperated from the long post that extends (sorry I'm new to this...the post that extends off the bow that the bowsprit is bully around.). Is that fixable?). I can't upload pics...I'm on my phone. Didn't bring a laptop with me because I'm just working all the time.
Btw brief topic drift..did you install your Nature's head in the yard or on water?
Both Peter and I live in Nor Cal...HOWEVER...due to prior commitments I am down in SoCal frequently until November. (Northern California and Southern California are like different countries. Seriously. 🙂 How much are we talking about saving in shipping? I could certainly pick some stuff up and haul it back when I happen to drive.
Peter, I've been told that Svendsen's Marine in Alameda is the place to go for good prices and Blue pelican has loads of used stuff. You're definitely more boaty than me so perhaps you knew all this but thought I'd pass it on.
Offline
Thanks Scott, that's a very good idea on the bow sprit spacer 'sizing'. It might work quite well. A compromise of sorts. I would really like to avoid shortening the Forestay. You really are a wealth of knowledge!
Hi Hilary, I've been sailing for a while and I don't like spending money....I agree, Blue Pelican is pretty good as is Craigslist. Also Jamestown and Amazon. Especially if you have Amazon Prime which does not charge for shipping.
There's also Minney's in Newport Beach for used sails, props and other stuff. Minney is a legend in his own way. Getting creative can also save money and allow you to put your own style on your boat. Think outside the boat, so to speak. A galley is a kitchen, and salon is a living room, a head is a bathroom, etc....at least that's the way I look at it.
Finding someone with a sewing machine that can handle sunbrella and sail dacron, too can be very good. I have a friend that can make cushions and do wonders with sunbrella.
Offline
diverchick71 said:
Scot you're a wealth of knowledge.:-). Trav sent me pics of our bowsprit today and it's not rotten,actually wood feels sturdy but it's seperated from the long post that extends (sorry I'm new to this…the post that extends off the bow that the bowsprit is bully around.). Is that fixable?). I can't upload pics…I'm on my phone. Didn't bring a laptop with me because I'm just working all the time.
Btw brief topic drift..did you install your Nature's head in the yard or on water?
Both Peter and I live in Nor Cal…HOWEVER…due to prior commitments I am down in SoCal frequently until November. (Northern California and Southern California are like different countries. Seriously.:-) How much are we talking about saving in shipping? I could certainly pick some stuff up and haul it back when I happen to drive.
Im not sure I follow on your bowsprit. I think if you could post a picture of what your talking about I might be able to think of something.:) It sounds as if your saying your bowsprit is laying flat on deck but I can't tell for shure. My bowsprit does not touch the deck at anypoint. There is a spacer a couple feet from the bow and then a thinner spacer under the aft base. I think they did this so it wouldn't hold water between it and the deck which would promote it rotting.
Natures head.
We installed in the water…No biggie.. there is nothing about it that requires the boat to be out of the water. We just bolted it with the supplied mounts to the platform the head had been on and ran the air exhaust up to the dorade opening in the head compartment and replaced the cowl on the dorade with a 3 inch nicro day/night solar vent. The exhaust hose we just bolted to the forward bulkhead along the outboard corner of it and once it got to the overhead did a section over to the supplied plastic mount. We just screwed that mount to the bronze fitting for the dorade that was inside the boat. Not sure how your boat was setup but I'm sure you will be able to do something similar easily. I had originally planned on running the exhaust aft and out a raised fitting there but did the quick and dirty just to get it working. I had thought there might be odor issues with the exhaust on the forward deck there but it has never been an issue. Even if hanging out on deck beside the solar vent. The total installation only took a a couple hours the way we did it, add another few minutes for the solar vent installation.
On shipping.
If your more than a couple hour round trip and were going that way anyways I probably wouldn't bother. Figure shipping at about 40 to 50 bucks probably. maybe less since your in the same state.
Offline
One more question (Yeah right). My bobstay connection to the hull is sitting almost in the water and I've noticed a lot of other boats with bobstays have their hull connection sitting a few inches above the water. But, I've got a substantial electric windlass, 45 lb CQR and 300 feet of 3/8 chain in the locker....all on the bow. I'm guessing that's what's making the whole thing sit lower in the water at the bow?
What's the best way to move 300 feet of chain for cleaning? It must weigh 500 lbs? Go out to some deep water anchor and start paying out chain? I've heard of dragging it on a dirt road. But just moving it anywhere seems like a challenge.
Offline
EXCELLENT question and I will await the response. I've heard the extra chain in the chain locker significantly affects the sailing performance and people keep it midship but my question is where?
Offline
CAE said:
One more question (Yeah right). My bobstay connection to the hull is sitting almost in the water and I've noticed a lot of other boats with bobstays have their hull connection sitting a few inches above the water. But,I've got a substantial electric windlass,45 lb CQR and 300 feet of 3/8 chain in the locker….all on the bow. I'm guessing that's what's making the whole thing sit lower in the water at the bow?
What's the best way to move 300 feet of chain for cleaning? It must weigh 500 lbs? Go out to some deep water anchor and start paying out chain? I've heard of dragging it on a dirt road. But just moving it anywhere seems like a challenge.
Ok first..
bobstay connection.
It seems to sit low to the water to touching the water on DE's in general. You need that 300 ft of chain in the bow to keep the boat balanced fore and aft. I had to cut out 100 ft of bad chain in our 275 ft that was on the boat when we bought it. Then we removed the holding tank and all the plumbing forward for the head when we went to a composting head. It left the bow more than 8 inchs high on her lines. We just moved some weight out of the cockpit lockers and into some temp storage boxes on the forward cabin and we are just at level With it just a hair above water on our boat we still are not level in the water and have a slight inclination to aft. Cook an egg and it will slide aft in the ski lit:) The boat should have been designed to float level which puts the bobstay connection touching the water. We have two 45 to 60 lb anchors on the bow along with 175 ft of chain and a manual windlass and it lacks probably 500 lbs of floating level. Check the level of your boat in the water. that will tell you what you need to do shifting weight for or aft. If you want her to come up in the water and she is level then you need to start lightening the boat.
Moving chain is easy sort of, no special equipment needed.. You only ever move a few feet at the time:) So to get it to your car if taking it somewhere you bring the dock cart or other conveyance that is strong enough to hold it and pull out 10 feet of chain and put it in the cart. Then the next 10 feet and the next,so on and so forth. Same to get it into the car.. feed it a few feet at a time from the cart to the car. It slow hard work but the only way to move it with human power:)
Cleaning chain..
simple way I have done is to let it all out into the water sitting in the slip. Just let it fall in a pile on the bottom. Then bring it back up a few feet at a time and scrub it with a brush and hose or use a pressure washer as you bring it back on board.
A fellow sailboat owner that has cruised the world did the industrial job on his a few months ago. He took a 5 gallon bucket and filled it half full of a water and acid solution and ran the chain off the boat into that one section at a time. Let it sit then scrubbed and rinsed and stretched along the dock to inspect and dry.. then after it was all done fed it back to the windlass and pulled it back on the boat. This cleaned all the rust off of it. I think he used phosporic acid? gotten from a pool supply company? but don't hold me to that.
A warning for you…
you need to make sure the bitter end of your chain is tied to the boat. That way if you let it all out you won't accidentally lose it over board. Another warning that comes from experience. On my boat 3 owners ago they attached the anchor chain to a big eye in the chain locker which is good,but then they used a steel cable to attach it with. They also used a short enough length of cable that you had to go down in the v-berth to access it through the door in the forward end of the vberth there.
This meant two things,if you did need to abandon your anchor and chain for some reason you couldn't cut it from on deck due to the length and the material. You needed to go below and have some bolt cutters to cut it. This is unsafe. You had to have bolt cutters or other specialized equipment to cut it. I replaced the steel cable with half inch double braid line that was long enough to when fully extended come out of the deck pipe a couple feet. This means it is strong enough to hold the weight of the chain so I don't lose it accidentally but that in an emergency I can cut it very quickly with a simple knife while on deck. It might be better to tie it with a lenght of nylon chain as if the chain ever runs out uncontrollably, when it hits the end the line will stretch a little and not just have all the weight hit with a sharp jerk like will happen with my double braid. (note to self on project there for me)
a note on a side project we did when cleaning the chain..
When we did this we took the time to do two other things. We scrubbed and cleaned the upper and lower chain lockers and then painted then a nice hard gloss white. I think we used Brightsides a single part polyurethane from west marine (we would have used bilgekote but they didn't have it in white just grey). It seems to be holding up nicely.
Secondly we fixed an issue with these boats in that any water that got into the chain locker ran all the way through the bilges of the boat to the main bilge under the engine and carried over time lots of debris from the chain into the bilges. Rust,mud,cockroach debris etc.. It made a mess the length of the boat and contributed to corrosion on our fuel tank from it piling up in front of it and holding moisture against the tank. Our solution was to buy a small bilge box with a sump pump inside it and install it just forward of the shower under the floor in the vberth. We then sealed the second chainlocker opening at the bottom with a plastic through hull fitting bedded in 5200 so that a hose could be put on it and run to the bilge box and pump. We also ran lines from the shower there as well as the condensate line from the old onboard ac system so that they also went to the bilge box and were pumped overboard directly from there to an above waterline through hull that was free on the side of the boat just to starboard of the bilge box. We ran the line from the bilge pump above the waterline and back down the thru hull with a anti siphon fitting at the top. Our bilges are bone dry the length of the boat now from doing this.
Offline
diverchick71 said:
EXCELLENT question and I will await the response. I've heard the extra chain in the chain locker significantly affects the sailing performance and people keep it midship but my question is where?
It would be difficult to do that on our boats. there is the upper and lower chain lockers and I try to keep most of my chain in the lower chain locker to keep the weight low. I personally think the weigh on this particular boat needs to be forward though just to balance the boat. It is hard to feed the chain into the lower locker. You need someone below to to feed it as someone brings it in from on deck with the windlass.
I plan on one day putting a 3 inch pvc pipe in that runs straight to the lower chain locker and second deck pipe on port that I can run my second anchor line,that is 3/4 inch 3 strand with about 50 ft of chain on the end,into the upper chain locker. This will put most of the weight low and let me store both rodes in the chain lockers without getting them tangled in each other.
If I could have anything I wanted I would get an anchor puller for my second 3 strand and chain anchor rode. This just spools it up on spool with an electric motor and it sits in its on housing on deck just forward of the forward cabin. However they are close to 3 grand so not on my horizon unless I get lucky for Christmas.:)
Offline
Hmm. Does yours have a lower chain locker, Peter? How is it accessed? I'm 500 miles away from my boat right now. My boyfriend was out there all day yesterday and he pulled loads of stuff out and said he found a lot of storage areas that he didn't know existed. Just looking at the locker space I could see (forward of v) it seems a stretch that that much chain would fit. Wondering if I have a lower storage area. Hmmm. More on his to-do list. He will be thrilled. 🙂
Offline
The chain is in both lockers. All 300 feet of it. But, I spent the day emptying out the boat and it's now riding about two inches higher out of the water. Measured up the the steel tube for the new bow sprit and removed about a third of all the headliner. It's starting to feel like a job.

Most Users Ever Online: 175
Currently Online:
2 Guest(s)
Currently Browsing this Page:
1 Guest(s)

Top Posters:
Jonathan Oasis: 177
bobmcd625: 165
CAE: 150
mgav451: 143
Rick: 94
svbodhran: 84
Member Stats:
Guest Posters: 7
Members: 366
Moderators: 1
Admins: 1
Forum Stats:
Groups: 3
Forums: 13
Topics: 747
Posts: 3838
Newest Members:
Tools of the Smith, tonyflor, sailordad46, Spirare, BradHartliep, DuncanModerators: Patrick Twohig: 134
Administrators: Scott Carle: 1481
