 Topic RSS
 Offline
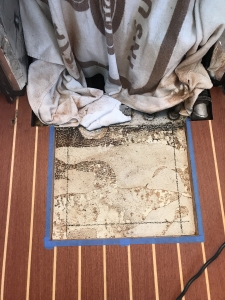
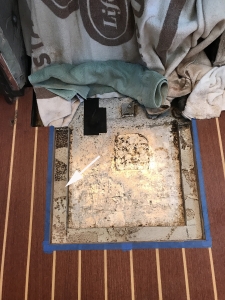
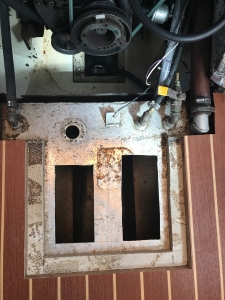
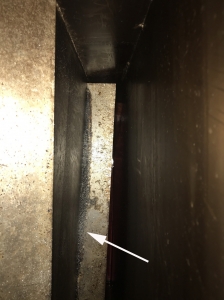
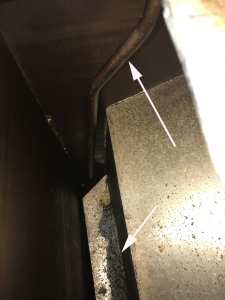
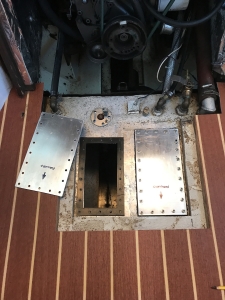
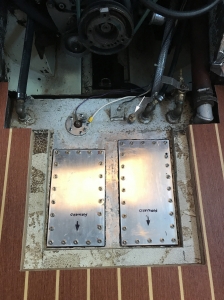
We had a rough passage up the Chesapeake Bay last month which stirred up the fuel in the tank so that the engine stalled. After changing the fuel filters twice over the next few days, I had the fuel "polished" in Annapolis. Heading south, the engine stalled again the next morning. I discovered the fuel pickup tube was plugged. After blowing that out, the next day the engine stalled again, this time a different problem related to the old fuel filter assy, which developed an air leak. Returning to home base I was determined to fix these problems for good! Attached photos show the steps I took to cut access holes in the top of the tank. Then I was able to clean the remaining black residue from the tank baffles, and a small amount from the bottom. The baffles are all welded to the tank walls. There is one large baffle that divides the tank in two front to back, top to bottom. Then there are two horizontal wing-like baffles about midway up the tank on both sides, also welded. There is about 1-2 inch clearance between the horizontal baffles and the center vertical baffle. This allows one to reach to the bottom of the tank for inspection or cleaning. An early hope was to pull the pick up tube and inspect it. However, it was found to be welded at the top and near the bottom of the tank. The tube ends without a strainer, about an inch off the bottom. A simple blast of air, and a ramrod was all that was possible. As another attempt to prevent future problems, I installed a small port to use for a dipstick shown in one of the images (arrow points ). The dipstick allows one to check the fuel level, I marked it in 5 gallon increments. The dipstick I use is a stainless 3/8 tube, which also doubles as a way to draw a fuel sample from the tank bottom using a small hand pump. If water is seen, one could keep pumping until clear fuel is seen. I have added the recommended biocide and fuel stabilizer, so with the proper attention, the original tank should be fine. After cleaning, the access holes were covered with aluminum covers and stainless steel screws. Gaskets are 1/8" nitrile rubber.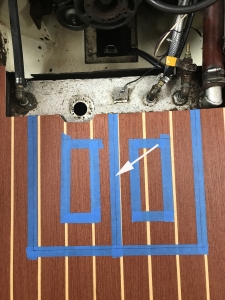








 Offline
Scott, The covers were also aluminum, same thickness, about 1/8". I used nitrile rubber sheet, also about 1/8" and screwed them down with 316 stainless machine screws (#10-24). The tank top was drilled and tapped holding a plastic tray underneath to catch the chips. Frequent vacuuming around the area helps keep things clean.
Most Users Ever Online: 120
Currently Online:
4 Guest(s)
Currently Browsing this Page:
1 Guest(s)
Top Posters:
Jonathan Oasis: 174
bobmcd625: 165
CAE: 150
mgav451: 143
Rick: 94
svbodhran: 84
Member Stats:
Guest Posters: 7
Members: 366
Moderators: 1
Admins: 1
Forum Stats:
Groups: 3
Forums: 13
Topics: 745
Posts: 3834
Newest Members:
tonyflor, sailordad46, Spirare, BradHartliep, Duncan, MistyDawnModerators: Patrick Twohig: 134
Administrators: Scott Carle: 1480
 Log In
 Register
 Home
Home


