 Topic RSS
We needed to replace Tondy's old teak stern caprail as it had reached the end of it's life.
.
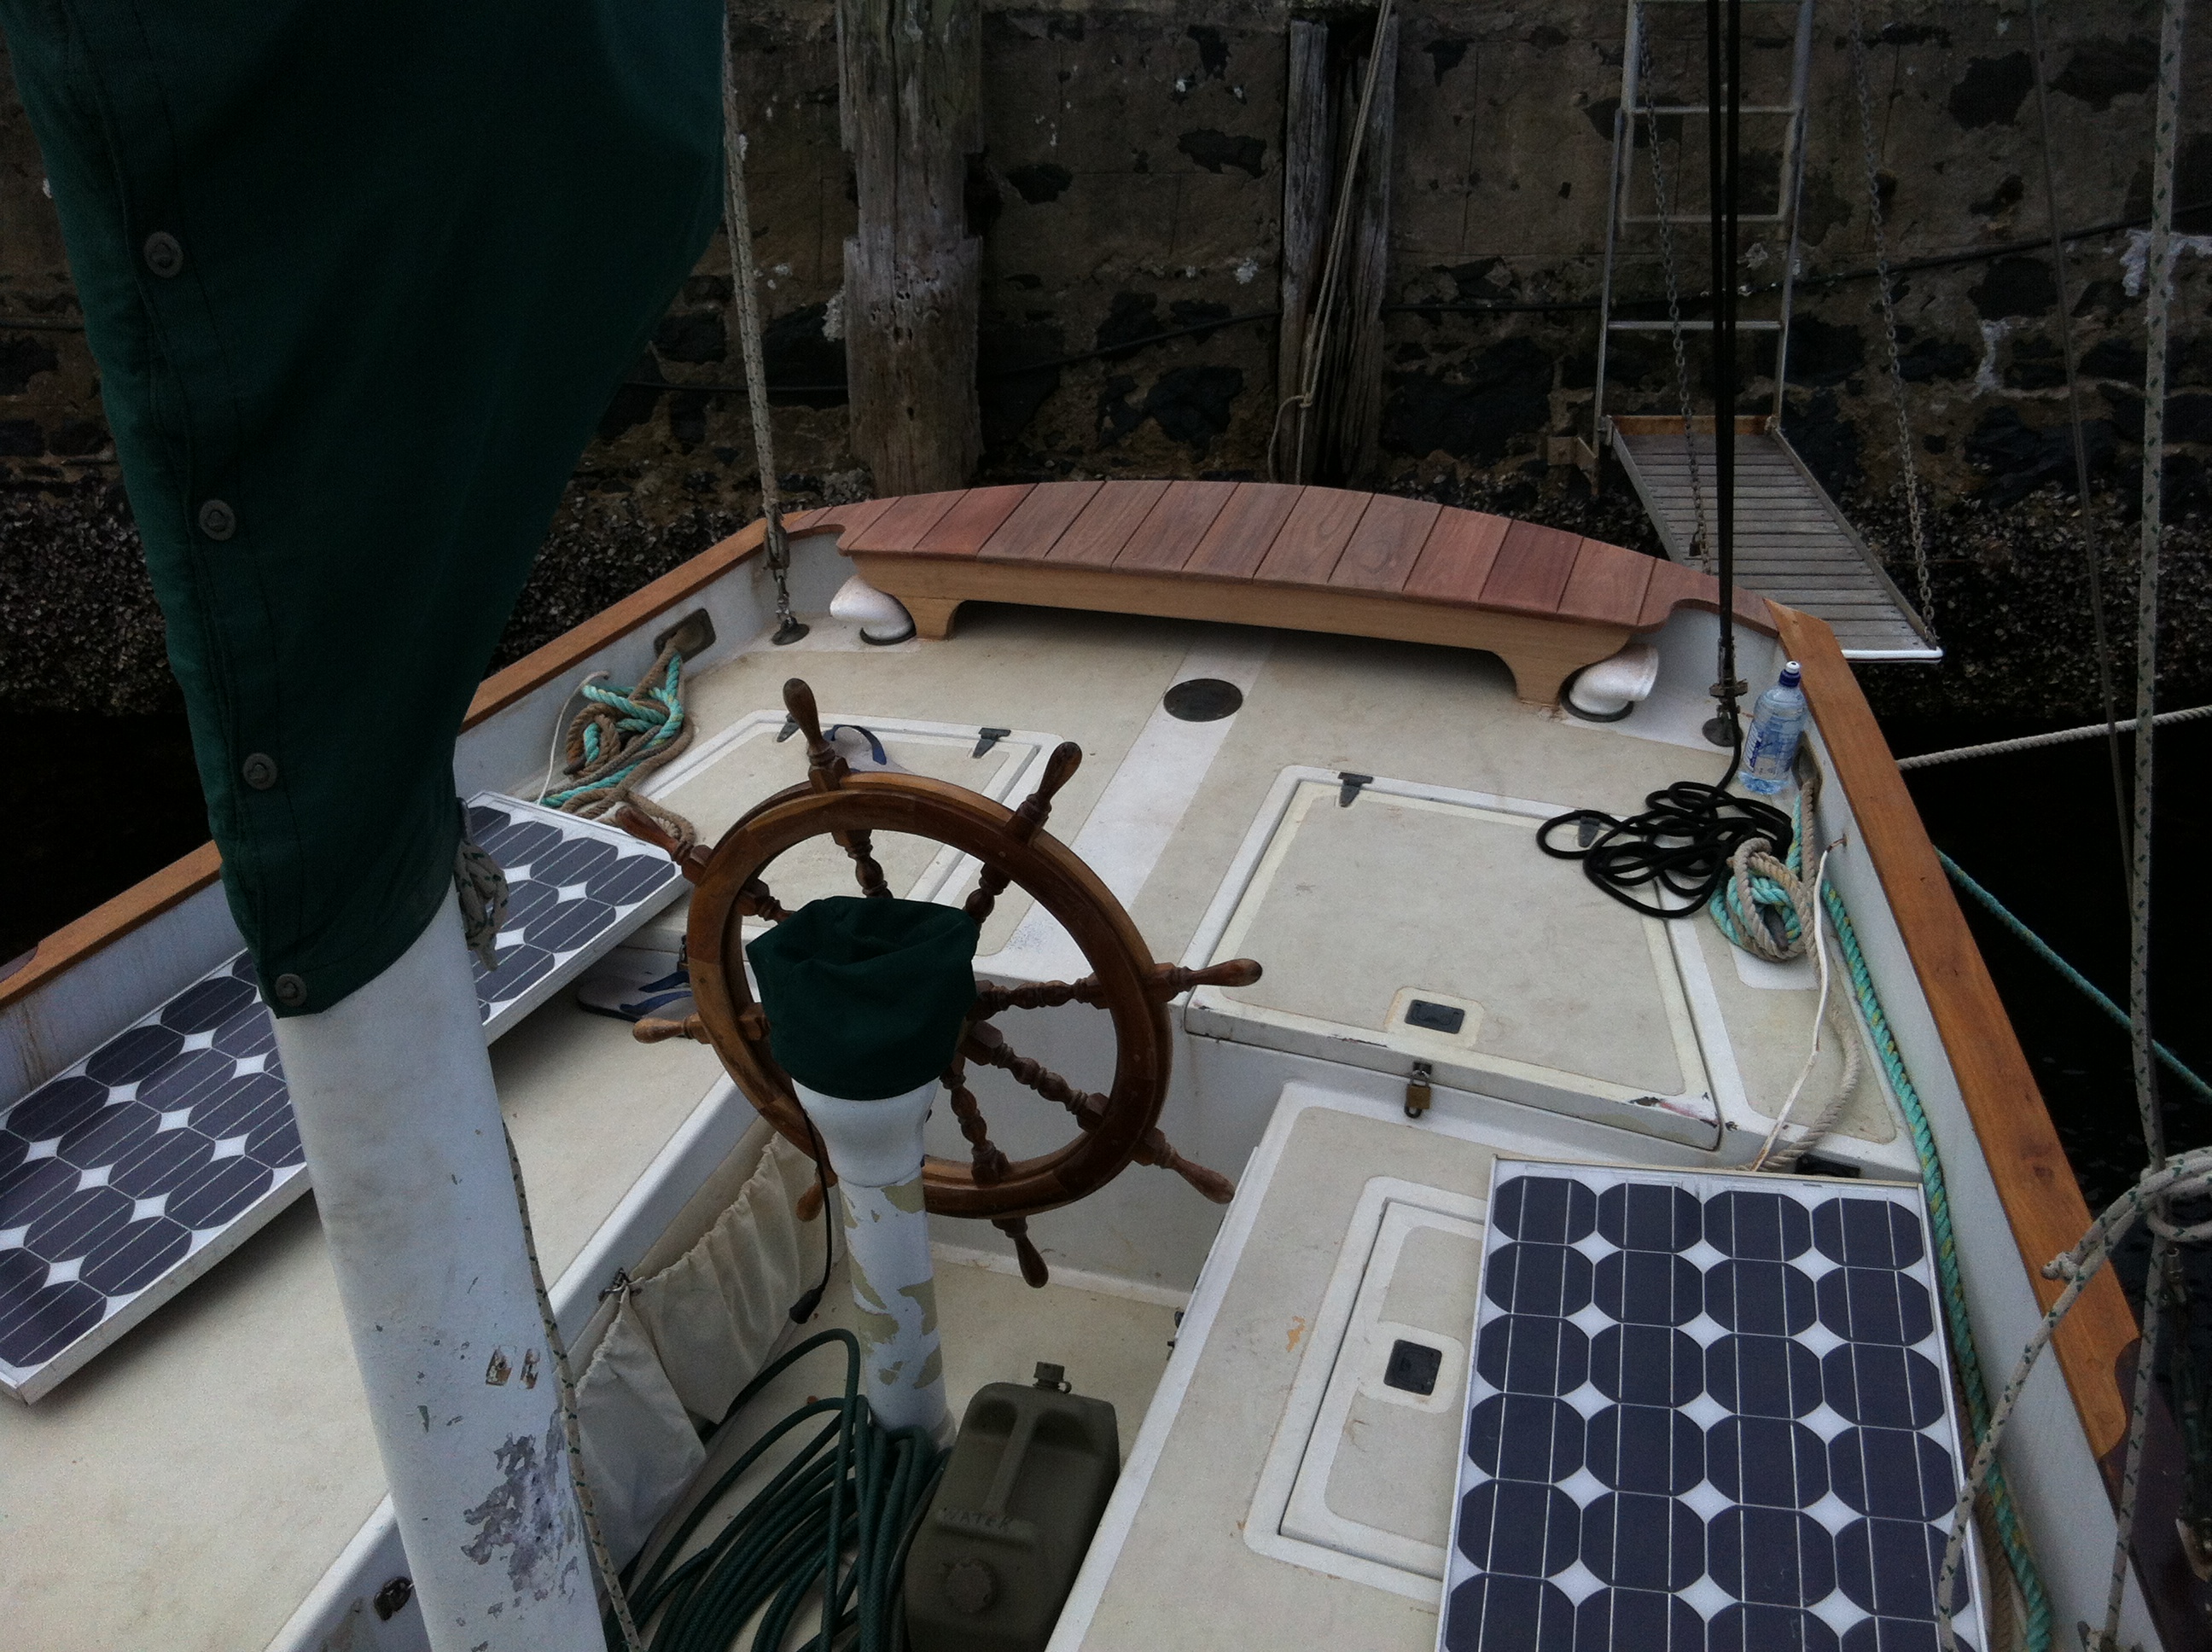
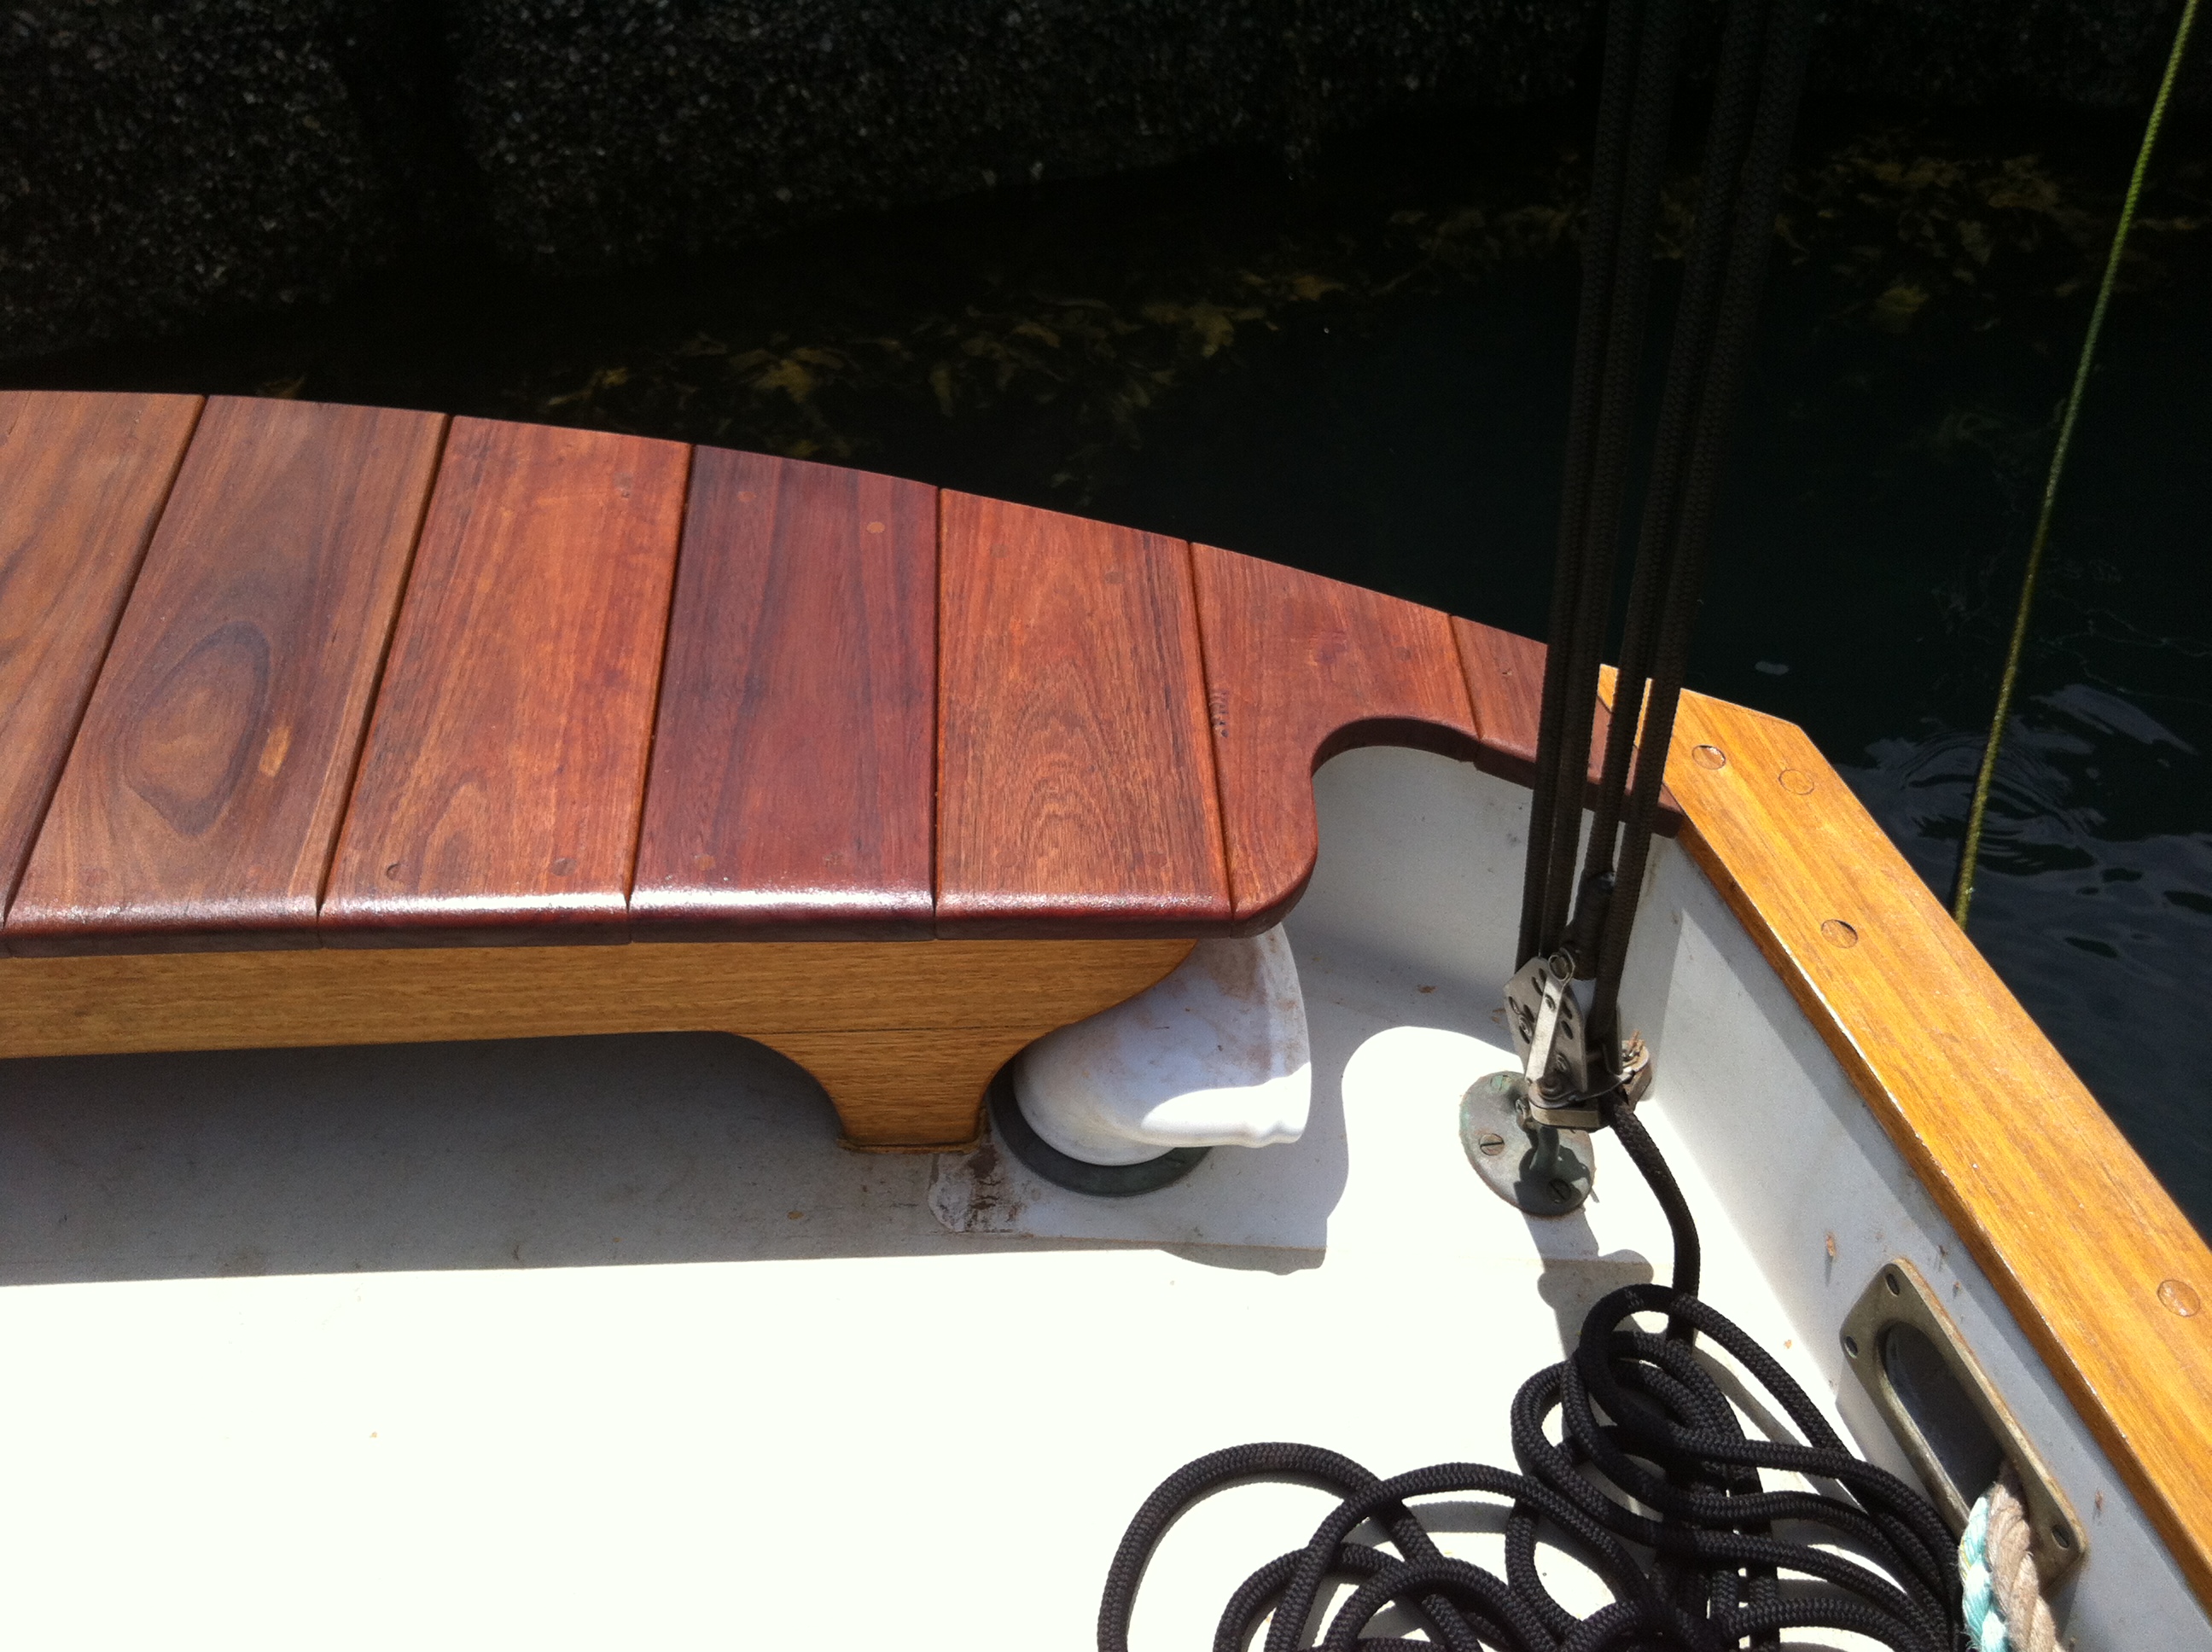
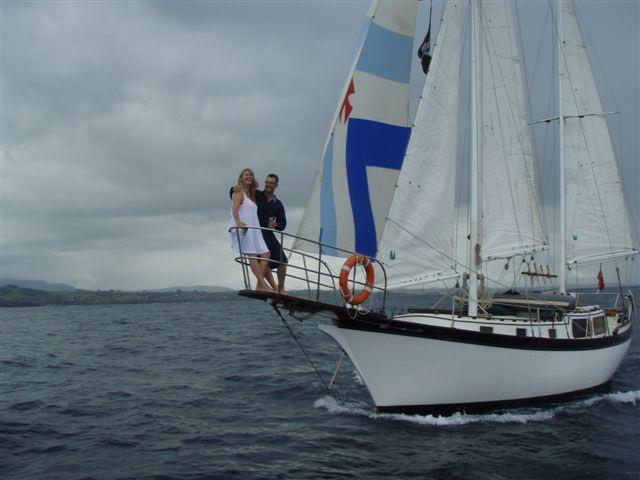
We had always wanted a seat across the back because we feel there's no better spot on the boat when we're sailing and that caprail just isn't big enough for our rear ends so I incorporated a seat into the refurbishment. I didn't want anything obvious which might ruin her classic lines so just kept it low profile and tried to use similar shapes. I've used Aussie hardwood (Redgum and Blackbutt) which is very durable but a bugger to shape and steam bend but we are happy with the end result. I've also put a gate in the pushpit to allow easier access and egress when we are on the moorings in Kiama harbour which requires a leap of faith off the stern with a graceful landing onto a drawbridge. I'll post a finished photo shortly.
So in the photo's, the two block and tackle setups on port and starboard on the aft deck, are they running backstays? or just adjustable dual backstays for the mizzen mast? Also what is the center line between you guys in the second picture?
Love the seat.. Are you putting the stainless pushpit back on ? Has a really clean look with it off 🙂 Not much between you and the water though 🙂
I am babying the teak on valkyr because I do not want to have to replace it. If I did I would probably go with something called IPE wood over here. Brazilian iron wood from what I understand. About half the cost of teak. Even tougher than teak. A bit heavier than teak, and much harder to cut and mill. Looks very much like teak in many ways though not quite as red-ish a color. Teak here will hurt the pocket book. I just purchased a 6.5 ft long 10 inch wide by 3/4 thick teak board to build some shelves out of and it was 50 bucks from a friend. About 75 or 80 or more at the store 🙁 I will post pictures of the finished spice racks and tea shelves when done 🙂
Yes Scott,they are adjustable/running back-stays for the mizzen so I can ease the leeward one off as I sail squarer to the breeze while the windward one takes the load. When I'm pretty well dead square I unclip the leeward one and reposition it to another padeye further forward so it isn't flopping around.
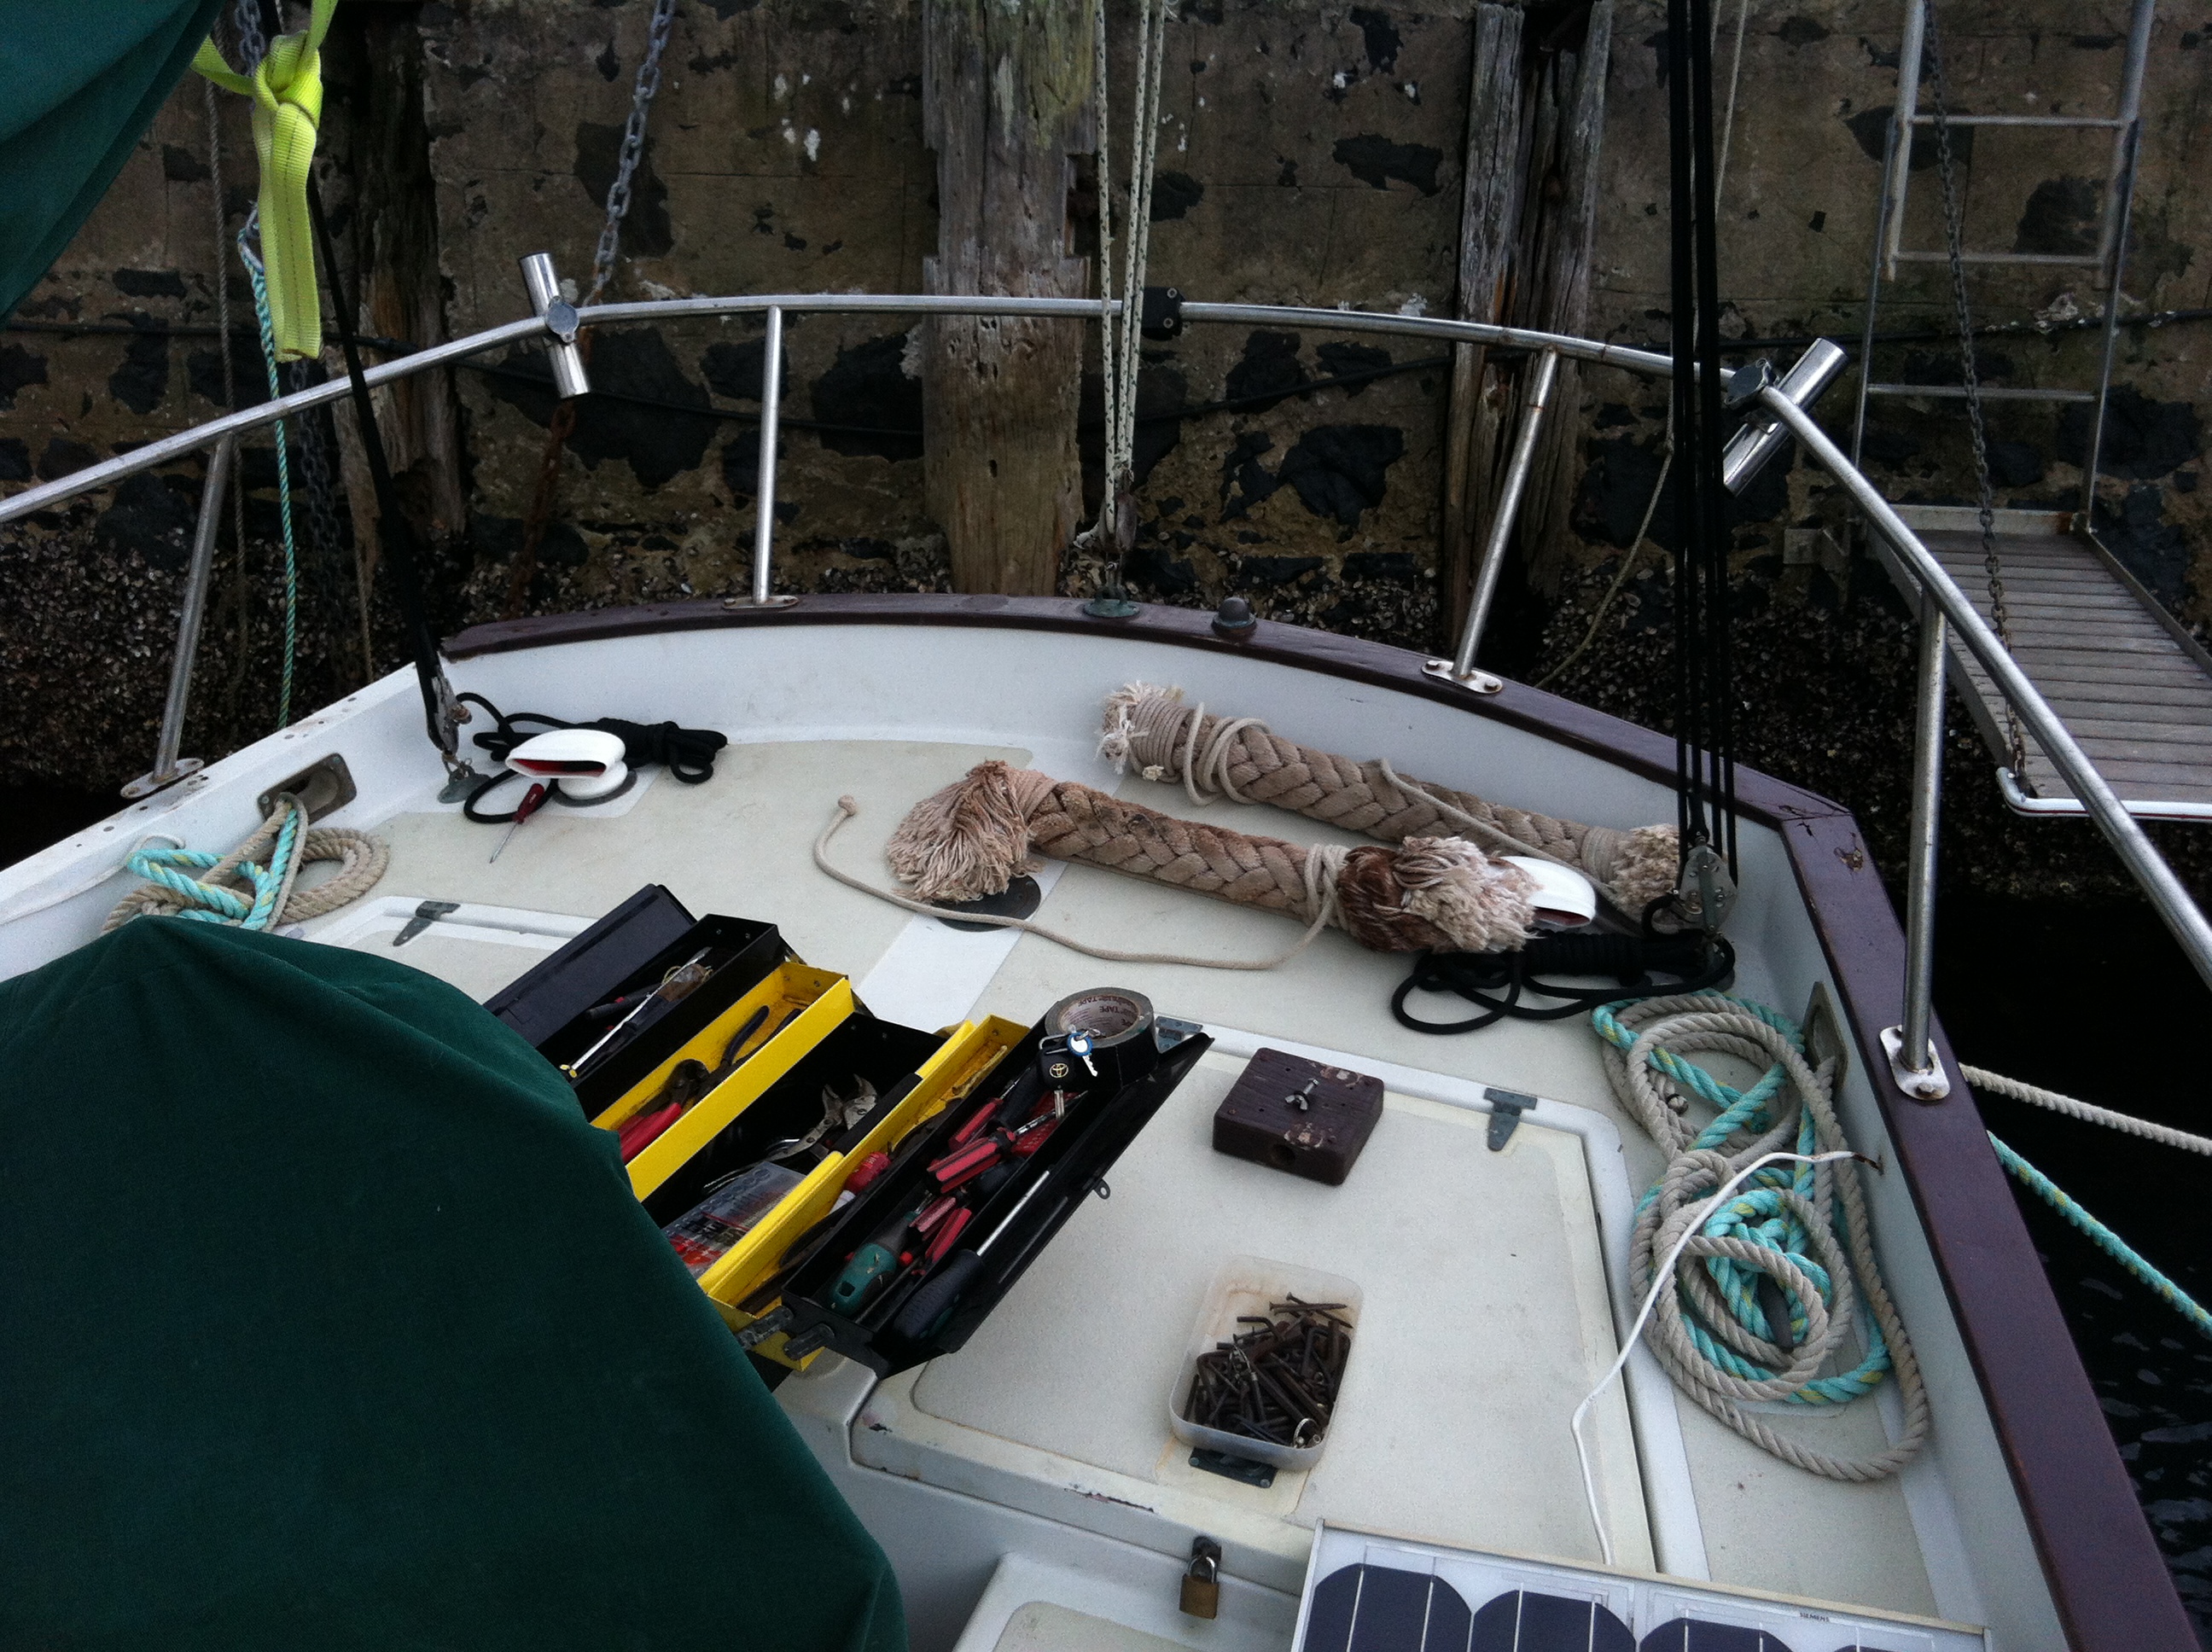

The line between us in shot 2 is the mizzen sheet which starts at the back of the mizzen boom,runs down to a pad eye on the centre of the stern/transom then back up and back along the boom to the mizzen mast cleat. I"ll send better photos soon.
I'm actually going to try to get away without the centre pad eye and just use the pad eyes for the backstays as I never was able to bring the mizzen on enough when running close to the breeze. This way I hope to be able to bring it right in and even past the centreline if needbe.
I like the look without the pushpit but will be putting it back on for safety and for the solar panels although I've modified it by putting in a gate so we can get off from the stern in Kiama and also it'll be a great place to make the kids "Walk the plank" on a hot day in Jervis Bay. (Photos to follow soon)
As far as your caprail is concerned I think you are wise to delay because it"s a little tricky and there are a lot of subtle bends which Aussie hardwoods just don"t like conforming to and I imagine Brazillian Iron wood may be the same.
I"ve heard that the teak these days is nowhere near as good as the stuff our boats were built with and yes the cost is prohibitive too.
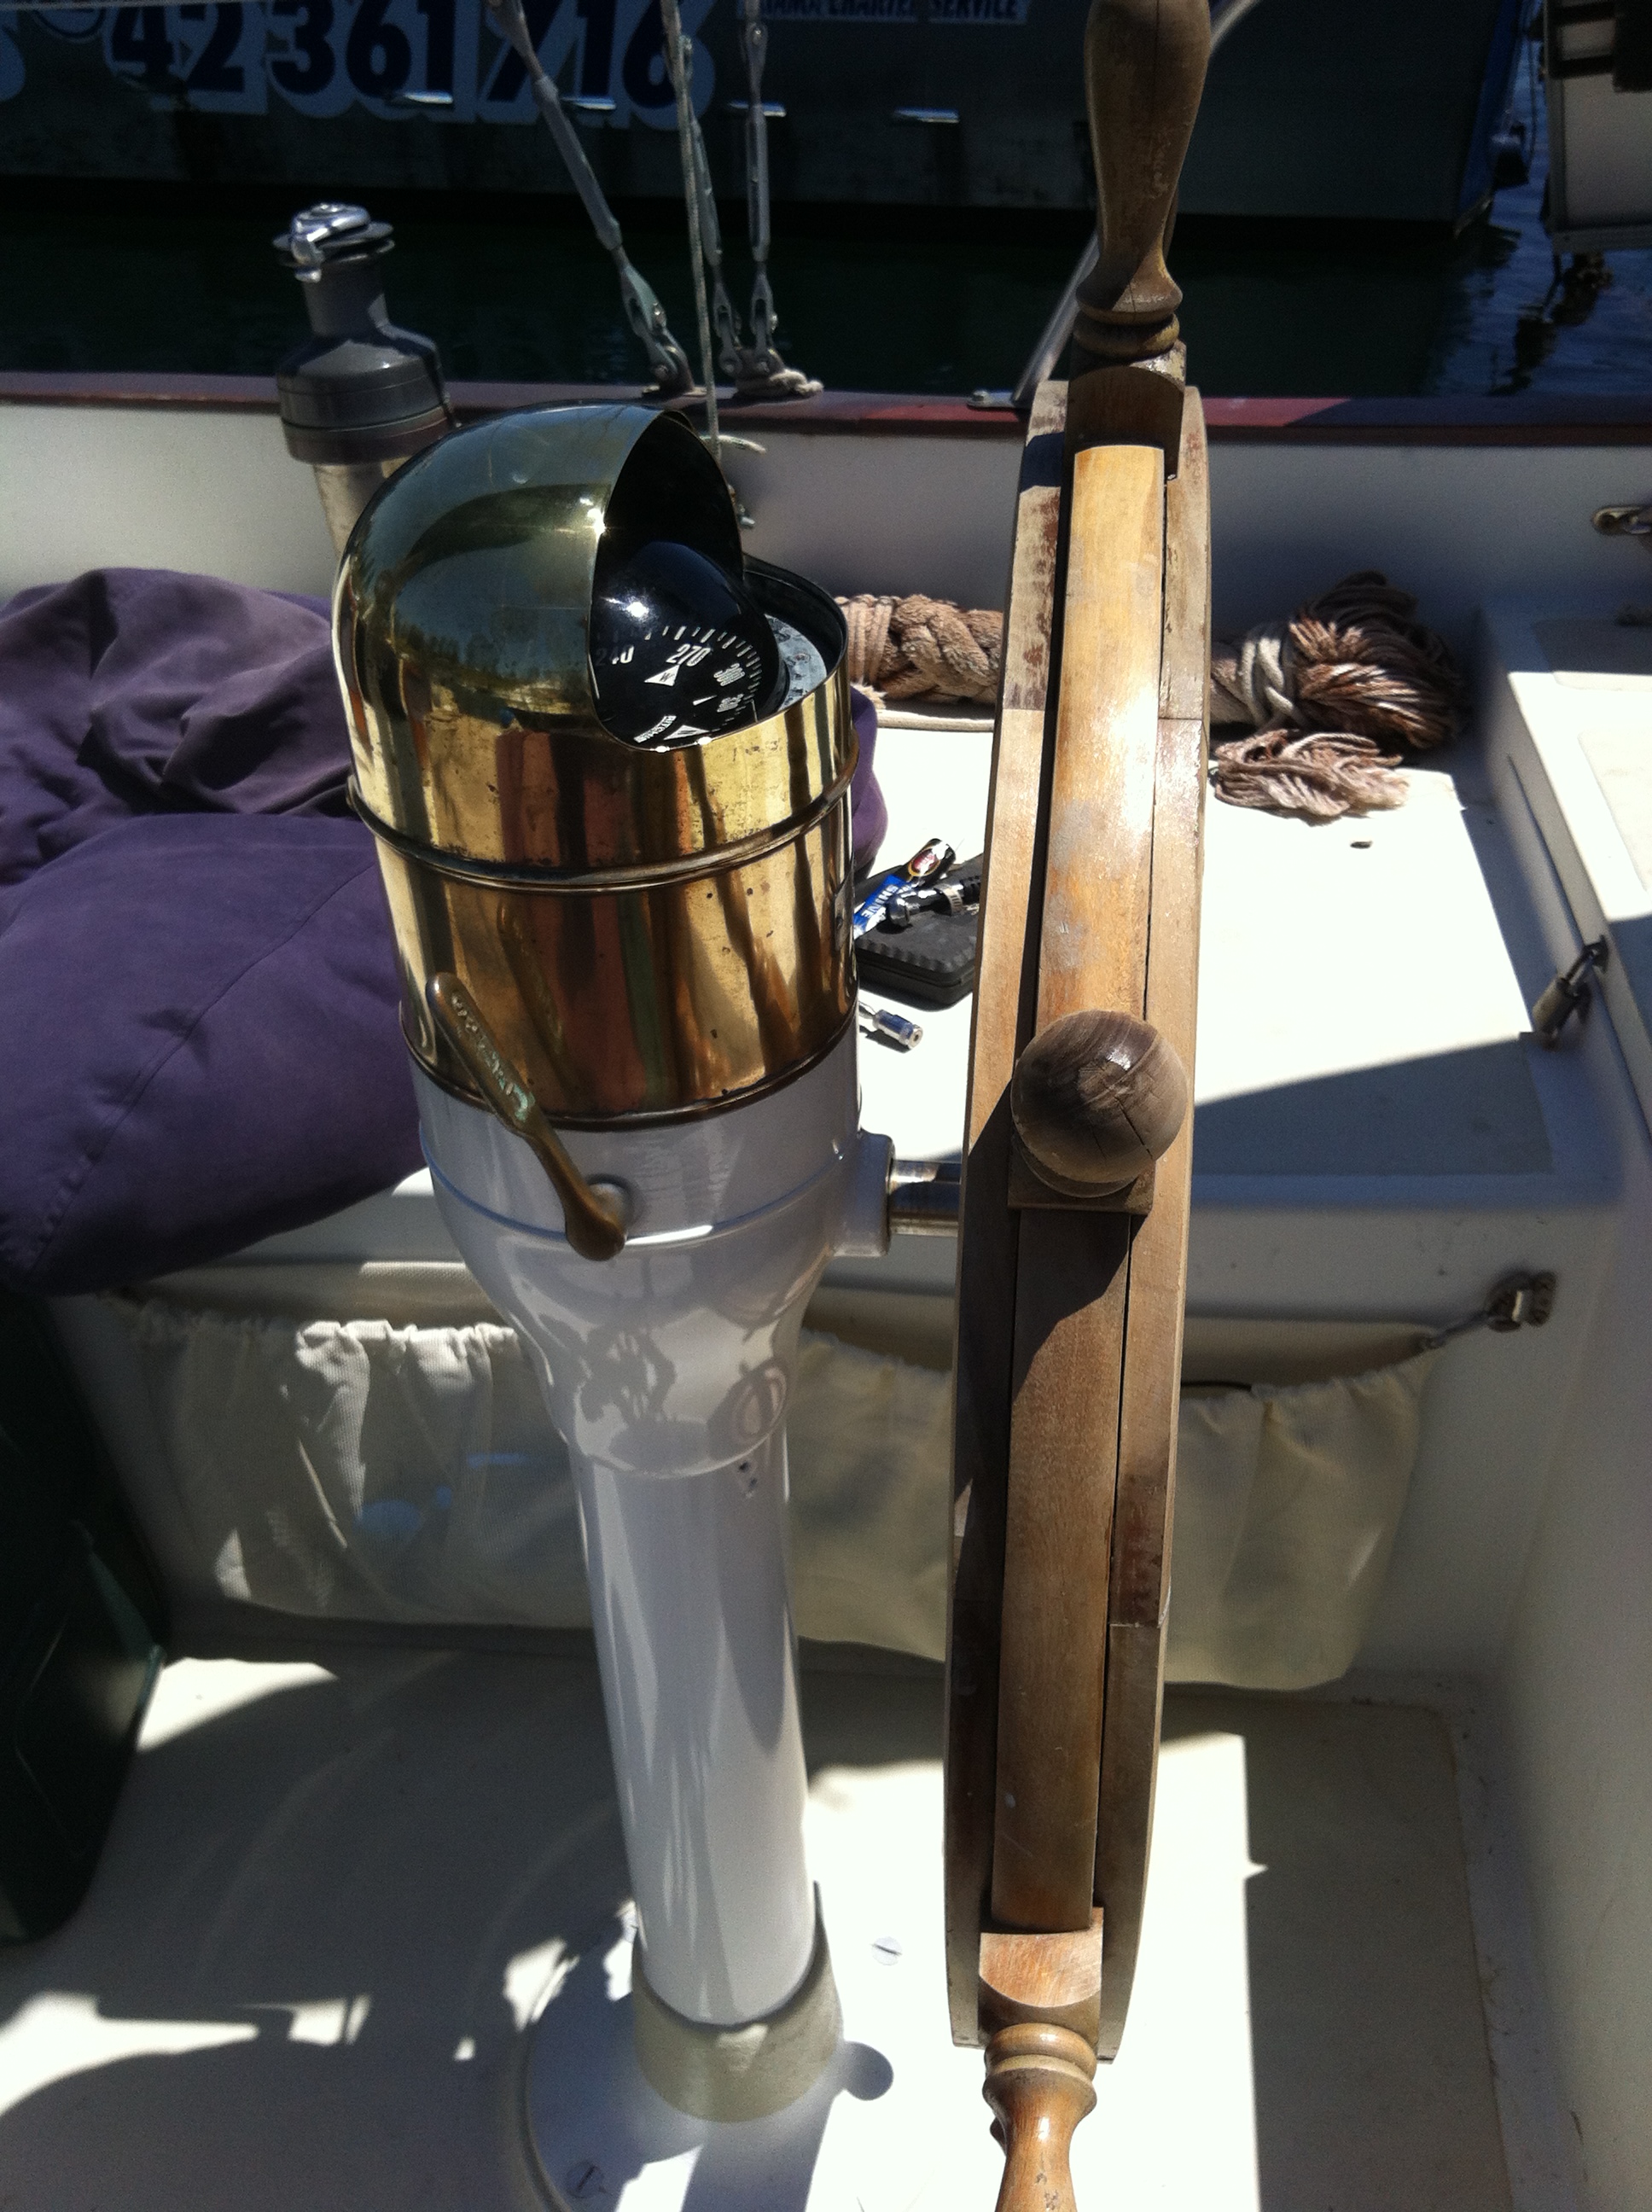
HELM REFURBISHMENT.
When we pulled into Kiama Harbour a few months ago I was in the middle of tight manoeuvring trying to reverse into my mates berth which sits tightly between a Stebber 47 and a Cabot 35.
As you would all be aware our boats don't really like going backwards so you basically line things up,get a bit of water flowing across the rudder,aim for your target,cross your fingers and hope for the best.
My first attempt was looking ugly so I decided to abort and just as I attempted to change gear from reverse to forward I heard a little noise inside the pedestal. I was stuck in reverse and my gear lever was flopping around. I had no choice at this stage than to turn off the engine then fend off the Cabot 35. With a bit of work we managed to get a line ashore and pull her into her berth. VERY EMBARRASSING.
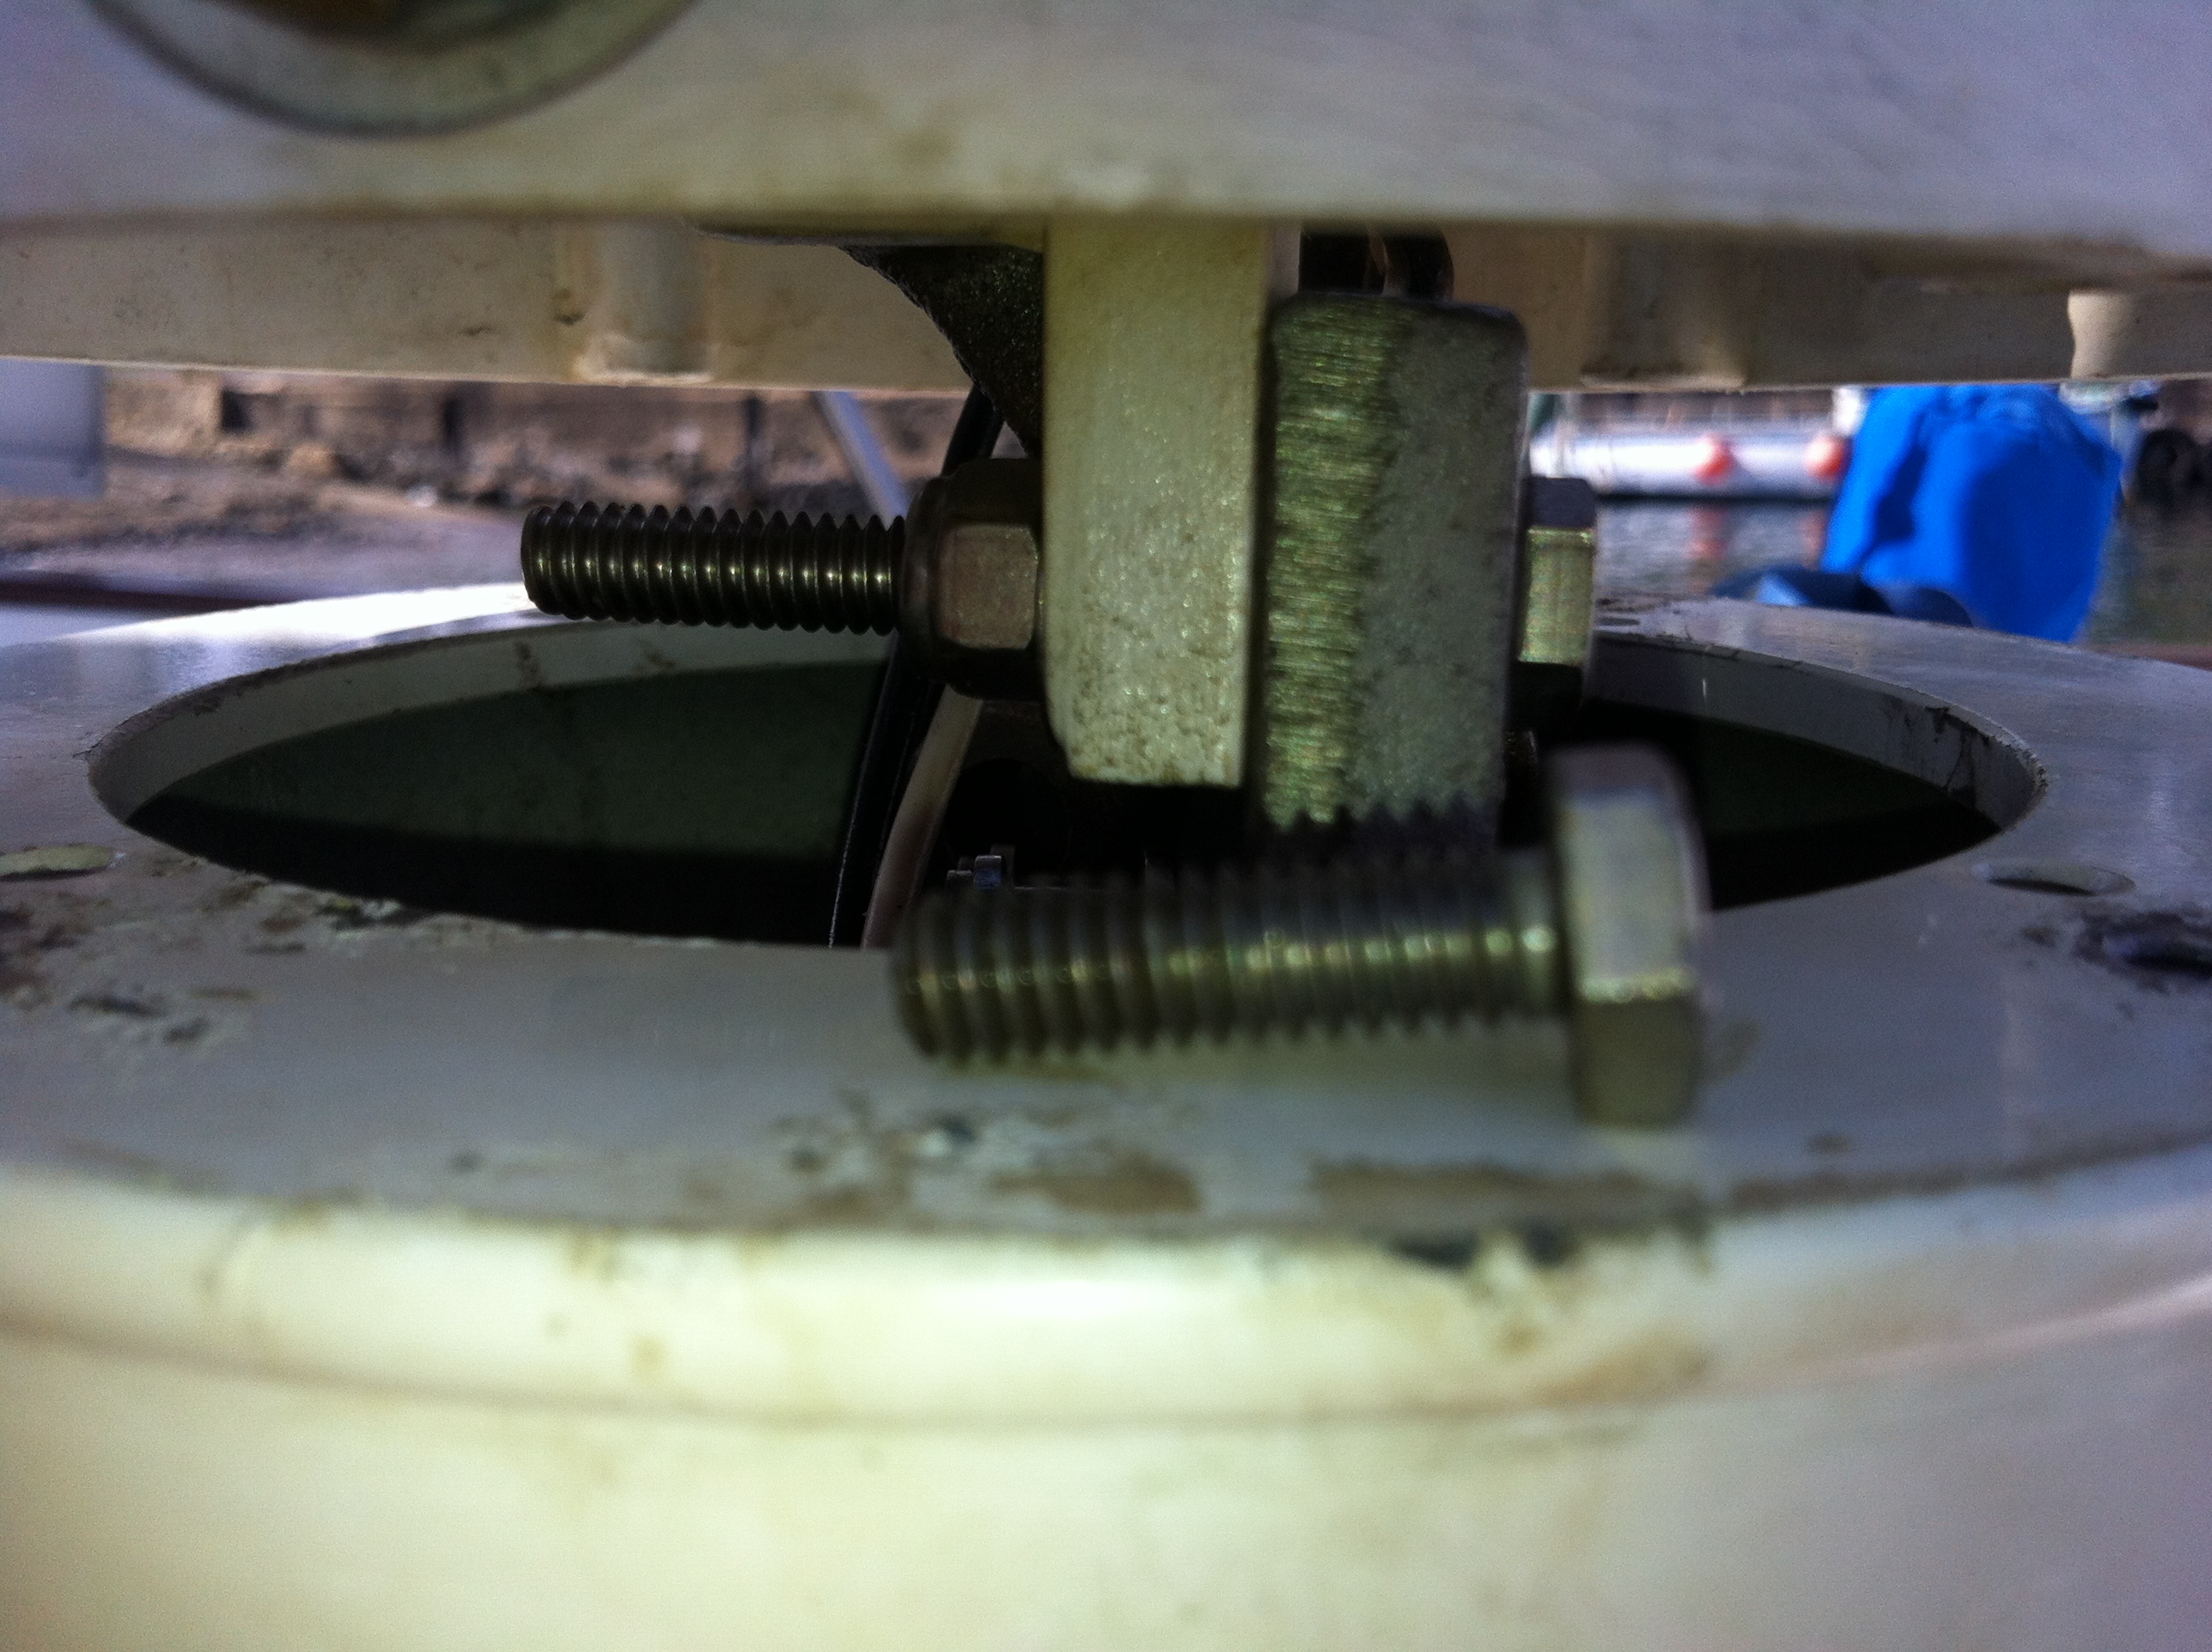

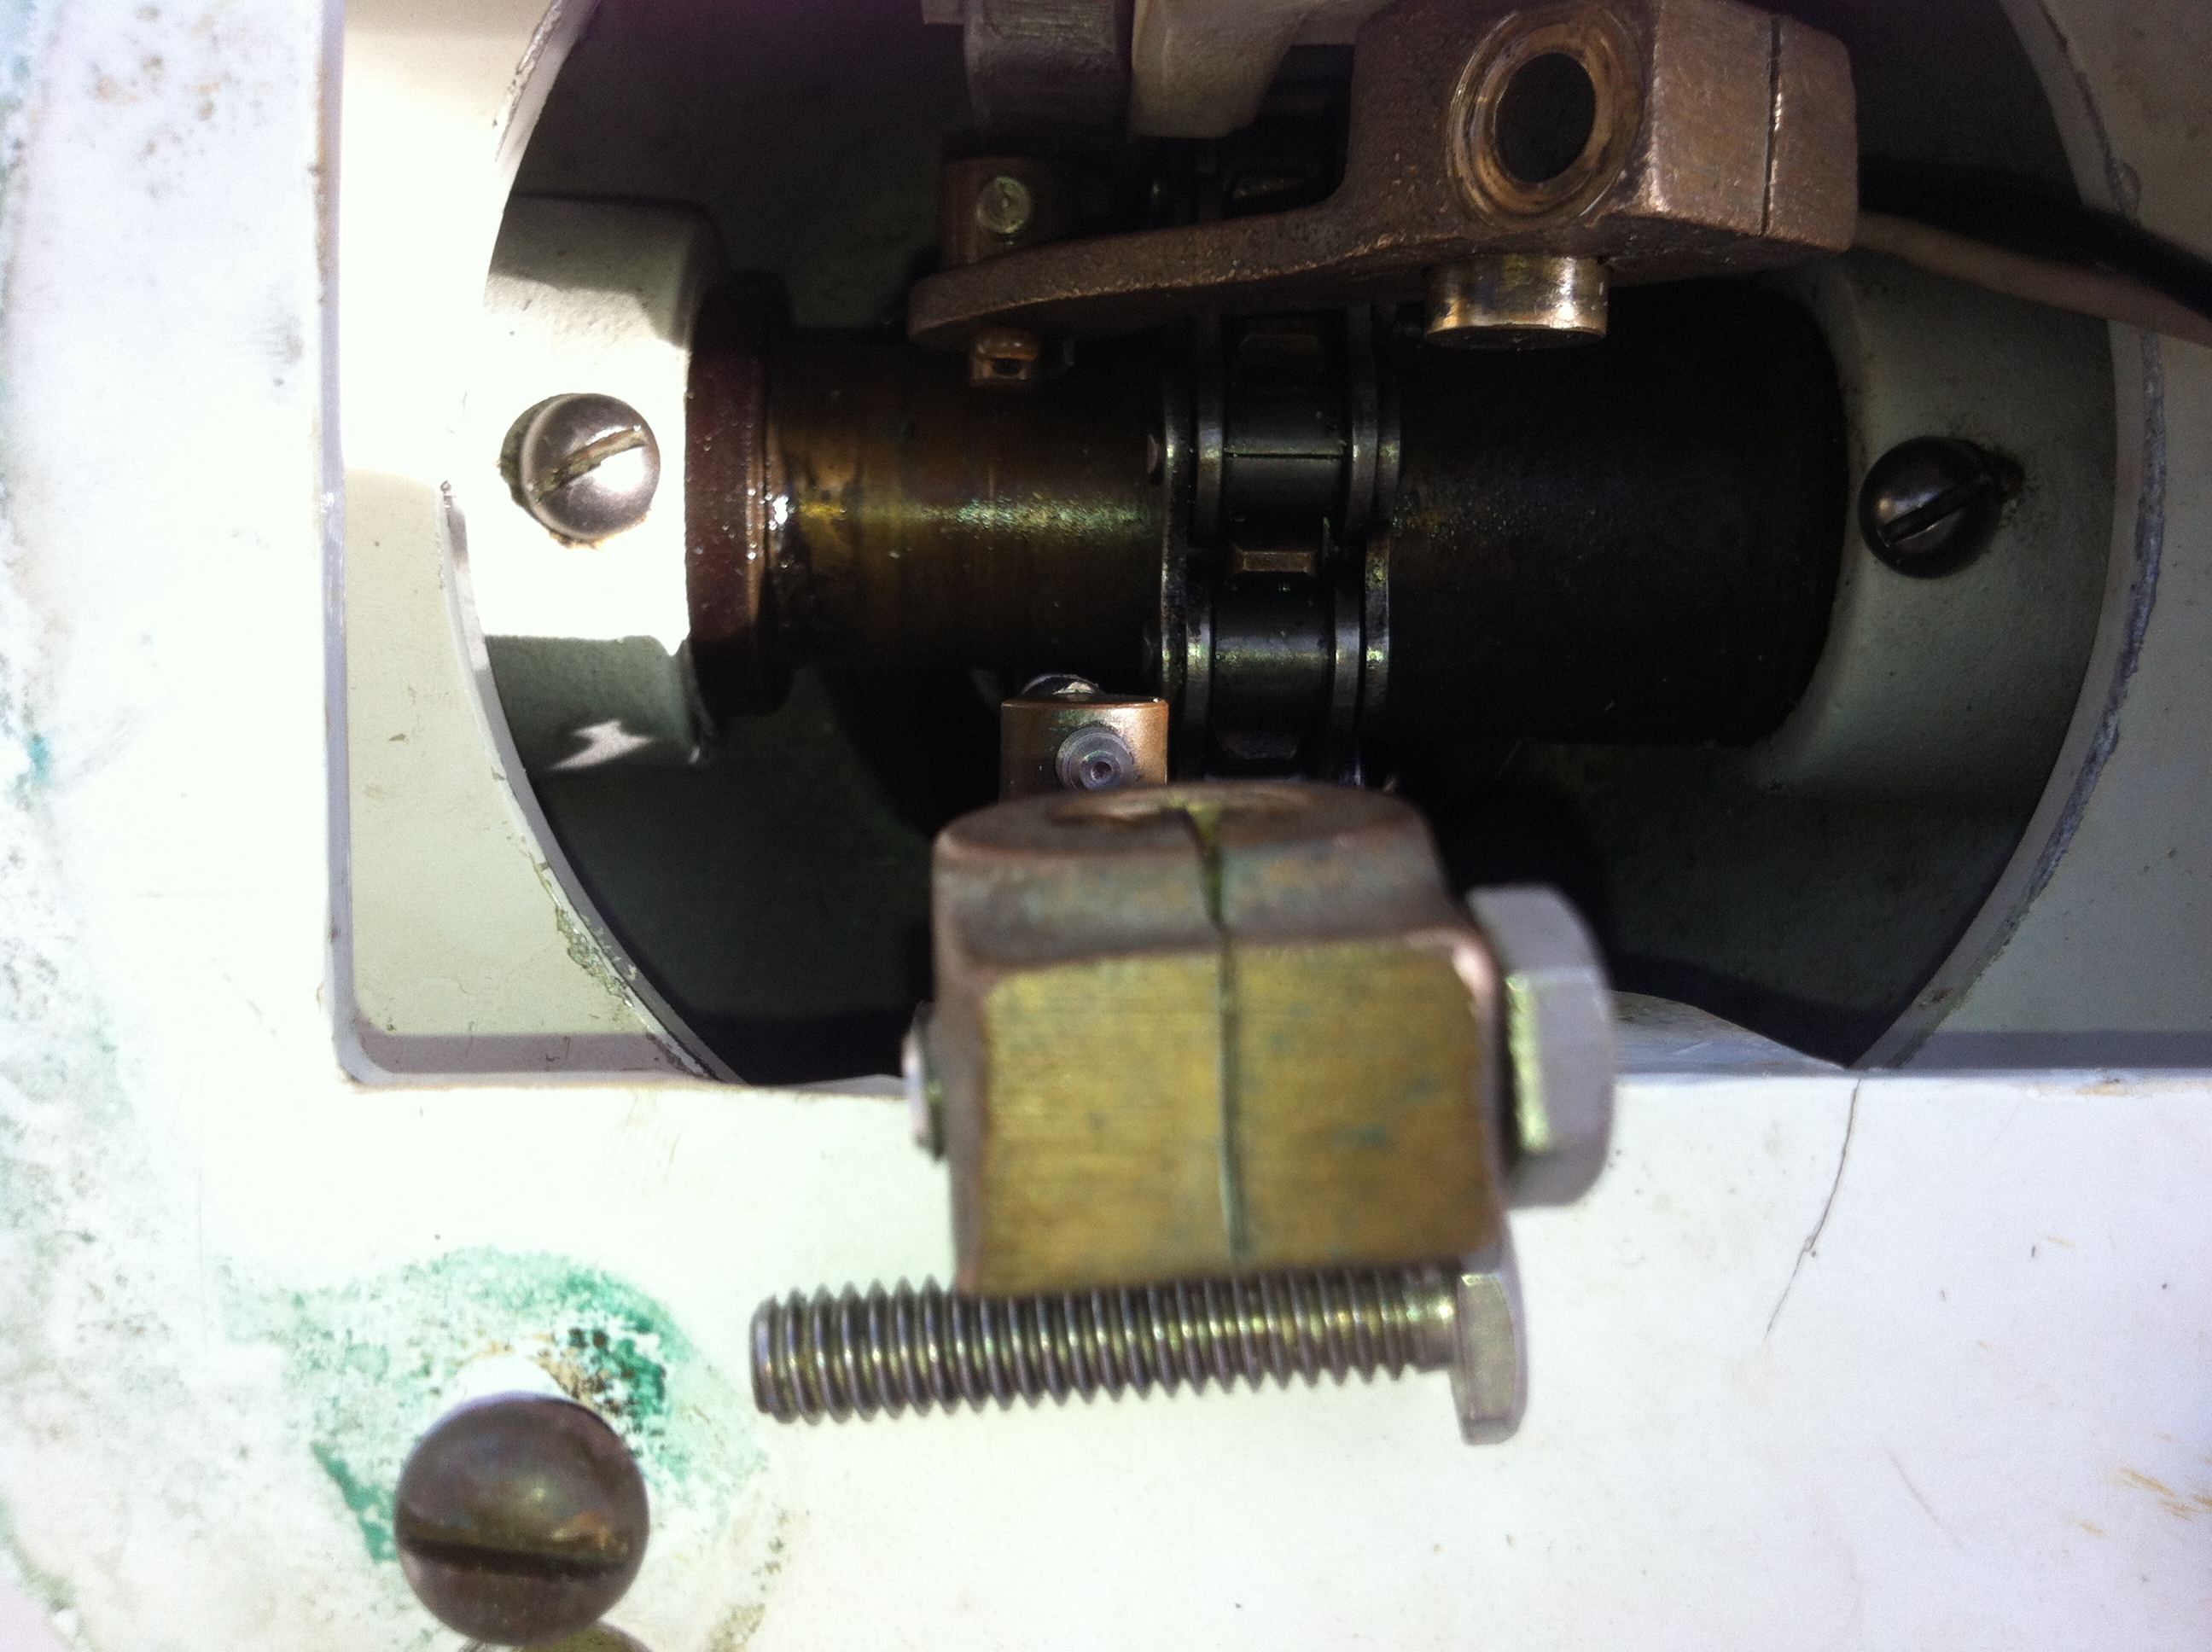
What had happened was the bolt that holds the gear linkage to the gear lever had worked /vibrated itself loose and fallen out.
As you can see in the photos I replaced the existing bolt with a longer one and put a nylock locking nut on it to ensure it couldn't do it to me ever again.
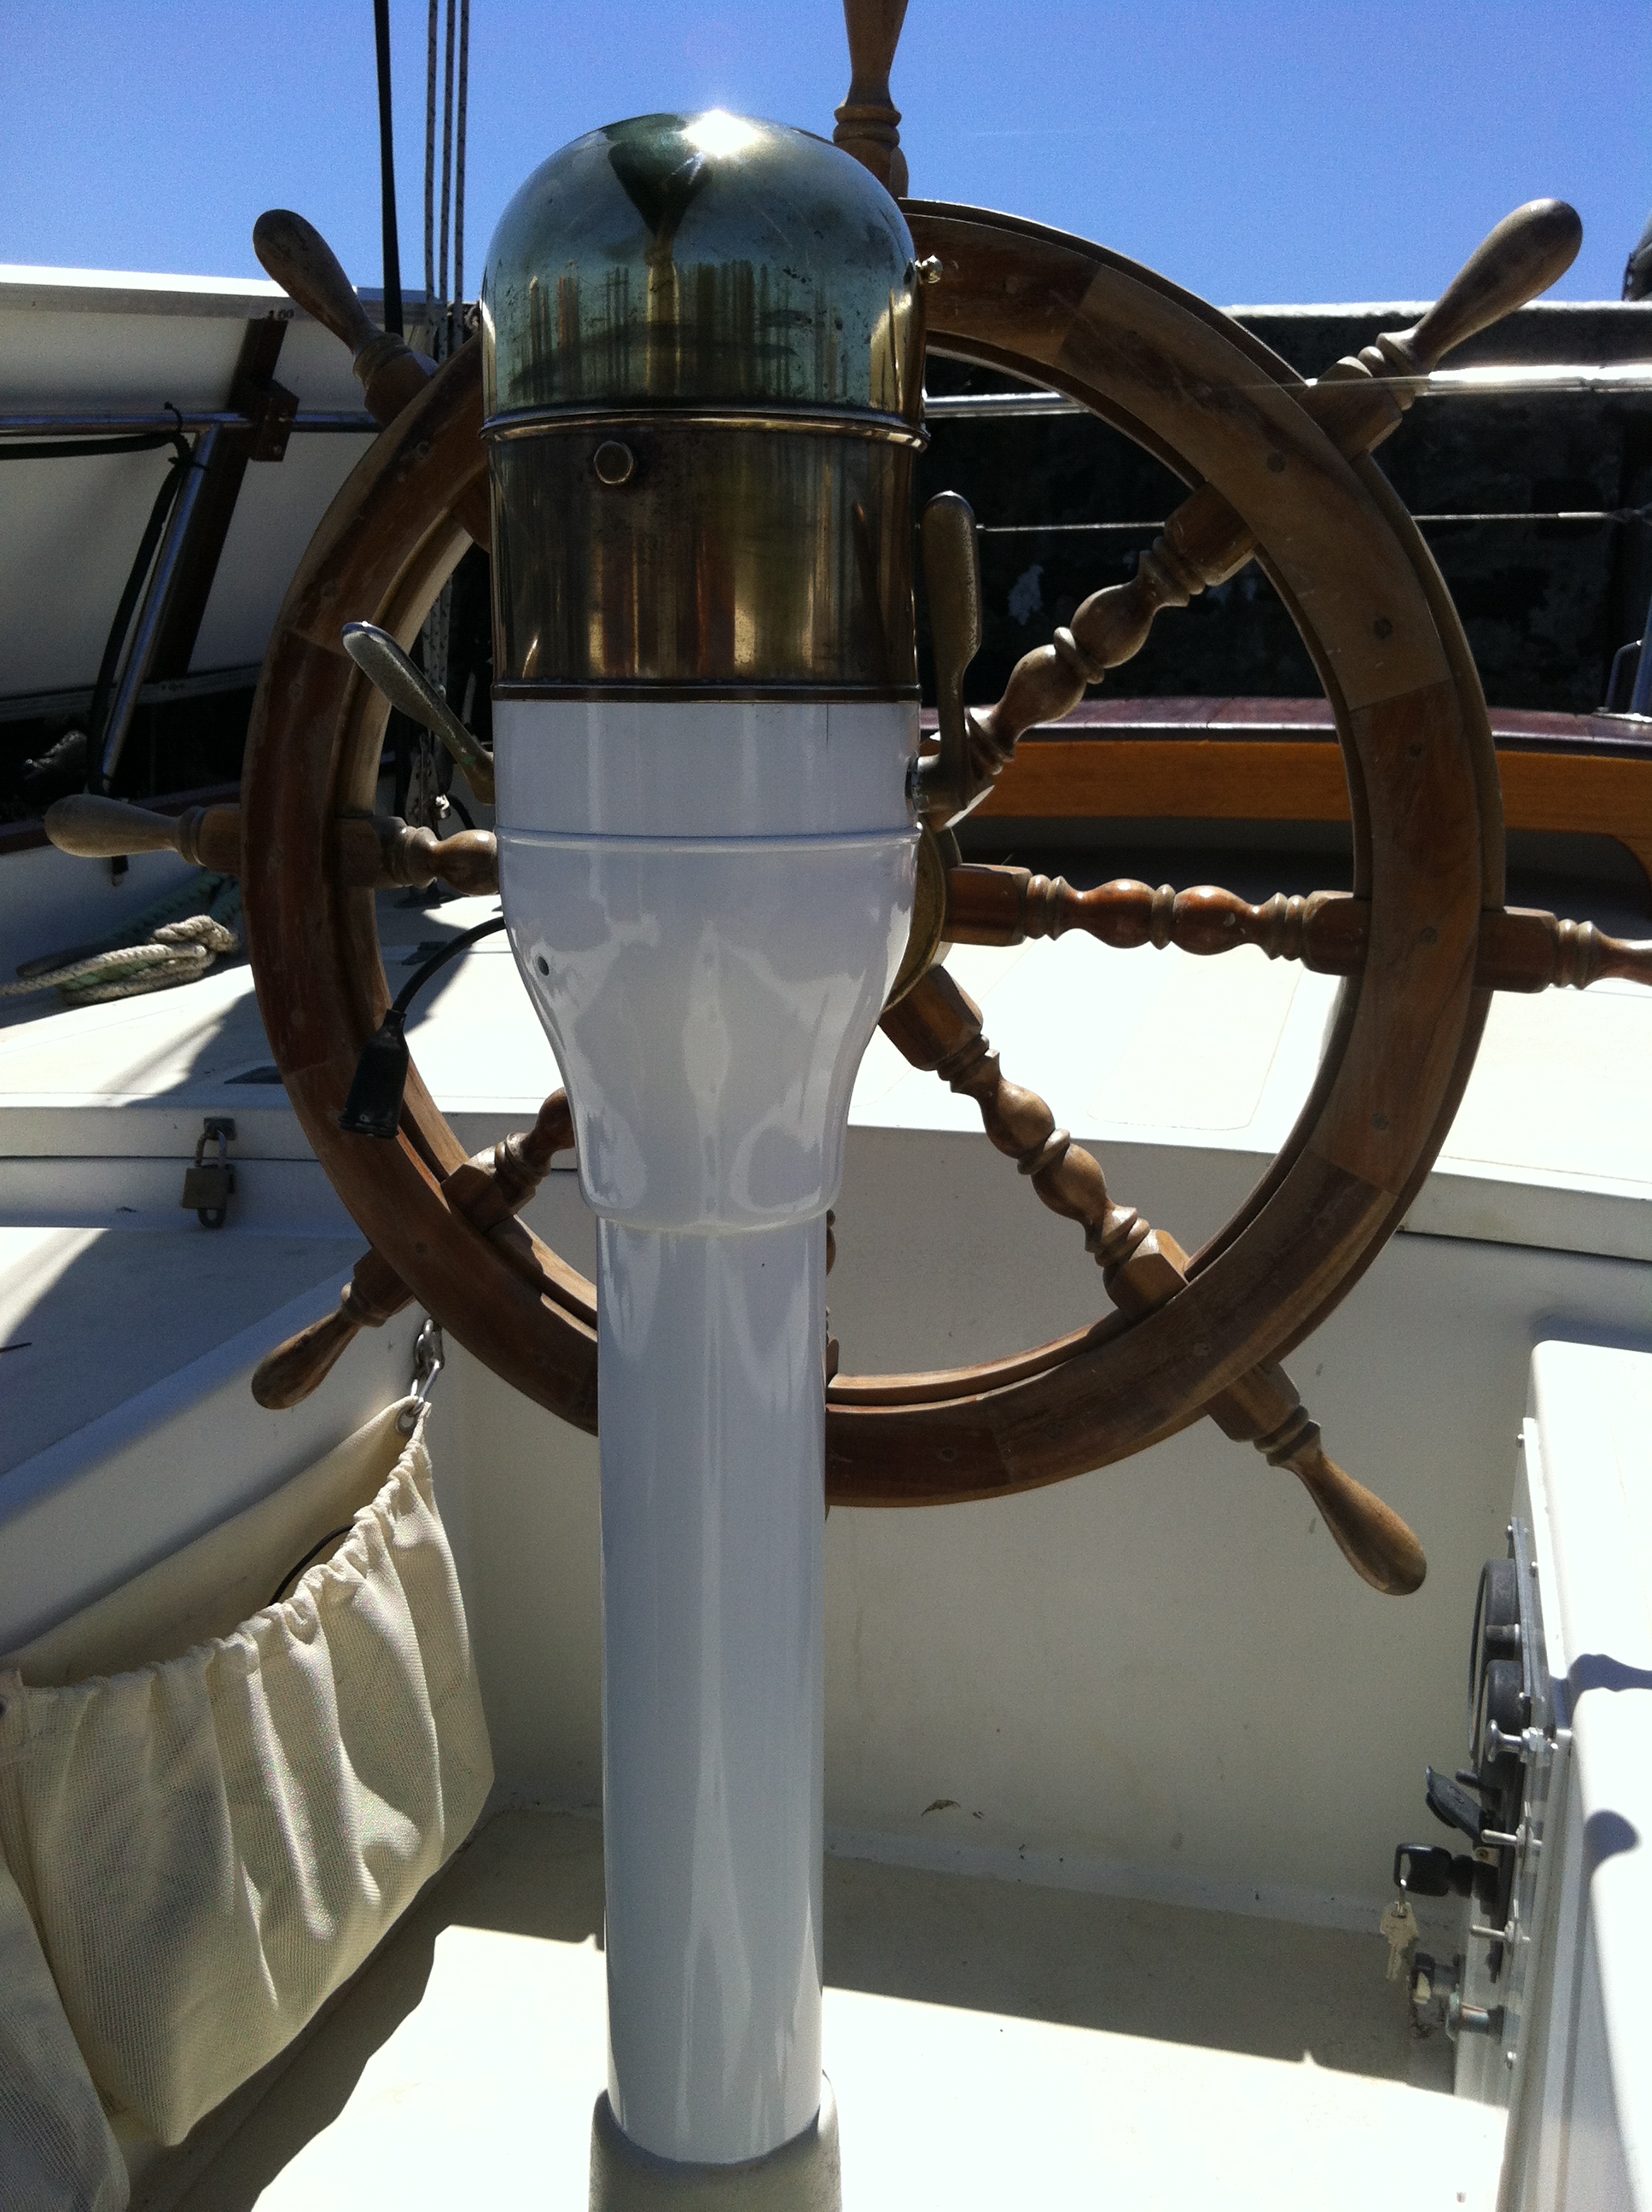
This was a good enough excuse to tidy up everything else and so I resprayed and polished everything and took the wheel home to strip and restore. I currently have a replica wheel that I scored on ebay for $40 which will get me out of trouble until the original is returned.
Just letting you know that we now have a web site including a blog of any projects or trips at http://www.tondelayo.com
Regards,
David.
David,
Enjoyed your web site. Brings back a lot of memories. Your aft seat looks great. Thanks for the tip on polishing the brass. Will give it a try. Chain plate leaks were a constant battle for me. Most things I tried lasted about six to nine months. Finally solved the problem by moving the chain plates to the outside of the boat. A surprising easy job. Thank you for the flour salt, and vinegar tip: a tip for you, to prevent corrosion between dissimilar metals, make a gasket out of old X-Ray film.
Cheers and beers,
Jim
Most Users Ever Online: 120
Currently Online:
5 Guest(s)
Currently Browsing this Page:
1 Guest(s)
Top Posters:
Jonathan Oasis: 174
bobmcd625: 165
CAE: 150
mgav451: 143
Rick: 94
svbodhran: 84
Member Stats:
Guest Posters: 7
Members: 366
Moderators: 1
Admins: 1
Forum Stats:
Groups: 3
Forums: 13
Topics: 745
Posts: 3834
Newest Members:
tonyflor, sailordad46, Spirare, BradHartliep, Duncan, MistyDawnModerators: Patrick Twohig: 134
Administrators: Scott Carle: 1480
 Log In
 Register
 Home
Home


 Offline


